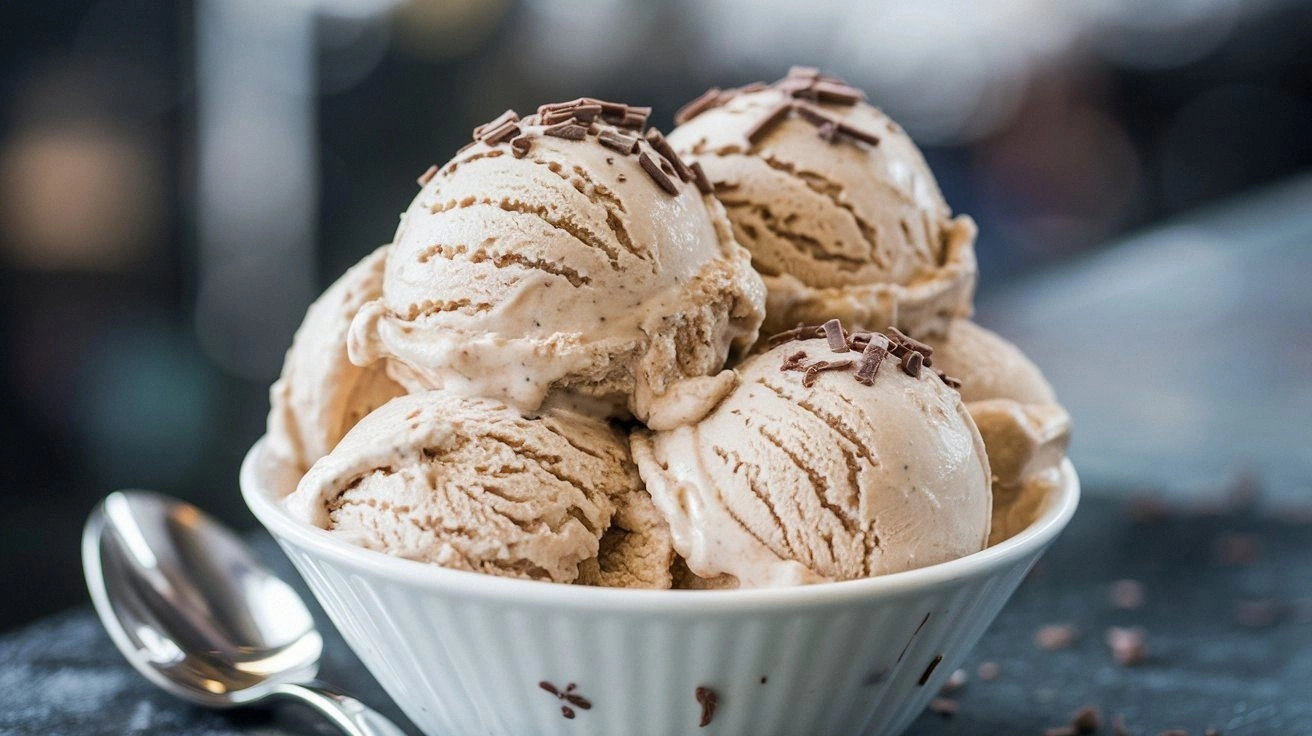
Picture this: a Saturday morning, the coffee machine sputtering, the kitchen humming, and you standing with a mug that smells like a dream. I was halfway through a disastrous attempt at making latte art when a friend dared me to create something that could stand up to the coffee gods themselves. The result? A four‑ingredient coffee ice cream that feels like a hug in a cup, yet is so simple you could make it while scrolling through your phone. I swear, the first lick was a revelation—rich espresso, silky cream, a whisper of vanilla, and the sweet promise of a perfect chill. This is not just a dessert; it’s a caffeinated revelation that will make you question why you ever settled for bland coffee drinks. And the best part? You only need four ingredients, no fancy gadgets or time‑consuming steps.
From the moment I poured the first shot of espresso into the ice‑cream maker, the kitchen filled with a deep, caramel‑brown aroma that made my eyes water in delight. The sound of the machine whirring was almost hypnotic, a steady drumbeat that set the rhythm for the next 15 minutes. Each spoonful of the finished product was a creamy cloud of espresso, with the coffee’s bitterness dancing against the subtle sweetness of the sugar. The texture is a paradox: it’s thick enough to hold a spoon yet melts instantly, leaving a velvety after‑taste that lingers on the palate. And the finish? A gentle, lingering espresso note that makes you want to sip the whole bowl in one go. The entire experience feels like a trip to a high‑end café without the long wait.
This version is hands down the best you’ll ever make at home because it strips away the noise and delivers pure flavor in every bite. No whipped cream, no custard base, no artificial additives—just four carefully selected ingredients that work together like a well‑tuned orchestra. The coffee is brewed strong enough to dominate, but balanced by the richness of heavy cream and the smoothness of vanilla. The result is a dessert that feels indulgent yet is light enough to enjoy on a hot summer day. It’s the kind of recipe that makes your kitchen smell like a coffee shop and your taste buds do a happy dance. And if you’ve ever tried a coffee ice cream that tasted like a coffee shop, this one will have you saying, “I’ve never tasted anything like this before.”
Now, I’m about to walk you through every single step—by the end, you’ll wonder how you ever made it any other way. I’ll share the secret to brewing the perfect espresso shot for ice cream, the trick that keeps the texture silky, and a hack that saves you time without compromising flavor. You’ll also get a micro‑challenge: I dare you to taste this and not go back for seconds. And trust me, this is not just a recipe; it’s a lifestyle upgrade for your coffee cravings. Picture yourself pulling this out of the machine, the whole kitchen smelling incredible, and sharing it with friends who will ask for the recipe. The anticipation of the first bite is almost as satisfying as the bite itself.
What Makes This Version Stand Out
- Flavor Depth: The espresso is brewed at a high concentration, capturing the bold, almost bittersweet notes that linger long after the first spoon. The heavy cream softens the intensity, creating a layered taste profile that feels both luxurious and grounded. This depth makes each bite feel like a full‑bodied coffee experience without the bitterness of a regular brew.
- Texture: The ice cream’s mouthfeel is a silky blend that melts on the tongue, thanks to the careful balance of fat and sugar. The heavy cream’s high fat content gives it that luxurious mouthfeel, while the sugar ensures it doesn’t become too dense. The result is an ice cream that feels like a cloud of coffee‑infused velvet.
- Simplicity: Forget about custard bases, gelatin, or multiple flavorings. With just four ingredients, the recipe is accessible to anyone, even those who’ve never made ice cream before. The fewer the steps, the higher the chance you’ll finish it on your first try.
- Ingredient Quality: The recipe rewards premium coffee beans and fresh, full‑fat cream. A high‑quality espresso shot makes all the difference, while the cream’s richness amplifies the coffee’s natural aroma. Choosing the right beans is the secret to a standout flavor.
- Crowd‑Pleaser: Coffee lovers, dessert enthusiasts, and even the skeptics will be wowed. The dessert’s universal appeal makes it a hit at gatherings, and the simple recipe means you can whip it up on a whim. It’s the kind of treat that turns an ordinary day into a celebration.
- Make‑Ahead Flexibility: The ice cream can be prepared a day ahead and stored in the freezer without losing its silky texture. The coffee flavor remains vibrant, and the simple ingredients keep the dessert from becoming stale. This flexibility makes it ideal for parties or busy schedules.
- Time Efficiency: The entire process takes less than 15 minutes from start to finish. You brew the coffee, whisk the ingredients, churn, and chill—all while the kitchen smells like a café. The quick turnaround means you can enjoy a gourmet dessert without a long wait.
Alright, let's break down exactly what goes into this masterpiece...
Inside the Ingredient List
The Bold Brew
The heart of this dessert is a single shot of espresso, brewed with precision. The espresso’s high concentration delivers an intense coffee flavor that anchors the entire ice cream. If you skip this step, the dessert loses its signature coffee character and becomes a generic dairy treat. A good rule of thumb: use a medium‑roast bean for balance—too dark and it’ll taste burnt; too light and it’ll be weak.
The Creamy Core
Heavy cream is the secret to the dessert’s silky texture. Its high fat content smooths the espresso’s bitterness and creates a luxuriously thick mouthfeel. Skipping the cream would leave the ice cream icy and grainy, while using low‑fat milk would result in a watery texture. If dairy isn’t your thing, try full‑fat coconut milk for a subtle coconut undertone that still keeps the creaminess.
The Sweet Finish
Granulated sugar balances the espresso’s bitterness and enhances the overall flavor profile. It dissolves quickly in the hot espresso, ensuring an even sweetness throughout the ice cream. Removing or reducing the sugar will make the dessert taste too sharp for most palates. If you prefer a low‑calorie version, experiment with a natural sweetener like monk fruit, but keep in mind it may alter the texture slightly.
The Final Flourish
A splash of vanilla extract rounds off the flavor, adding a warm, aromatic note that complements the coffee. Vanilla’s subtle sweetness cuts through the espresso’s depth, creating a harmonious balance. If you’re vegan, a plant‑based vanilla essence works just as well. For an extra twist, add a pinch of sea salt to amplify the flavors—just a whisper to keep it from becoming too salty.
Everything's prepped? Good. Let's get into the real action...
The Method — Step by Step
- Begin by brewing a single shot of espresso using your favorite beans. Allow it to cool slightly; you want it hot enough to dissolve the sugar but not so hot that it burns the cream. As it cools, the espresso’s aroma will intensify, signaling that the flavor profile is on point. The coffee should smell deep and slightly smoky, a cue that you’re ready to proceed.
- While the espresso is cooling, place the heavy cream into a chilled mixing bowl. Chill the bowl in the freezer for about 10 minutes—this step keeps the mixture cold enough to churn quickly and avoid ice crystals. Once chilled, whisk the cream until it’s lightly frothy but not fully whipped; you want a silky base that will blend smoothly with the espresso.
- Add the granulated sugar to the cream and whisk until fully dissolved. The sugar should be completely integrated, leaving no gritty texture. At this point, the mixture should have a glossy sheen, indicating that the sugar has emulsified into the cream. This is the moment where the base starts to feel luxurious.
- Slowly pour the cooled espresso into the cream mixture, stirring constantly to prevent any coffee clumps. The espresso should blend in like a silk ribbon, creating a homogeneous mixture. If you notice any lumps, let the mixture sit for a minute and stir again—this ensures a smooth final product.
- Stir in the vanilla extract, giving the mixture a gentle swirl. The vanilla should coat the surface, infusing the dessert with its warm, aromatic notes. A small splash of vanilla is enough; you don’t want it to overpower the coffee.
- Transfer the mixture to your ice‑cream maker and churn according to the manufacturer’s instructions—typically 20–25 minutes. Keep an eye on the texture; it should start as a thick custard and gradually thicken into a dense, creamy consistency. The churned ice cream should have a glossy finish and a smooth mouthfeel.
- Once churned, transfer the ice cream into an airtight container. Seal it tightly and place it in the freezer for at least 4 hours to set. The cold environment allows the ice crystals to freeze solid, giving the dessert its signature bite.
- When ready to serve, let the ice cream sit at room temperature for 5 minutes to soften slightly. This short rest allows the flavors to fully bloom. Scoop into bowls, drizzle a little espresso syrup if desired, and enjoy the silky, coffee‑laden experience.
That's it — you did it. But hold on, I've got a few more tricks that'll take this to another level...
Insider Tricks for Flawless Results
The Temperature Rule Nobody Follows
Many bakers think the colder the better, but the ice cream mixture should be just warm enough to dissolve the sugar before churning. If the mixture is too hot, the sugar will crystallize; too cold, and it won’t churn properly. I’ve learned that letting the espresso cool to about 80°F before adding it to the cream yields the smoothest texture.
Why Your Nose Knows Best
Before you start, smell the espresso grounds. A fresh, aromatic scent signals that your beans are still potent. If the aroma is flat, consider grinding a fresh batch or using a higher‑quality roast. Your nose is the first quality control check in this recipe.
The 5‑Minute Rest That Changes Everything
After adding the espresso, let the mixture sit for 5 minutes before churning. This brief pause allows the flavors to meld, creating a more cohesive taste. A friend once skipped this step and ended up with a slightly disjointed flavor profile—let's just say it was a lesson learned.
Balancing Sweetness Without Overdoing It
If you’re a sweet tooth, you might be tempted to add more sugar. Instead, try adding a dash of espresso powder or a small amount of brown sugar to deepen the coffee flavor without adding bulk. This keeps the dessert light while enhancing depth.
Storing for Ultimate Creaminess
When storing the ice cream, keep it in a tightly sealed container and place it in the back of the freezer, away from temperature fluctuations. If you notice ice crystals forming, give the ice cream a quick stir before refreezing—this redistributes the moisture and restores smoothness.
Creative Twists and Variations
This recipe is a playground. Here are some of my favorite ways to switch things up:
Caramel Coffee Crunch
Swirl in a tablespoon of caramel sauce before churning for a sweet, buttery undertone. The caramel will caramelize slightly in the freezer, giving a subtle crunch. Serve with a drizzle of caramel on top for a decadent finish.
Mocha Madness
Add a tablespoon of unsweetened cocoa powder to the cream mixture for a mocha twist. The cocoa adds a rich chocolatey depth that pairs beautifully with the espresso. This version is perfect for chocolate lovers who crave coffee.
Minty Espresso Delight
Include a few drops of peppermint extract to give a refreshing minty edge. The mint brightens the coffee’s robust flavor and adds a cool finish. It’s an ideal treat for hot days or holiday parties.
Spiced Latte Scoop
Stir in a pinch of cinnamon and a dash of nutmeg before churning. These spices add warmth and depth, turning the dessert into a spiced latte experience. Sprinkle a little cinnamon on top before serving.
Coconut Coffee Dream
Replace the heavy cream with full‑fat coconut milk for a tropical twist. The coconut adds a subtle sweetness and a silky texture that pairs well with coffee. This variation is dairy‑free and equally creamy.
Storing and Bringing It Back to Life
Fridge Storage
If you plan to serve the ice cream within 24 hours, keep it in a sealed container in the refrigerator. The cold environment will keep it firm, but it will soften slightly for easier scooping. Store it in the back of the fridge, away from temperature swings.
Freezer Friendly
For longer storage, place the ice cream in a freezer‑safe container with a tight seal. It will stay fresh for up to 2 weeks. When you’re ready to serve, let it sit at room temperature for 5–10 minutes to soften.
Best Reheating Method
Never microwave the ice cream—this will melt it and ruin the texture. Instead, let it sit in the fridge for 15 minutes before scooping. If you prefer a slightly warmer scoop, gently stir it with a spoon for a few seconds; this will release the aroma without melting it.