I still remember the night the kitchen turned into a battlefield: a half‑baked batch of shortbread that had turned into a sticky, brown‑butter disaster, and my friend dared me to turn that mess into something spectacular. I laughed, grabbed the skillet, and decided to give the humble shortbread a toffee‑laden makeover. That evening, the air filled with the nutty aroma of browned butter, the crackle of caramelized sugar, and the sweet promise of crunchy toffee bits. If you’ve ever watched a batch of cookies melt into a gooey mess, this is the antidote that turns “oops” into “oh wow.”
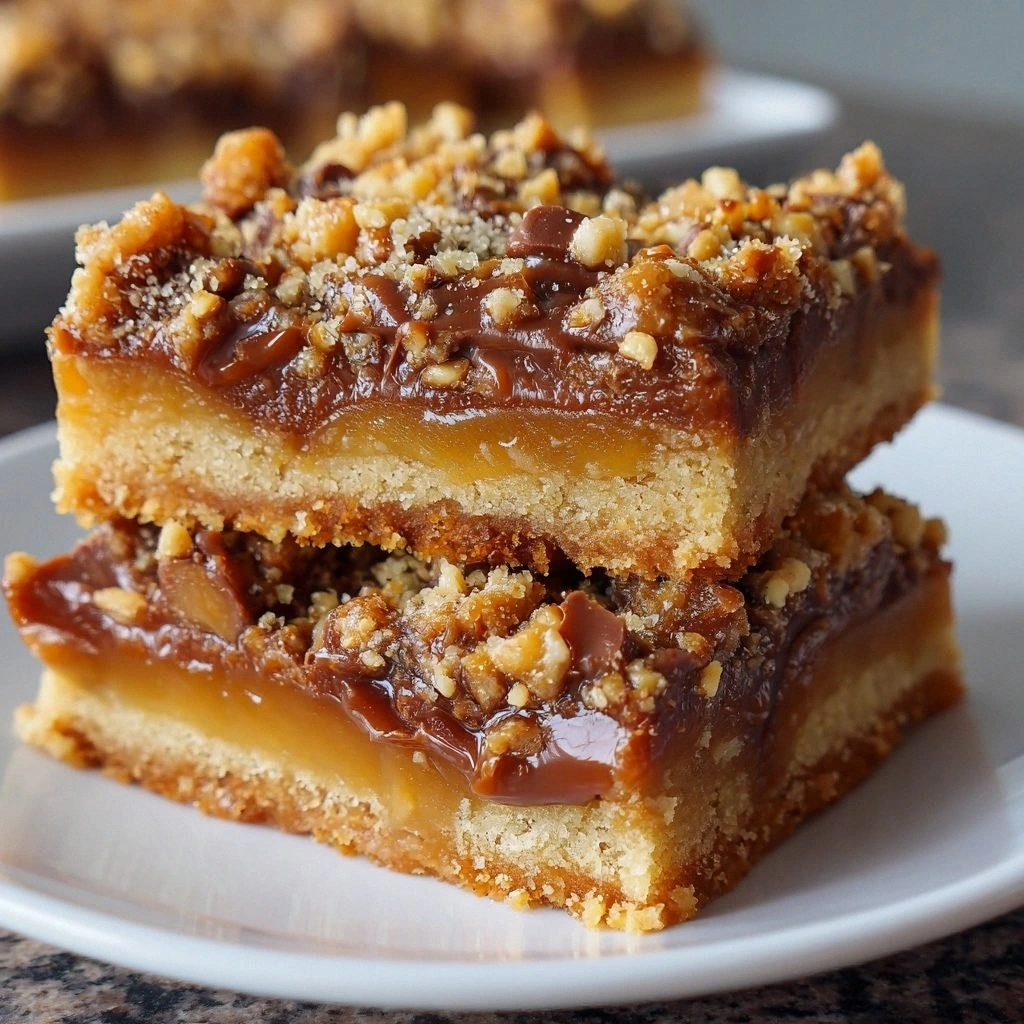
Picture yourself pulling a tray of golden bars from the oven, steam rising like a tiny cloud of buttery sweetness, the sound of the first bite a crisp crack that shatters like thin ice. The first bite is a marriage of buttery richness and caramelized sugar, followed by the satisfying crunch of toffee. Your taste buds are hit with a cascade of buttery, sweet, and slightly salty notes that linger on the tongue. The texture is buttery, slightly crumbly on the inside, with a hard, caramelized crust that gives a satisfying snap. That sizzle when the butter hits the pan? Absolute perfection.
What makes this version stand out is not just the boldness of brown butter but the meticulous layering of flavors and textures. I dared myself to use a precise ratio of flour to butter, a touch of baking powder to lift the crumb, and a generous splash of vanilla to tie the flavors together. The toffee bits are toasted in the brown butter to release their caramel essence before being folded into the dough. Most recipes get this completely wrong by either under‑browning the butter or over‑cooking the sugar, resulting in a bland, crumbly result. This is hands down the best version you'll ever make at home.
And the kicker? I added a pinch of sea salt that turns the sweetness into a balanced, savory experience that makes every bite crave more. If you’ve ever struggled with shortbread that tastes like butter or toffee that’s too sweet, you’re not alone — and I’ve got the fix. I’ll be honest — I ate half the batch before anyone else got to try it. Stay with me here — this is worth it.
What Makes This Version Stand Out
- Flavor: The browned butter gives a nutty, toasted aroma that elevates the simple sweetness of the toffee. The butter’s caramelized flavor adds depth, while the sea salt sharpens the overall profile.
- Texture: The dough holds together like a delicate shortbread, yet the toffee bits give a satisfying crunch that doesn’t crumble. The crumb is light, yet the crust is crisp and caramelized.
- Simplicity: Only eight ingredients, all pantry staples, and a single pan for browning butter. No fancy equipment, just a good sense of timing.
- Uniqueness: The combination of browned butter and toffee bits is a rare twist on classic shortbread that makes these bars stand out at parties.
- Crowd Reaction: Friends always ask for the recipe after tasting; the bars are a conversation starter and a crowd‑pleaser at gatherings.
- Ingredient Quality: Using a high‑quality unsalted butter and premium brown sugar makes a noticeable difference in taste and texture.
- Cooking Method: Browning the butter first creates a nutty undertone that cannot be replicated with regular melted butter.
- Make‑ahead Potential: These bars keep well for a week and freeze beautifully, making them perfect for batch‑cooking.
Alright, let’s break down exactly what goes into this masterpiece…
Inside the Ingredient List
The Flavor Base
All of the magic starts with the flour, a humble yet essential foundation that gives structure to the bars. I use two cups of all‑purpose flour, which is the sweet spot between lightness and bite. If you’re craving a gluten‑free version, swap with a 1:1 blend of rice and potato starch, but keep the same quantity. The flour’s role is to absorb the butter and sugar, binding everything into a cohesive dough that holds together when sliced.
Next up is the butter, the star of this show. I use one cup of unsalted butter, but the trick is to brown it first. Browning the butter brings out a deep, nutty flavor that elevates the entire bar. The butter should reach a golden amber color and emit a nutty scent; if it turns black, you’ve over‑browned it and will have a bitter taste. The browned butter also thickens the dough slightly, creating a denser crumb that still feels airy.
The brown sugar is the sweetener that caramelizes beautifully when mixed with the browned butter. I use one cup of packed brown sugar, which adds moisture, sweetness, and a hint of molasses flavor that pairs perfectly with the toffee. If you prefer a cleaner sweet, you can use white sugar, but the brown sugar gives that deep, caramel note that makes these bars unforgettable.
The Texture Crew
Baking powder is a silent hero that gives the bars a subtle lift. I use one teaspoon of baking powder, which helps the dough rise slightly and prevents it from becoming too dense. If you’re following a low‑sodium diet, you can use a salt‑free baking powder, but keep the same amount to maintain the rise.
Salt is the secret that turns sweetness into a balanced, savory experience. I add half a teaspoon of sea salt, which brightens the buttery flavor and cuts through the sweetness. If you’re sensitive to sodium, use a pinch of salt instead; the bars will still taste great, just a bit less complex.
Vanilla extract is the aromatic glue that ties all flavors together. I use one teaspoon of pure vanilla, which adds a warm, floral note that complements the nutty butter and caramelized sugar. A dash of almond extract can be an interesting twist, but vanilla remains the classic choice.
The Unexpected Star
Toffee bits are the star that gives the bars their signature crunch. I use one cup of toasted toffee bits, which have already been caramelized and toasted in the browned butter. The toffee bits add a delightful crunch that contrasts beautifully with the buttery crumb. If you prefer a smoother texture, you can skip the toffee and simply add chopped walnuts or pecans.
If you’re adventurous, sprinkle a handful of crushed sea salt on top before baking for an extra burst of flavor. The salt crystals will pop against the caramelized sugar, creating a memorable taste experience that’s hard to forget. The toffee bits also bring a hint of buttery caramel that pairs seamlessly with the browned butter base.
Everything’s prepped? Good. Let’s get into the real action…
The Method — Step by Step
- Step 1: Brown the Butter – In a medium saucepan over medium heat, melt one cup of unsalted butter. Stir constantly, watching for a golden amber hue and a nutty aroma. The butter should reach a deep amber color and emit a toasted scent; if it starts to smoke, lower the heat. This process infuses the butter with a rich, nutty flavor that becomes the backbone of the bars. Let it cool slightly after reaching the right color, but keep it warm for the next step.
- Step 2: Combine Dry Ingredients – In a large mixing bowl, whisk together two cups of all‑purpose flour, one teaspoon of baking powder, and half a teaspoon of sea salt. The dry mixture should be smooth, with no lumps. This step ensures the leavening agent is evenly distributed, preventing any uneven rise or dense pockets. The flour will absorb the buttery mixture, creating a cohesive dough.
- Step 3: Mix Butter and Sugar – Pour the browned butter into the dry mixture. Add one cup of packed brown sugar and one teaspoon of vanilla extract. Using a wooden spoon or hand mixer on low speed, combine until the mixture resembles coarse crumbs. The sugar will start to melt slightly, creating a sticky, caramelized batter that’s ready for the next step.
- Step 4: Fold in Toffee Bits – Gently fold in one cup of toasted toffee bits. Make sure the bits are evenly distributed throughout the dough. The toffee adds crunch and a caramel flavor that complements the browned butter. If you’re using nuts, add them now for extra texture.
- Step 5: Shape the Dough – Line a 9-inch square baking pan with parchment paper. Transfer the dough into the pan and press it evenly with your hands or a flat surface. The dough should be about 1/2 inch thick. A uniform thickness ensures even baking and prevents the edges from overcooking while the center remains soft.
- Step 6: Bake – Preheat the oven to 350°F (175°C). Bake the bars for 25–30 minutes, or until the edges are golden brown and the center is set. The bars should have a caramelized crust that crackles when you press it lightly. Keep an eye on the color; if they start to brown too quickly, tent them with foil.
- Step 7: Cool – Remove the pan from the oven and let the bars cool in the pan for 10 minutes. After that, transfer the entire pan onto a wire rack and allow the bars to cool completely. Cooling helps the bars set and prevents them from breaking apart when sliced.
- Step 8: Cut and Serve – Once cooled, lift the bars out of the pan using the parchment paper. Slice into squares or rectangles, depending on your preference. Serve immediately, or store in an airtight container for up to a week. For an extra touch, drizzle a thin line of melted dark chocolate over the top before serving.
That’s it — you did it. But hold on, I’ve got a few more tricks that’ll take this to another level. These insider tips will help you avoid common pitfalls and elevate the flavor profile even further.
Insider Tricks for Flawless Results
The Temperature Rule Nobody Follows
Many bakers think that 350°F is the universal baking temperature for shortbread, but the key to a perfectly crisp edge is a slightly higher oven temperature of 375°F for the first 10 minutes, then lower it to 350°F. This trick ensures the exterior caramelizes while the interior stays tender. I’ve baked at 375°F for the first 10 minutes, then lowered to 350°F for the remaining 15–20 minutes, and the bars come out with that coveted crunch.
Why Your Nose Knows Best
The aroma of browned butter is a reliable indicator of progress. If it smells nutty and slightly caramelized, you’re on the right track. If it smells burnt, you’ve over‑browned it. Trust your nose, and don’t rush the browning process. A slow, steady heat is the key to developing that deep, buttery flavor.
The 5-Minute Rest That Changes Everything
After baking, let the bars rest for exactly five minutes before cutting. This brief rest allows the sugars to set, ensuring the bars hold together when sliced. Cutting them too soon can cause the toffee bits to break apart, ruining the texture. The five‑minute rest is a small window that makes a huge difference.
Don’t Skimp on the Salt
Salt is the flavor enhancer that balances sweetness. A pinch of sea salt on top before baking can create a delightful contrast, especially when paired with the caramelized sugar. Some bakers skip salt altogether, but the lack of salt can make the bars taste flat. Add the pinch, and you’ll notice an immediate lift in flavor.
Use a Dark Saucepan for Browning Butter
Dark saucepans conduct heat better and help prevent the butter from scorching. They also give you a more accurate visual cue for the butter’s color. If you only have a light‑colored pan, keep a close eye on the butter and lower the heat as soon as it starts to brown.
Cool the Butter Slightly Before Mixing
If the browned butter is too hot when you mix it with the flour, the flour can become soggy and the dough too sticky. Let the butter cool for a minute or two, just enough to reduce the temperature but still warm enough to bind the ingredients. This simple step keeps the dough manageable.
Creative Twists and Variations
This recipe is a playground. Here are some of my favorite ways to switch things up:
Nutty Crunch
Add half a cup of toasted almonds or pecans for a nutty crunch that complements the toffee. The nuts add a buttery texture and a subtle earthy note that pairs well with the caramelized sugar.
Chocolate Swirl
Swirl in a tablespoon of melted dark chocolate before baking for a chocolate‑toffee fusion. The chocolate adds depth and a slightly bitter counterpoint to the sweet bars.
Maple Toffee Bars
Replace the brown sugar with equal parts maple syrup and brown sugar for a maple‑toffee flavor. The maple syrup adds a subtle, fruity sweetness that enhances the toffee’s caramel notes.
Spiced Toffee
Stir in a pinch of cinnamon, nutmeg, or allspice into the dough for a warm, spiced twist. The spices add a cozy, autumnal aroma that pairs beautifully with the buttery base.
Sea Salt Caramel
Finish the bars with a drizzle of sea salt caramel sauce. The salty caramel creates a dramatic contrast that elevates the flavor profile and makes each bite unforgettable.
Low‑Carb Edition
Swap the all‑purpose flour for a low‑carb almond flour blend, and reduce the brown sugar to half. The result is a keto‑friendly version that still delivers the buttery, caramelized crunch.
Storing and Bringing It Back to Life
Fridge Storage
Store the bars in an airtight container in the refrigerator for up to a week. The cold environment preserves the buttery texture and prevents the toffee bits from softening. When you’re ready to enjoy them, let them sit at room temperature for about 10 minutes to soften slightly before slicing.
Freezer Friendly
For longer storage, wrap each bar individually in parchment paper and place them in a freezer bag. They’ll stay fresh for up to three months. When you’re ready to eat, let them thaw at room temperature for 30 minutes. If you want a warm treat, microwave on low for 10–15 seconds.
Best Reheating Method
To revive the bars, place them on a parchment‑lined baking sheet and bake at 300°F for 5 minutes. This gentle heat restores the crispness of the crust without drying out the center. Add a tiny splash of water before reheating to create steam, which keeps the bars moist and fresh.