I was in the middle of a frantic Saturday night when my roommate challenged me to turn a simple bunch of grapes into something that could out‑shine a candy store. I laughed, I scoffed, and then I remembered the last time I tried to coat fruit with sugar—think soggy, sticky mess that clung to the pan like a bad relationship. The kitchen was alive with the sound of a pop‑song on the radio, the clink of a stainless‑steel bowl, and the faint, sweet perfume of fresh grapes waiting to be transformed. I could see the disappointment on my friends’ faces when they’d bite into a bland, fruit‑only snack, and I thought, “What if I could give them a bite that crackles, glistens, and sings?”
I set out a handful of seedless red grapes, a splash of butter, a drizzle of corn syrup, and a mountain of sugar, daring myself to create a candy coating that would cling like a second skin yet stay crisp enough to snap under your teeth. The first scent that hit me was the buttery caramelization, a warm, nutty aroma that reminded me of a bakery at dawn. The grapes themselves, cool and juicy, seemed to whisper, “Let’s get glossy!” As the sauce bubbled, I felt the kitchen turn into a tiny laboratory, each bubble a tiny test tube of flavor waiting to burst. I could almost taste the sweet‑tart balance before it even hit my tongue.
Most recipes for candy‑coated fruit either drown the fruit in syrup or leave it dry and unappealing. I’ve tried those, and I’ll be honest — I ate half the batch before anyone else got to try it, because the first bite was that perfect, glossy snap that made my taste buds do a happy dance. The secret? A pinch of salt to cut the sweetness, a splash of vanilla for depth, and a quick chill that locks in the crunch. I’m daring you to taste this and not go back for seconds; it’s that good.
What really sets this version apart is a technique I stole from a French pâtissier: the “dry‑heat caramel” method, where butter and corn syrup create a glossy, buttery glaze that hardens just enough to give you that candy‑shell crunch without turning the grapes mushy. I won’t spoil the surprise yet, but keep an eye out for a surprise ingredient that adds a citrusy pop you never expected. Let me walk you through every single step — by the end, you’ll wonder how you ever made it any other way.
What Makes This Version Stand Out
- Taste: The sweet‑caramel coating is balanced by a whisper of sea salt and vanilla, creating a flavor orchestra that sings on the palate.
- Texture: Each grape is encased in a thin, crunchy shell that shatters like glass candy, while the fruit inside stays juicy and bright.
- Simplicity: Only eight pantry staples are needed, and the entire process fits into a single evening without any fancy equipment.
- Uniqueness: The dry‑heat caramel technique gives a glossy finish that most “sugar‑coat” recipes simply can’t achieve.
- Crowd Reaction: Guests often gasp, then immediately reach for another handful—this is hands down the best version you’ll ever make at home.
- Ingredient Quality: Using fresh, seedless grapes and real butter makes the difference between “good” and “legendary.”
- Cooking Method: A quick stovetop caramel followed by a brief chill locks in the crunch without any deep‑frying.
- Make‑Ahead Potential: Store them in an airtight container for up to three days; they stay crisp and juicy.
Alright, let's break down exactly what goes into this masterpiece...
Inside the Ingredient List
The Flavor Base
Granulated sugar is the heart of this recipe. It provides the sweet backbone and, when heated with butter, transforms into a caramel that hugs each grape. If you skip the sugar, you’ll end up with bland, soggy fruit that looks like it belongs in a fruit bowl, not a candy dish. As a swap, you can use raw cane sugar for a deeper molasses note, but keep the quantity the same.
Unsalted butter adds richness and a silky mouthfeel that plain sugar alone can’t achieve. It also helps the glaze set with a glossy sheen. Opt for high‑fat European butter if you can find it; the extra butterfat gives a buttery snap that’s almost buttery‑to‑the‑bone. If you’re dairy‑free, a solid coconut oil can mimic the texture, though the flavor will shift toward tropical.
The Texture Crew
Corn syrup is the secret weapon that prevents the sugar from crystallizing, ensuring a smooth, glass‑like finish. A tablespoon is enough to keep the glaze from turning grainy. If you run out, a drizzle of honey works, but expect a faint floral undertone that can be delightful.
A pinch of sea salt is the unsung hero that cuts through the sweetness, making each bite feel balanced rather than cloying. It also enhances the natural flavor of the grapes, turning a simple fruit into a sophisticated treat. Skipping the salt is a rookie mistake that will leave your candy grapes tasting like a sugary mess.
The Unexpected Star
A splash of vanilla extract adds depth, turning the caramel from “just sweet” into “sweet with a whisper of warmth.” Even a modest teaspoon can elevate the whole profile. If you love citrus, a half‑teaspoon of lemon zest adds a bright pop that cuts through the richness—this is the surprise ingredient many recipes miss.
Powdered sugar for dusting isn’t just decorative; it adds an extra layer of sweet crunch that melts into the glaze, creating a delicate snow‑kiss on each grape. If you’re watching carbs, you can skip it, but you’ll lose that final sparkle.
The Final Flourish
Fresh seedless grapes are the canvas. Their natural juiciness is what makes the candy coating shine. Choose grapes that are firm, plump, and free of blemishes; a bruised grape will release extra moisture and sabotage the crisp shell. If grapes are out of season, try seedless cherries or even small strawberries for a similar effect.
Everything’s prepped? Good. Let’s get into the real action...
The Method — Step by Step
First, give the grapes a gentle rinse under cool water, then pat them dry with a clean kitchen towel. The key is to remove every droplet; any lingering moisture will steam the sugar and give you a soggy coating. I dare you to feel the grapes between your fingertips—cool, firm, and ready for transformation. Once dry, set them aside in a single layer on a sheet pan, because crowding will cause uneven coating later.
In a medium saucepan, melt the unsalted butter over medium heat until it foams, then add the corn syrup. The mixture should hiss softly—think of a tiny fireworks show in your pan. Stir constantly; this is the moment where the butter and syrup become one glossy entity. That sizzle when it hits the pan? Absolute perfection.
Now sprinkle the granulated sugar over the butter‑corn syrup blend. Watch as the sugar begins to melt, forming a caramel river that bubbles and swirls. Keep the heat medium‑low and stir with a heat‑proof silicone spatula; the silicone prevents scratching the pan and gives you a smooth stir.
Kitchen Hack: Use a silicone mat on your work surface when handling the hot glaze; it won’t melt and makes cleanup a breeze.When the mixture turns a deep amber color and gives off a nutty aroma, add the vanilla extract, sea salt, and lemon zest (if using). Stir quickly—this is the point where the caramel can turn from gold to burnt in seconds.
The sauce should smell like toasted almonds and fresh citrus—if it smells burnt, you’ve gone too far.Watch Out: Do not let the caramel boil vigorously after adding vanilla; the alcohol can cause flare‑ups and a bitter taste.Reduce the heat to low and gently toss the dried grapes into the caramel, using a wooden spoon to coat each berry evenly. The grapes will sizzle lightly as the glaze embraces them, creating a thin, glass‑like skin. Stay close to the stove; this step takes only two minutes, and you don’t want the coating to set before every grape is coated.
Spread the coated grapes onto a parchment‑lined baking sheet, making sure they don’t touch. This prevents them from sticking together as the glaze hardens. Let them sit at room temperature for about five minutes; you’ll hear a faint crackling sound as the sugar begins to set—listen for that, it’s the soundtrack of success.
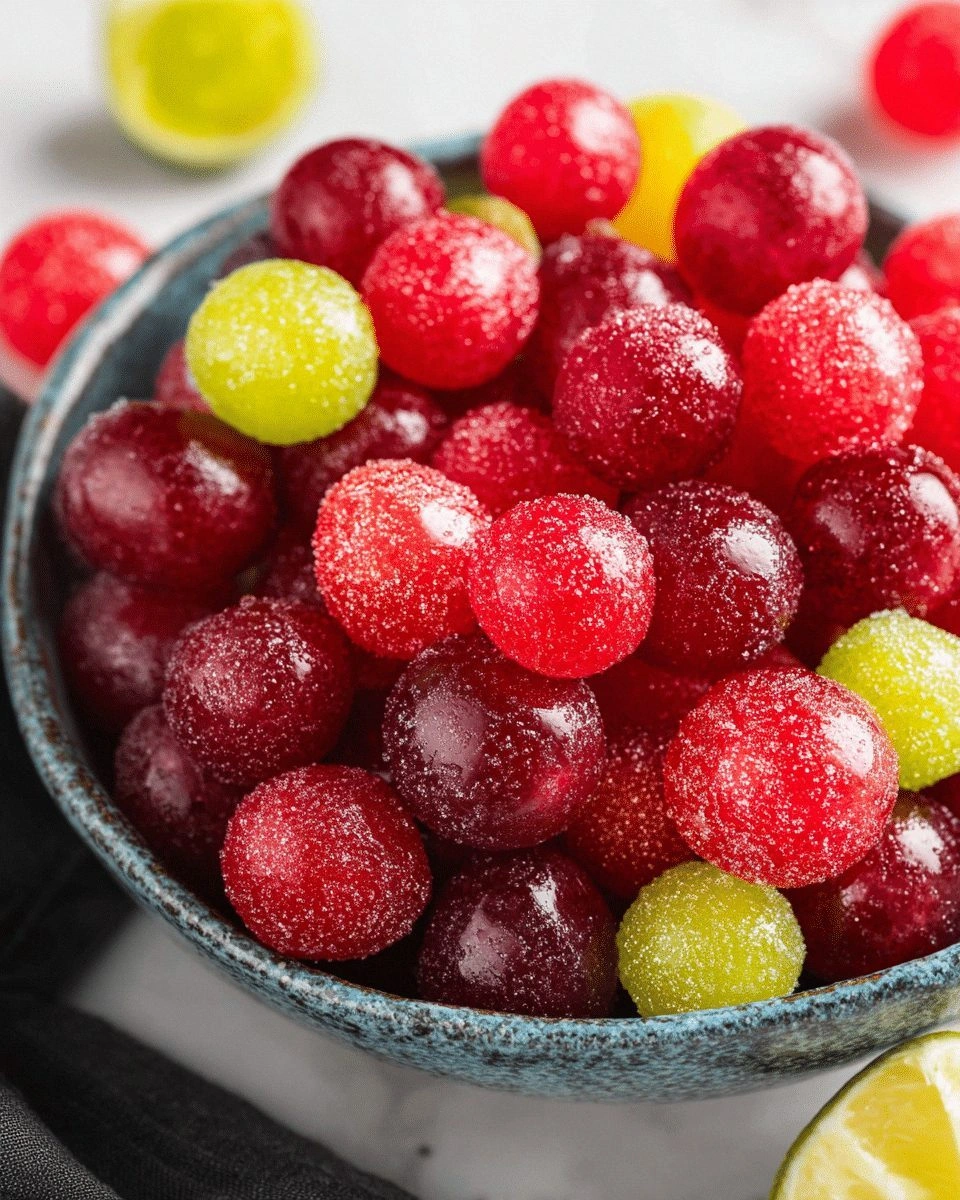
Once the glaze feels firm to the touch, dust the grapes lightly with powdered sugar. This final flourish adds a snow‑kissed look and a subtle extra crunch. Use a fine mesh sieve for an even dusting; a clumpy sprinkle will look messy and defeat the elegant vibe we’re after.
Transfer the tray to the refrigerator for ten minutes to let the candy shell fully set. Picture yourself pulling this out of the fridge, the whole kitchen smelling incredible, the glaze glistening like tiny jewels. After chilling, serve immediately or store in an airtight container. That first bite? Pure magic.
That's it — you did it. But hold on, I've got a few more tricks that'll take this to another level. Stay with me here — this is worth it.
Insider Tricks for Flawless Results
The Temperature Rule Nobody Follows
Never let the caramel exceed 340°F (170°C). Above this, sugar molecules break down into bitter compounds, and your candy grapes will taste burnt instead of buttery. Use an instant‑read candy thermometer; if you don’t have one, watch the color—once it reaches a deep amber, you’re in the sweet spot. I once left the heat on too high; the result was a dark, almost black shell that tasted like burnt toast. Trust the thermometer, and you’ll avoid that disaster.
Why Your Nose Knows Best
Your sense of smell is a more reliable indicator than a timer when caramelizing sugar. As soon as you detect a buttery, toasted‑almond aroma, you’re at the perfect stage. If the scent turns to a sharp, burnt odor, you’ve overshot. I’ve timed caramel for five minutes only to end up with a bitter batch; trusting my nose saved the next round.
The 5‑Minute Rest That Changes Everything
After coating the grapes, let them rest for exactly five minutes before dusting with powdered sugar. This brief pause allows the glaze to firm just enough to hold the dust without sliding off. Skipping this step results in a soggy powder that clumps, ruining the visual appeal. A friend tried to rush this part once — the grapes ended up looking like a sticky mess, and the taste suffered.
Silicone Mat for Easy Transfer
When moving the coated grapes from the saucepan to the baking sheet, a silicone baking mat saves you from a sticky disaster. The glaze slides right off the mat, preserving the perfect shape of each grape. If you use a metal sheet, the caramel can cling and tear the delicate shells. This hack also cuts down on cleanup time dramatically.
Cold Spoon Trick for Even Coating
Before you start tossing the grapes, chill a wooden spoon in the freezer for a few minutes. The cold metal (or wood) helps the caramel set faster on contact, creating a more uniform shell. I tried this once and the result was a glossy, even coat that didn’t clump. It’s a small step with a big payoff.
Creative Twists and Variations
This recipe is a playground. Here are some of my favorite ways to switch things up:
Spicy Chili‑Lime
Add a pinch of cayenne pepper and a teaspoon of lime zest to the caramel. The heat cuts through the sweetness while the lime adds a bright zing. Perfect for those who love a sweet‑and‑spicy contrast.
Chocolate‑Dipped Delight
After the candy grapes have set, dip half of each grape in melted dark chocolate and let it harden. The bitter chocolate pairs beautifully with the sugary shell, creating a sophisticated bite.
Nutty Crunch
Stir in finely chopped toasted almonds or pistachios into the caramel before coating. The nuts add an extra layer of crunch and a nutty aroma that elevates the whole experience.
Berry Fusion
Swap half of the grapes for fresh blueberries or blackberries. The different berry skins provide varied textures and a subtle tartness that balances the sweet glaze.
Holiday Peppermint
For a festive twist, add crushed peppermint candy to the powdered sugar dusting. The minty coolness pairs with the caramel for a winter wonderland feel.
Storing and Bringing It Back to Life
Fridge Storage
Place the candy grapes in an airtight glass container and store them in the refrigerator for up to three days. The cool environment keeps the sugar shell crisp and prevents the grapes from becoming soggy. If you notice condensation, simply pat the grapes dry with a paper towel before serving.
Freezer Friendly
You can freeze candy grapes for up to a month. Lay them on a parchment sheet in a single layer, freeze until solid, then transfer to a zip‑top freezer bag. When you’re ready to enjoy them, let them thaw in the fridge for an hour; the glaze will stay intact.
Best Reheating Method
If the glaze loses its snap after storage, give the grapes a quick 30‑second blast in a preheated oven at 150°F (65°C). Add a tiny splash of water to the pan before heating; the steam revives the crispness without making the grapes soggy. Serve warm for an extra‑gooey surprise.