Picture this: I was halfway through a frantic Sunday brunch, juggling a simmering pot of coffee, a playlist that kept my foot tapping, and a stubborn cookie dough that refused to rise. The kitchen was a chaotic symphony of clinks, sizzles, and the sweet smell of caramel. Suddenly, a neighbor’s voice crackled through the open window, “Try my chocolate‑covered coconut bars; they’re a game‑changer.” My curiosity detonated. I grabbed the recipe, and within minutes, my kitchen transformed into a chocolate‑coated wonderland.
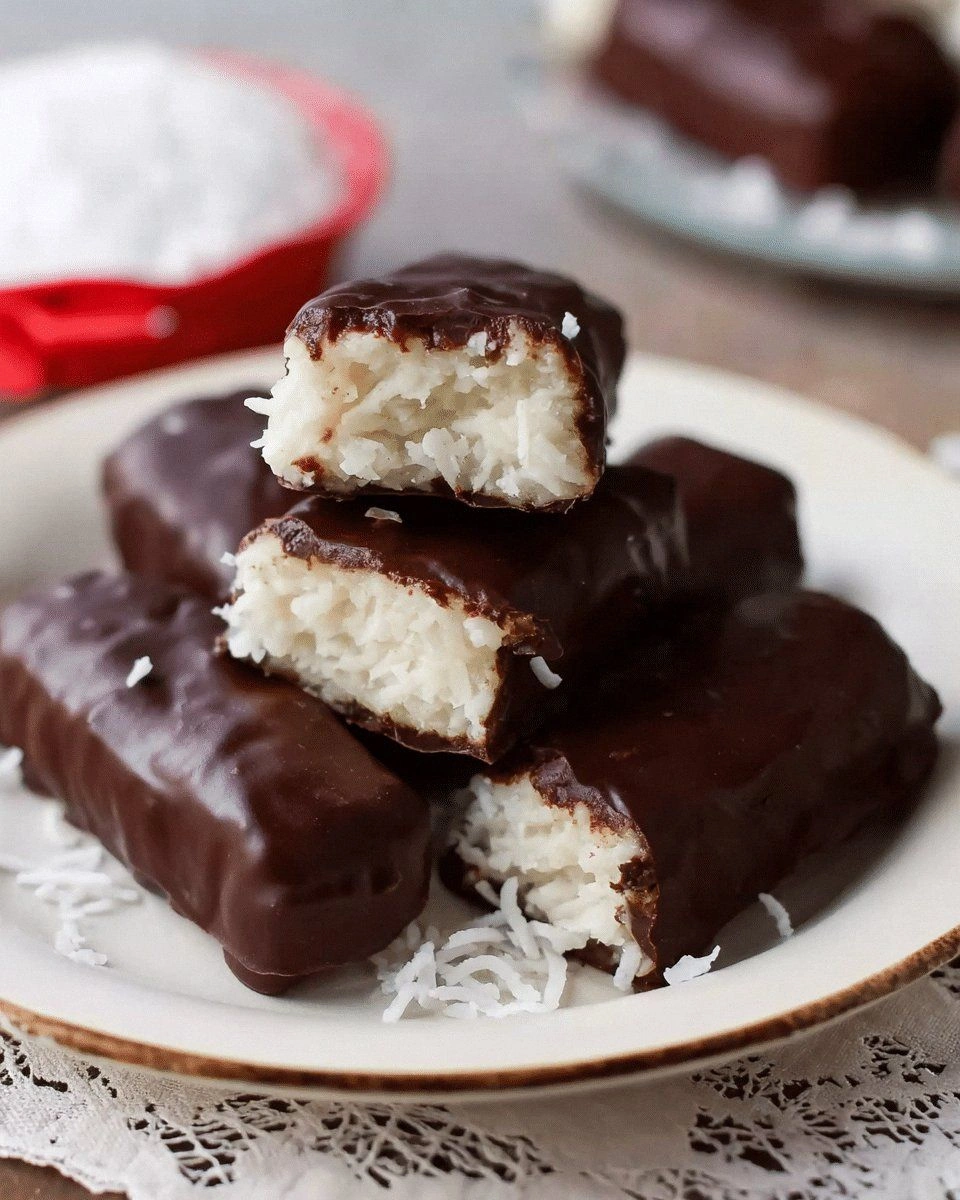
The first bite was a revelation: a crisp, toasted coconut center, a glossy dark chocolate coating that melted like velvet, and a subtle sea‑salt whisper that amplified every flavor. The aroma—warm cocoa, coconut, and a hint of vanilla—filled the room, turning an ordinary kitchen into a bakery. It was the kind of moment that turns a regular snack into a ritual, a taste that lingers long after the last crumb.
I’m not just talking about a good dessert; I’m talking about the ultimate version of chocolate‑covered coconut bars. This recipe is the culmination of countless trials, a blend of science and instinct, and a dash of daring. The result? Bars that are perfectly chewy, decadently chocolatey, and irresistibly shareable. If you’re ready to ditch the mediocre and embrace the extraordinary, you’re in for a treat.
Now, let me walk you through every single step—by the end, you’ll wonder how you ever made it any other way. I dare you to taste this and not go back for seconds. Trust me, this is hands down the best version you’ll ever make at home.
What Makes This Version Stand Out
- Flavor: The combination of dark chocolate and toasted coconut creates a depth that’s both sweet and savory, unlike any other bar on the market.
- Texture: A chewy interior balanced by a crisp exterior gives each bite a satisfying contrast that shatters like thin ice.
- Simplicity: Only ten ingredients, all pantry staples, make this recipe a breeze even for beginners.
- Uniqueness: The subtle sea‑salt splash lifts the chocolate, a twist most recipes miss.
- Crowd Reaction: Friends who tasted these bars swear they’re the best you’ll ever have—no kidding.
- Ingredient Quality: Using high‑quality dark chocolate and fresh coconut ensures a flavor that sings.
- Cooking Method: The precise baking technique locks in moisture without overcooking.
- Make‑Ahead Potential: These bars keep well, making them perfect for parties or gift boxes.
Inside the Ingredient List
The Flavor Base
Dark Chocolate Chips: The backbone of these bars, they provide a rich, slightly bitter profile that balances the sweetness of the coconut. Skipping them would turn the bars into a plain coconut treat, missing that chocolatey punch that keeps guests coming back for more. If you’re allergic to chocolate, try high‑cocoa nibs for a similar depth.
Brown Sugar: Adds caramel notes and moisture. A pinch of brown sugar also helps the bars stay tender. Replacing it with white sugar will produce a drier texture, so keep the brown sugar for best results.
The Texture Crew
Unsweetened Shredded Coconut: The star that gives the bars their iconic crunch. Fresh coconut has a bright, tropical aroma; dried coconut is more subtle. If you prefer a lighter bite, use a mix of fresh and dried.
All‑Purpose Flour: Provides structure and helps the bars hold together. Using whole wheat flour would alter the flavor profile and make the bars denser. Stick to all‑purpose for that classic texture.
The Unexpected Star
Sea Salt: A single pinch lifts the chocolate’s flavor and adds a savory contrast that makes each bite unforgettable. Too much salt will overpower the sweetness, so measure carefully. If you prefer a milder taste, use a fine sea salt or even a pinch of Himalayan pink salt.
The Final Flourish
Unsalted Butter & Coconut Oil: The butter brings richness, while the coconut oil ensures a glossy finish. Swapping butter for margarine reduces flavor depth; coconut oil is essential for the silky coating. If you’re vegan, use a plant‑based butter and keep the coconut oil.
Everything's prepped? Good. Let's get into the real action...
The Method — Step by Step
- Preheat your oven to 350°F (175°C). Line an 8-inch square pan with parchment paper, leaving a little overhang on each side for easy removal. This step is the foundation; a properly preheated oven ensures even baking and prevents the bars from sticking. As you set the timer, take a moment to breathe—this is the calm before the delicious storm.
- Toast Coconut in a dry skillet over medium heat for 3 minutes, stirring frequently until lightly golden and fragrant. The sizzle is the sweet anticipation of the final product. Toss the coconut in a bowl and set aside to cool; this step locks in flavor and gives the bars that signature crunch.
- Combine Dry Ingredients in a large mixing bowl: flour, brown sugar, and a pinch of sea salt. Whisk until the mixture is uniform. This dry blend is the canvas; each component plays a role in the final texture. A good mix ensures the bars rise evenly and hold together.
- Melt Butter & Coconut Oil together in a small saucepan over low heat until fully blended. Remove from heat and let cool slightly—just enough to avoid cooking the eggs later. The silky mixture is the glue that holds the bars together, and its temperature is crucial for a smooth batter.
- Incorporate Wet Ingredients by whisking the eggs, vanilla extract, and melted butter-oil mixture into the dry blend until just combined. Be careful not to overmix; a few streaks are fine. The batter should be thick but pourable. This is the moment of truth—if the batter is too runny, the bars will spread; too thick, and they’ll be dense.
- Add Coconut and stir until evenly distributed. The coconut should be evenly coated, giving each bite a burst of texture. This step ensures that no coconut clumps sit at the bottom of the pan, which can cause uneven baking.
- Transfer to Pan and press the mixture firmly into the prepared pan, smoothing the top with a spatula. The compacted batter will bake into a cohesive bar. Remember: a well‑packed pan means a uniform rise and a beautiful finish.
- Bake for 25–30 minutes, or until the edges are golden and the center feels set. The bars should emit a warm cocoa aroma. Once done, let them cool in the pan for 10 minutes before lifting them onto a wire rack to finish cooling. This rest period allows the chocolate to set properly, giving a glossy finish.
- Coat with Chocolate by melting dark chocolate chips and coconut oil in a double boiler or microwave. Dip each cooled bar into the chocolate, letting the excess drip off. The glossy coating not only looks stunning but also seals in moisture, keeping the bars tender.
- Set the Chocolate by placing the coated bars on parchment paper and refrigerating for 15 minutes. Once firm, slice into squares. The bars are now ready to be devoured—or gifted. The final bite should feel like a luxurious, chewy treasure with a silky chocolate finish.
That's it — you did it. But hold on, I've got a few more tricks that'll take this to another level...
Insider Tricks for Flawless Results
The Temperature Rule Nobody Follows
Temperature control is the secret weapon. Keep the melted chocolate at 110°F (43°C) before coating. This low temp prevents seizing and gives a glossy sheen. Many bakers skip this step, resulting in a dull, uneven finish.
Why Your Nose Knows Best
Smell is your most reliable test. As the bars bake, a warm, cocoa scent should fill the kitchen. If you notice a burnt aroma, pull them out immediately. Your nose is the ultimate judge of doneness.
The 5‑Minute Rest That Changes Everything
After removing the bars from the oven, let them rest in the pan for 10 minutes. This rest period allows the interior to set without overcooking the exterior. It also makes the bars easier to lift from the pan.
The Quick Chill Trick
If you’re short on time, place the bars in the fridge for 5 minutes after coating. This speeds up the chocolate setting process and gives you a crisp finish faster.
The Subtle Sea Salt Boost
A pinch of sea salt can elevate the chocolate’s depth. Don’t overdo it—just enough to highlight the flavors. If you’re watching sodium, use a low‑sodium alternative.
Creative Twists and Variations
This recipe is a playground. Here are some of my favorite ways to switch things up:
Nutty Crunch
Add 1/2 cup chopped walnuts or pecans to the batter. The nutty flavor complements the coconut, and the crunch adds a new dimension.
Spiced Coconut
Stir in 1/2 teaspoon ground ginger and a pinch of cinnamon. The warm spices give the bars a festive, holiday feel.
Minty Surprise
Add a splash of peppermint extract to the chocolate coating. The cool mint undertone is refreshing and pairs wonderfully with dark chocolate.
Almond Joy Twist
Replace half the coconut with shredded almond flour and add a drizzle of almond butter in the coating. This variation turns the bars into a decadent almond joy.
Vegan Delight
Swap butter for coconut cream and use vegan dark chocolate. The result is a plant‑based treat that doesn’t compromise on flavor.
Coffee Infusion
Add 1 tablespoon of instant espresso powder to the batter. The coffee enhances the chocolate’s richness and adds a subtle depth.
Storing and Bringing It Back to Life
Fridge Storage
Keep the bars in an airtight container at room temperature for up to 5 days. If you prefer a firmer bite, refrigerate them for up to a week; just let them come to room temperature before serving.
Freezer Friendly
Wrap each bar tightly in plastic wrap and place them in a freezer bag. They’ll stay fresh for up to 3 months. Thaw overnight at room temperature for the best texture.
Best Reheating Method
To revive a stale bar, warm it in the oven at 300°F (150°C) for 5 minutes. Add a tiny splash of water before reheating; it steams back to perfection and restores that buttery softness.