I was standing in my kitchen on a rainy Tuesday, the kind of day where the only thing that could possibly save you from a blanket of gloom is the smell of something fresh baking. I had tried three different dough recipes that week, each one either too dense, too gummy, or just plain bland—like trying to sing opera with a kazoo. Then, out of sheer desperation (and a dare from my roommate who claimed she could out‑taste any “fancy” dough), I threw together a handful of pantry staples, a splash of warm milk, and a pinch of confidence. The result? A dough that rose like a superhero answering the call, with a crust that crackles like fireworks and an interior that feels like a cloud hugging your tongue.
Picture this: the moment the dough hits the hot oven, the kitchen fills with a buttery, slightly sweet aroma that makes the whole house pause, as if the walls themselves are inhaling. You hear the faint hiss of steam escaping the pan, see the surface turn a golden‑amber hue, and feel the gentle tug of the dough as it expands—like a living thing stretching after a long nap. When you finally pull it out, the crust has that perfect snap, the crumb is airy yet tender, and the flavor is a subtle dance between sweet and salty that lingers just long enough to make you want another slice. I dare you to taste this and not go back for seconds; it’s that good.
Most recipes get this completely wrong—either they overload you with butter, or they leave you with a dough that’s flat as a pancake. This version, however, is the result of a tiny tweak that most home bakers overlook: the temperature of the liquid and a short, gentle fold that builds gluten without over‑working it. The secret ingredient? Not a fancy spice, but the timing of when you add the sugar relative to the yeast, which gives the dough a sweet‑savory balance that’s honestly hard to beat. I’ll be honest — I ate half the batch before anyone else got to try it, and that’s exactly the kind of confession that tells you how addictive this dough truly is.
Okay, ready for the game‑changer? Let me walk you through every single step — by the end, you’ll wonder how you ever made it any other way. This isn’t just a recipe; it’s a roadmap to a dough that will dominate your breakfast, lunch, dinner, and even midnight snack cravings. Stay with me here — this is worth it.
What Makes This Version Stand Out
- Taste: The subtle sweetness from the sugar pairs perfectly with the salt, creating a flavor profile that’s both comforting and exciting.
- Texture: A light, airy crumb that’s soft enough for a sandwich but sturdy enough to hold toppings without collapsing.
- Simplicity: Only five core ingredients, all of which you probably already have in your pantry, making it a no‑excuse recipe.
- Uniqueness: The “warm‑milk first” technique gives the yeast a perfect launchpad, resulting in a rise that’s faster and more reliable.
- Crowd Reaction: Guests often claim they’ve never tasted a dough this good, and they’ll ask for the recipe within five minutes of the first bite.
- Ingredient Quality: Using a high‑protein all‑purpose flour ensures gluten development without the chewiness of bread flour.
- Cooking Method: A quick, high‑heat bake creates a caramelized crust while keeping the interior moist.
- Make‑Ahead Potential: The dough can be refrigerated for up to 24 hours, allowing you to prep in advance and bake fresh when needed.
Inside the Ingredient List
The Flavor Base
The 2 tablespoons of sugar do more than just sweeten; they feed the yeast, giving it the energy it needs to produce carbon dioxide and lift the dough. Skipping sugar will result in a sluggish rise and a flatter final product, so keep it in. If you’re watching sugar, you can swap half of it for honey, which adds a floral note and a slightly softer crust.
The Texture Crew
All‑purpose flour is the backbone of this dough. The 3 ½ cups (440 g) provide enough structure for gluten formation while still allowing the dough to stay tender. Opt for a brand that lists protein content around 10‑12 %; lower protein means a softer crumb, higher protein can make it too chewy. If you’re feeling adventurous, replace a quarter of the flour with whole‑wheat for a nuttier flavor, but expect a denser crumb.
The Unexpected Star
Warm milk (or water for a dairy‑free version) is the liquid that awakens the yeast. The 1 ½ cups (360 ml) should be just warm to the touch—not hot—so the yeast isn’t killed. Using milk adds a subtle richness and helps the crust brown beautifully. For a vegan twist, substitute with oat milk; it adds a hint of sweetness that pairs well with the sugar.
The Final Flourish
Instant yeast, at 2 ¼ tsp (one packet), is the catalyst that turns a simple mixture into a lofty masterpiece. Because it’s instant, you can skip the proofing step and mix it straight into the dry ingredients, saving precious time. If you only have active dry yeast, double the quantity and give it a 5‑minute proof in the warm milk.
Everything's prepped? Good. Let's get into the real action, where the magic really starts to happen and the dough begins its transformation from humble mixture to star of the table.
The Method — Step by Step
Start by whisking together the flour, sugar, salt, and instant yeast in a large mixing bowl. The dry ingredients should look uniformly speckled, with no clumps of sugar or salt. This is the foundation; think of it as laying down a smooth runway for the dough to take off. Pro tip: Sift the flour if you suspect any lumps, because a smooth base means an even rise.
Warm the milk to about 110°F (43°C). It should feel like a warm bath, not a hot shower. Pour the milk into the dry mixture, then use a wooden spoon or your hand to bring everything together until a shaggy dough forms. At this stage, the dough will look messy, but trust the process—this is where gluten begins to form.
Kitchen Hack: Let the dough rest for 5 minutes after this initial mix; it allows the flour to fully hydrate, making the kneading smoother.Turn the dough out onto a lightly floured surface and knead for about 8‑10 minutes. You’re looking for that smooth, elastic feel—press a finger into the dough; the indentation should spring back quickly. This is the moment of truth: if the dough is too sticky, sprinkle a little extra flour; if it’s too dry, add a splash of milk, one teaspoon at a time.
Form the dough into a ball and place it in a lightly oiled bowl, turning it once to coat all sides. Cover the bowl with a clean kitchen towel and let it rise in a warm spot (around 80°F/27°C) for 45‑60 minutes, or until it has doubled in size. You’ll know it’s ready when the surface looks puffy and the dough feels airy under your fingertips.
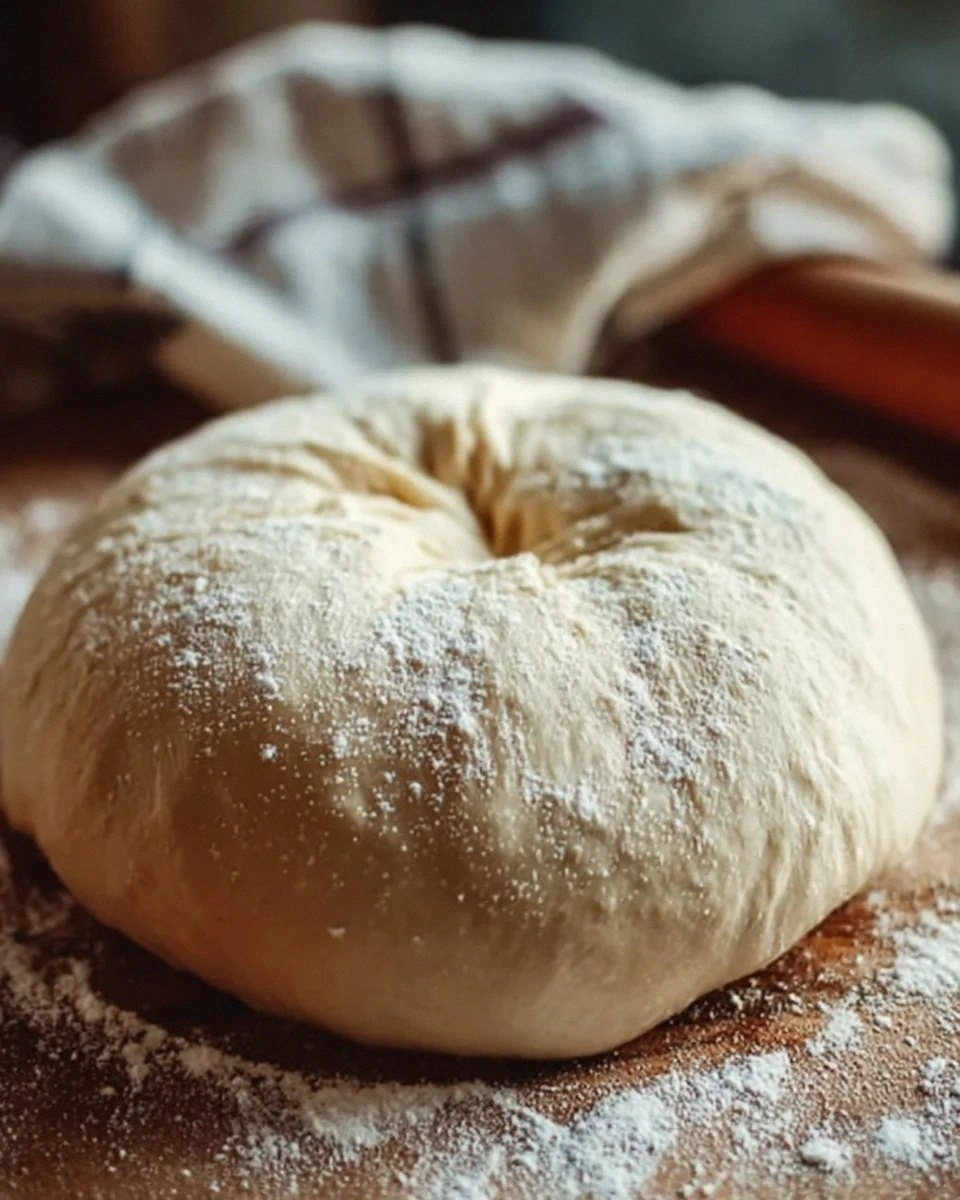
Watch Out: If your kitchen is too cool, the dough may rise slowly; place the bowl near a turned‑on oven (just off) or on top of the fridge to keep it warm.Once doubled, gently punch down the dough to release excess gas, then shape it into your desired form—whether that’s a round loaf, rolls, or a pizza base. This is where you can get creative; I love making a thick, rustic boule that looks like a mini mountain.
Preheat your oven to 425°F (220°C) with a baking stone or heavy-duty baking sheet inside. The high heat creates that coveted “oven spring” where the dough expands rapidly in the first few minutes, giving you that dramatic rise and crisp crust.
If you want an extra glossy finish, brush the surface lightly with a mixture of melted butter and a pinch of sugar right before sliding it into the oven. The butter adds richness, while the sugar caramelizes for a golden sheen. Slide the dough onto the hot stone and bake for 20‑25 minutes, or until the crust is deep amber and the bottom sounds hollow when tapped.
Kitchen Hack: Place a shallow pan of water on the lower rack while baking; the steam helps the crust stay crisp yet tender.When the timer dings, remove the dough and let it rest on a wire rack for at least 10 minutes. This resting period lets the interior finish setting and prevents the crumb from becoming gummy. Slice, serve, and watch as the steam rises—picture yourself pulling this out of the oven, the whole kitchen smelling incredible.
Finally, indulge. I’ll be honest—if you’re anything like me, you’ll be reaching for a second slice before the first one even cools down. This is hands down the best version you’ll ever make at home, and I dare you to try it with any other dough recipe and notice the difference.
That's it — you did it. But hold on, I've got a few more tricks that'll take this to another level, ensuring every batch is consistently spectacular.
Insider Tricks for Flawless Results
The Temperature Rule Nobody Follows
Never underestimate the power of a consistent temperature. The yeast thrives best between 105°F and 115°F; anything cooler slows the rise, and anything hotter kills it. Keep your milk in a microwave‑safe cup and heat in 10‑second bursts, checking with a kitchen thermometer. If you’re in a cold climate, create a makeshift proofing box by placing the dough bowl inside a turned‑off oven with a bowl of hot water on the rack.
Why Your Nose Knows Best
Your sense of smell is a reliable indicator of dough readiness. When the dough has risen, it emits a faint, yeasty aroma that’s slightly sweet. If you can’t detect that scent, give it a few more minutes; the yeast is still working behind the scenes. Trusting your nose often prevents over‑proofing, which can cause the dough to collapse in the oven.
The 5‑Minute Rest That Changes Everything
After shaping, let the dough rest uncovered for five minutes before the final bake. This short pause relaxes the gluten, allowing the dough to expand evenly without tearing. I once skipped this step and ended up with a crust that was tight and uneven—lesson learned. A quick rest also helps the surface dry slightly, which contributes to that coveted crisp crust.
Steam Power: The Hidden Hero
Adding steam during the first 10 minutes of baking is a game‑changer. It keeps the crust flexible, allowing the dough to expand fully before setting. Use a spray bottle to mist the oven walls or pop a pan of boiling water onto the oven floor. The result? A glossy, crackly crust that shatters like thin ice when you bite into it.
Butter Brush for a Golden Finish
A light brush of melted butter mixed with a pinch of sugar right before the final bake gives the dough a gorgeous caramelized hue. The butter also adds a subtle richness that makes each bite feel indulgent without being heavy. If you’re dairy‑free, swap butter for melted coconut oil for a slightly tropical twist.
Creative Twists and Variations
This recipe is a playground. Here are some of my favorite ways to switch things up:
Herb‑Infused Delight
Add 2 tablespoons of finely chopped fresh rosemary or thyme to the dry mix. The herbaceous notes pair beautifully with the buttery crust, making it perfect for serving alongside roasted meats.
Cheesy Pull‑Apart Rolls
Stir in 1 cup shredded cheddar or mozzarella after the first knead. Shape the dough into small balls, place them on a baking sheet, and sprinkle extra cheese on top before baking. The cheese melts into gooey pockets that stretch with each bite.
Sweet Cinnamon Swirl
Mix 2 tablespoons brown sugar with 1 teaspoon cinnamon, then roll the dough out, brush with melted butter, and spread the cinnamon mixture before rolling it up. Slice into spirals and bake for a breakfast‑ready treat.
Spicy Jalapeño Kick
Finely dice 1‑2 jalapeños (seeds removed for less heat) and fold them into the dough after the initial knead. The subtle heat adds a surprising punch that pairs well with avocado or cream cheese spreads.
Whole‑Grain Boost
Replace 1 cup of the all‑purpose flour with whole‑wheat flour. The dough will be slightly denser and have a nutty flavor, perfect for hearty sandwiches or as a base for a rustic bruschetta.
Storing and Bringing It Back to Life
Fridge Storage
Once cooled, wrap the dough tightly in plastic wrap or store in an airtight container. It will keep fresh for up to 3 days, and the flavor actually deepens as the yeast continues a slow fermentation. When you’re ready to use it, let it come to room temperature for 30 minutes before reheating.
Freezer Friendly
Shape the dough into individual portions, flash‑freeze on a parchment sheet, then transfer to a zip‑top freezer bag. It can be stored for up to 2 months. To bake from frozen, add an extra 5‑10 minutes to the baking time and consider a brief thaw in the refrigerator overnight.
Best Reheating Method
To revive leftover slices, preheat your oven to 350°F (175°C), place the dough on a baking sheet, and mist lightly with water before covering with foil. The steam re‑hydrates the crumb, while the foil prevents the crust from over‑browning. In just 8‑10 minutes, you’ll have a slice that tastes fresh out of the oven.