Picture this: a rainy Tuesday, the kind where the clouds look like someone spilled a bucket of grey paint across the sky, and you’re stuck in the kitchen with a half‑finished stir‑fry that smells like burnt ambition. I was on the brink of ordering pizza when a sudden craving for something silky, comforting, and just a little bit daring hit me like a lightning bolt. I rummaged through the fridge, found a lonely pack of chicken livers that had been nagging for a purpose, and thought, “What if I could turn these into a sauce that hugs pasta like a warm blanket?” That thought turned into a kitchen experiment that ended up being the most rewarding culinary victory of the month.
The moment the livers hit the hot butter, a sizzle erupted that sounded like applause in a tiny theater of steel. The aroma was instantly intoxicating—a blend of earthy richness, a whisper of sweet onion, and a faint smoky hint from the paprika that made my nose do a happy dance. I could hear the faint crackle of the butter as it melted, feel the heat radiating from the pan, and see the livers turning a deep, caramelized brown that promised depth of flavor. The kitchen filled with a scent so comforting it reminded me of my grandmother’s Sunday lunches, yet it carried a modern twist that felt like a culinary rebellion.
Most chicken liver recipes I’ve tried either left the livers feeling rubbery or turned the sauce into a gritty mess that clung to the fork like cheap chewing gum. This version, however, achieves a velvety texture that coats each bite with a luxurious silkiness—think of a cashmere scarf draped over a sturdy denim jacket. The secret isn’t a magic ingredient; it’s a method that respects the delicate nature of the livers while coaxing out their natural buttery flavor. I’m about to spill the beans (and the butter) on why this is hands down the best version you’ll ever make at home.
There’s a tiny twist in this recipe that will make you question everything you thought you knew about cooking livers: a splash of heavy cream added at just the right moment, turning a simple pan sauce into a dreamy, glossy finish that rivals any restaurant’s. I dare you to taste this and not go back for seconds. Let me walk you through every single step — by the end, you’ll wonder how you ever made it any other way.
What Makes This Version Stand Out
- Flavor Explosion: The combination of butter, onion, and garlic creates a foundational base that sings, while the paprika adds a subtle smokiness that lifts the dish from ordinary to unforgettable.
- Velvet Texture: The heavy cream is introduced at a precise temperature, allowing it to emulsify without curdling, resulting in a sauce that coats the pasta like a silk sheet.
- Simplicity Meets Sophistication: With just eight ingredients, you won’t need a pantry full of exotic spices to achieve a restaurant‑level dish.
- Ingredient Quality: Fresh, plump chicken livers are the star; their natural richness is amplified, not masked, by the buttery sauce.
- Crowd Reaction: Even the most skeptical eaters—especially those who think liver is “gross”—will be converted after the first bite.
- Make‑Ahead Potential: The sauce can be prepared ahead of time and gently reheated, making it perfect for busy weeknights.
- Versatile Pairings: Serve it over pasta, rice, or a crusty loaf, and finish with a fresh green salad for contrast.
- Cooking Method Mastery: The searing technique locks in juices, while the deglazing step captures every caramelized crumb for maximum flavor.
Inside the Ingredient List
The Flavor Base
Onion: One medium onion, finely diced, provides a subtle sweetness that balances the earthy liver. If you skip it, the dish loses its aromatic backbone and can feel one‑dimensional. Try a sweet Vidalia for an extra caramel note, or a red onion for a sharper bite.
Garlic: Three cloves, minced, introduce a pungent depth that awakens the palate. Overcooking garlic turns it bitter, so keep it on medium heat and watch it turn golden, not brown. If you’re allergic to garlic, a pinch of asafoetida can mimic its umami.
The Texture Crew
Butter: Two tablespoons of unsalted butter are the golden glue that binds everything together. It creates a rich, glossy sheen and adds a nutty undertone when it begins to brown. For a dairy‑free version, substitute with clarified ghee, but expect a slightly different flavor profile.
Chicken Livers: One pound of fresh, plump chicken livers are the heart of this dish. Look for livers that are firm to the touch and have a deep reddish hue—avoid any that appear gray or have a strong metallic smell. If you can’t find chicken livers, duck livers work too, though they’re richer and may need a touch less butter.
The Unexpected Star
Heavy Cream: Half a cup of heavy cream is added at the end to transform the pan juices into a velvety sauce. The high fat content prevents curdling and creates that luxurious mouthfeel. If you’re watching calories, you can swap half the cream for whole‑milk Greek yogurt, but add it off‑heat to keep the texture smooth.
The Final Flourish
Paprika: One teaspoon of sweet paprika injects a gentle smoky warmth without overwhelming the delicate liver flavor. Smoked paprika is an alternative, but it will dominate the profile—use sparingly if you choose it.
Pasta/Rice/Crusty Bread: This dish is a chameleon; serve it over al dente linguine, fluffy basmati rice, or a crusty baguette to soak up the sauce. Each starch offers a different texture contrast, so pick your favorite or keep a few options on hand for guests.
Fresh Green Salad: A simple side of mixed greens dressed with lemon vinaigrette cuts through the richness, refreshing the palate between bites. Skipping the salad means missing the bright, acidic counterpoint that makes the dish feel balanced.
Everything's prepped? Good. Let's get into the real action…

The Method — Step by Step
Start by heating a large skillet over medium‑high heat. Add the two tablespoons of butter and let it melt until it foams and begins to turn a light amber. As soon as the butter is shimmering, toss in the diced onion. You’ll hear a gentle sizzle that says, “We’re about to build flavor.” Cook the onion for about three minutes, stirring occasionally, until it becomes translucent and just starts to caramelize. That sizzle when it hits the pan? Absolute perfection.
Next, add the minced garlic. Keep the heat at medium to avoid burning; the garlic should turn fragrant and golden in about 30 seconds.
Kitchen Hack: Add a splash of water to the pan if the garlic starts to brown too quickly; this creates steam that cooks it evenly.Now, it’s time for the stars: the chicken livers. Pat them dry (remember that hack from earlier) and season lightly with salt and pepper. Lay them in the pan in a single layer, giving each piece enough room to sear. Let them cook undisturbed for about two minutes; you’ll see the edges start to pull away and turn a deep mahogany color. Flip them once, cooking another two minutes on the other side.
Watch Out: Overcooking livers makes them tough; they should remain slightly pink in the center for optimal tenderness.Once the livers are beautifully seared, sprinkle the teaspoon of paprika over them. Stir quickly to coat every piece; the paprika will release a faint, sweet aroma that mingles with the butter. This is the moment of truth: the spice should be fragrant but not overpowering. Let it toast for about 30 seconds, then deglaze the pan with a splash of water or low‑sodium broth, scraping up any brown bits stuck to the bottom. Those browned bits are flavor gold.
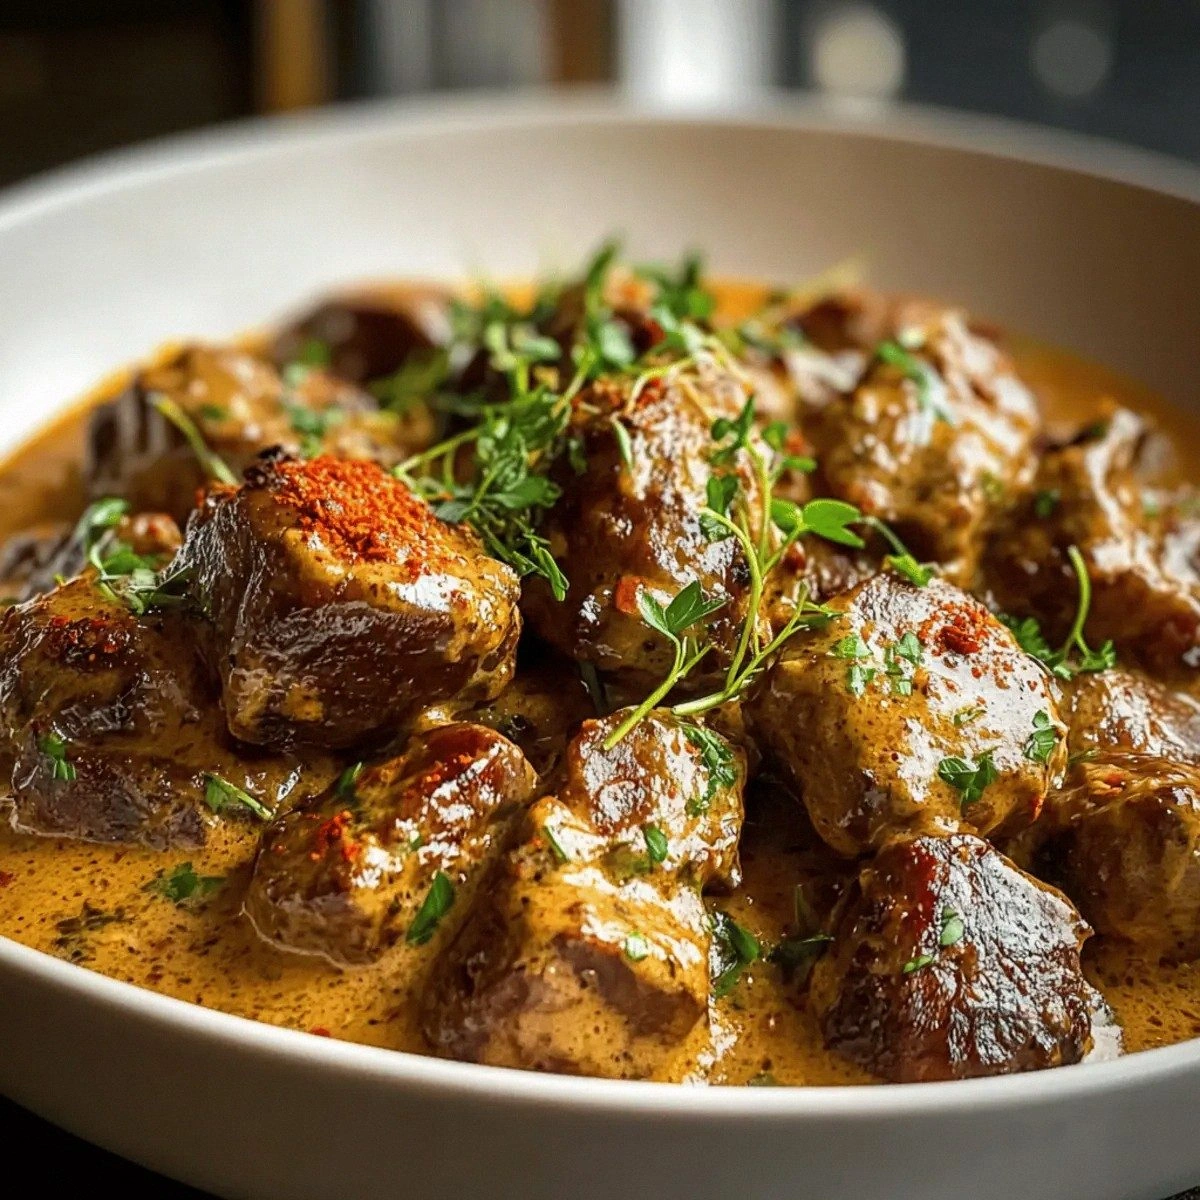
Reduce the heat to low and pour in the half‑cup of heavy cream. Stir continuously; the cream will swirl into the pan juices, creating a glossy, velvety sauce. Keep the temperature low enough that the sauce simmers gently—if it boils, the cream can separate. Let it cook for three to four minutes, allowing it to thicken just enough to coat the back of a spoon.
While the sauce thickens, bring a pot of salted water to a rolling boil if you’re serving over pasta. Cook your choice of pasta al dente according to package instructions, then reserve a cup of the pasta water. This starchy water can be added to the sauce later to adjust consistency without diluting flavor.
When the sauce reaches a silky consistency, taste and adjust seasoning with a pinch more salt if needed. If the sauce feels too thick, whisk in a tablespoon of the reserved pasta water until it reaches a luxurious pourable texture.
Kitchen Hack: Finish the sauce with a squeeze of fresh lemon juice; the acidity brightens the richness instantly.Drain the pasta and add it directly to the skillet, tossing to coat each strand with the creamy liver sauce. If you’re serving with rice or crusty bread, simply spoon the sauce over the base. Let everything mingle for a minute so the starch absorbs the flavor.
Plate the dish with a generous serving of the creamy livers and sauce, then garnish with a handful of fresh herbs—parsley or chives work beautifully. Serve alongside a crisp green salad dressed lightly with lemon vinaigrette. The salad’s bright acidity cuts through the richness, creating a harmonious bite every time.
Take a moment to admire your creation. Picture yourself pulling this out of the oven, the whole kitchen smelling incredible, and the first forkful sliding off the spoon like a silk ribbon. That’s the payoff for every careful step you just took. That’s it — you did it. But hold on, I’ve got a few more tricks that’ll take this to another level…
Insider Tricks for Flawless Results
The Temperature Rule Nobody Follows
Most home cooks crank the heat to “high” because they think a hotter pan means faster cooking. In reality, a moderate temperature ensures the butter doesn’t burn and the livers stay tender. Keep the skillet at medium‑high for searing, then drop to low when adding the cream. This temperature dance is the secret to that velvety sauce that never curdles.
Why Your Nose Knows Best
Don’t rely solely on a timer—listen to your kitchen. When the onions start to caramelize, you’ll hear a soft, almost musical sizzle. When the paprika hits its fragrant peak, your nose will pick up a sweet, smoky perfume. Trust those sensory cues; they’re more reliable than any clock.
The 5‑Minute Rest That Changes Everything
After you finish cooking, let the sauce sit off the heat for five minutes. This brief rest allows the flavors to meld, and the cream to fully integrate with the pan juices. Skipping this step leaves the sauce a little disjointed, like a conversation that never quite finds its rhythm.
Seasoning Layers, Not Just a Finish
Season at three points: after the onions, after the livers, and finally after the cream. Each layer builds depth, ensuring no single bite is flat. A friend once tried skipping the mid‑cook seasoning and ended up with a bland sauce that tasted like “just butter.” Don’t be that friend.
Use the Right Pan for the Right Result
A heavy‑bottomed stainless steel or cast‑iron skillet distributes heat evenly, preventing hot spots that can scorch the butter. Non‑stick pans can work, but they don’t allow the same caramelization that gives the sauce its depth. If you only have a non‑stick, use a bit more butter and keep the heat slightly lower.
Creative Twists and Variations
This recipe is a playground. Here are some of my favorite ways to switch things up:
Spicy Kick
Add a pinch of cayenne or a dash of hot sauce when you sprinkle the paprika. The heat will contrast beautifully with the creamy base, giving the dish a bold edge that’s perfect for those who love a little fire.
Mushroom Medley
Stir in a cup of sliced cremini or shiitake mushrooms after the livers are seared. The mushrooms absorb the sauce, adding an earthy umami layer that deepens the overall flavor profile.
Herbaceous Delight
Finish with a handful of fresh thyme or rosemary just before serving. The herb oils infuse the sauce with fragrant notes that elevate the dish from comforting to sophisticated.
Cheesy Finish
Sprinkle grated Parmesan or Pecorino Romano over the plated dish and let it melt into the sauce. The cheese adds a salty, nutty dimension that pairs wonderfully with the livers’ richness.
Vegetarian “Liver” Substitute
For a plant‑based version, use marinated and pan‑seared king oyster mushroom caps. Their meaty texture mimics livers, and they soak up the creamy sauce just as well.
Wine‑Infused Elegance
Deglaze with a splash of dry white wine instead of water or broth. The wine adds acidity and a subtle fruitiness that brightens the sauce, making it ideal for a dinner party.
Storing and Bringing It Back to Life
Fridge Storage
Transfer any leftovers to an airtight container and refrigerate for up to three days. The sauce may thicken as it cools; simply reheat gently on the stovetop, adding a splash of water or broth to loosen it back to a silky consistency.
Freezer Friendly
Portion the cooked livers and sauce into freezer‑safe bags or containers. They’ll keep for up to two months. When ready to use, thaw overnight in the fridge, then reheat over low heat, stirring in a tablespoon of water to revive the creaminess.
Best Reheating Method
For the ultimate reheating, place the sauce in a saucepan over low heat, add a tiny splash of water, and stir constantly until it’s glossy again. Avoid microwaving, as it can cause the cream to separate and the livers to become rubbery.