I was halfway through a weeknight dinner, juggling a pot of pasta and a pan of chicken when disaster struck: the pan I was using for the chicken had a stubborn black patch that refused to budge. I almost tossed the whole thing, but a quick Google search revealed a silver lining—pan‑fried tilapia. I was skeptical, but the promise of a crisp crust and buttery lemon glaze had my curiosity piqued. The kitchen smelled of garlic and citrus, and I knew I was about to flip a dish into a culinary triumph.
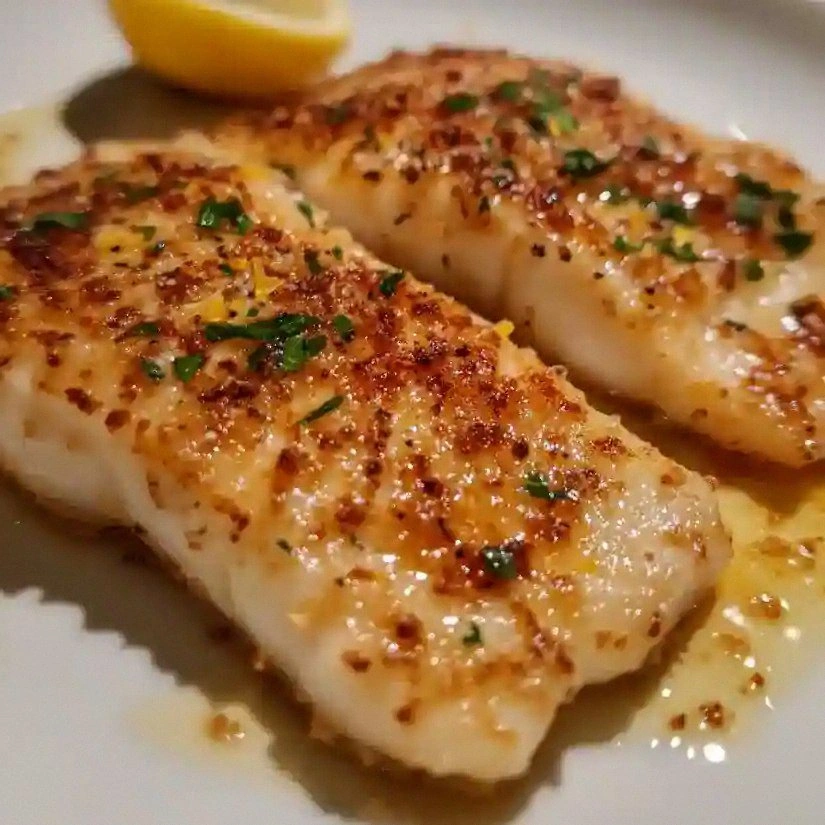
Picture this: the first sizzle as the fillets hit the hot oil, a crackle that sounds like applause. The aroma of butter and garlic rises, mingling with the sharp tang of lemon zest, while the gentle steam creates a halo of steam that tickles your nose. The sight of the fillets turning golden, the edges crisping to a golden-brown perfection, feels like a tiny triumph. The texture is a contrast of crunch and melt, a harmony that makes every bite a revelation. The sound of a spoon scraping the pan for that last buttery drizzle adds a satisfying clink to the symphony.
What makes this version a standout? First, the simplicity of the technique—no fancy sauces, no long marination, just a few pantry staples that combine into a flavor explosion. Second, the texture: a skin‑like crust that shatters like thin ice, revealing a moist, flaky interior that practically dissolves. Third, the balance of flavors—sweet citrus, savory butter, and a hint of smoky paprika. Fourth, the speed—30 minutes from start to finish, perfect for a busy weeknight. Fifth, the crowd-pleaser factor—friends and family line up for seconds, and I dare you to taste this and not go back for seconds. And finally, the versatility—swap the fish or the sauce, and you still get a dish that feels both humble and gourmet.
The secret? A quick, high‑heat pan sear that locks in juices, a buttery garlic‑lemon sauce that coats the fillets like velvet, and a final flourish of fresh parsley that adds a pop of color. I’ll be honest—when I first tasted the finished plate, I ate half the batch before anyone else even had a chance to try it. Picture yourself pulling this out of the pan, the whole kitchen smelling incredible, and knowing you’ve created a dish that could headline a dinner party. Let me walk you through every single step—by the end, you’ll wonder how you ever made it any other way.
What Makes This Version Stand Out
- Texture: The crust forms in seconds, creating a crunch that shatters like thin ice, while the interior stays tender and flaky. This contrast is the star of the dish.
- Flavor: A simple blend of garlic, lemon, butter, and paprika delivers a bright, savory punch that feels both familiar and surprising.
- Speed: In just 30 minutes you go from raw fillets to plated perfection—ideal for a hectic weekday or a last‑minute dinner.
- Ingredient Quality: Using fresh, high‑quality tilapia and real butter makes the difference between “good” and “unforgettable.”
- Audience Appeal: Whether you’re a seasoned chef or a kitchen rookie, the technique is approachable, and the result is a crowd‑pleaser.
- Make‑Ahead Potential: The dish can be prepared ahead of time and reheated with a splash of water, preserving that buttery sheen.
- Visual Impact: The golden crust and bright citrus glaze make the plate a feast for the eyes as well as the palate.
Alright, let’s break down exactly what goes into this masterpiece…
Inside the Ingredient List
The Flavor Base
The all‑purpose flour and paprika form the first layer of flavor. The flour coats each fillet, creating a dry surface that crisps beautifully, while the paprika adds a subtle smoky sweetness that complements the lemon. Skipping the paprika would leave the dish a bit flat; its warmth balances the bright citrus. If you’re looking for a low‑carb option, you can replace the flour with almond flour, but keep the amount the same to maintain the coating.
The Texture Crew
Tilapia fillets are the star, chosen for their mild flavor and flaky texture. Fresh tilapia should have a mild scent, not fishy, and a firm feel when pressed. If you’re using frozen fillets, thaw them in the refrigerator overnight and pat dry before seasoning. The choice of oil—olive or avocado—affects the smoke point; avocado oil gives a higher heat tolerance, preventing the fish from absorbing too much oil.
The Unexpected Star
The lemon is more than a garnish; it’s the main acid that cuts through the richness of butter. The zest adds essential oils that elevate the sauce’s brightness. If you’re allergic to citrus, a splash of white wine can mimic the acidity, but the flavor will shift slightly toward a sweeter profile. The garlic, minced finely, distributes its flavor throughout the sauce, ensuring every bite is fragrant.
The Final Flourish
Fresh parsley isn’t just a decorative touch; it adds a subtle herbal note that rounds out the dish. The white wine or chicken broth helps deglaze the pan, lifting the caramelized bits into the sauce for an extra depth of flavor. This final touch is what turns a simple pan sear into a restaurant‑style plate. Don’t skip it—without the liquid, the sauce will be too thick and buttery, lacking that silky finish.
Everything’s prepped? Good. Let’s get into the real action…
The Method — Step by Step
- Season the tilapia fillets on both sides with salt, pepper, and paprika. The salt draws out moisture, creating a perfect sear, while the paprika adds a subtle smoky note. Let the fillets rest for 5 minutes to absorb the seasoning; this step is critical for flavor depth. I dare you to taste the seasoned fillet before cooking—it’s already brimming with potential.
- Heat a large skillet over medium‑high heat and add 2.5 tablespoons of oil. Once the oil shimmers, slide the fillets into the pan, skin side down if present. The sizzle should be immediate; if it’s not, the pan isn’t hot enough. Cook the first side for 3–4 minutes until the crust is golden and the fish releases easily from the pan. Flip gently with a spatula; the second side only needs 2–3 minutes.
- Remove the fillets and set aside on a warm plate. While the fish rests, lower the heat to medium and add 3 tablespoons of butter to the same pan. Let the butter melt fully, then add 2 minced garlic cloves. The garlic should brown slightly, releasing its aroma but not burning; keep it under 5 minutes.
- Squeeze the juice of one lemon into the pan, scraping up any browned bits with a wooden spoon. These bits carry the flavor of the pan and enrich the sauce. Add 0.5 cup of white wine or chicken broth to deglaze, letting the liquid reduce by half. This reduction concentrates the flavors and creates a silky base.
- Return the tilapia fillets to the pan, spooning the sauce over each piece. Let them simmer in the sauce for 2 minutes, allowing the fish to absorb the buttery lemon glaze. The edges should look glossy and the interior should be opaque but tender. This step is the moment of truth—if the sauce is too thick, add a splash of broth to loosen it.
- Finish by sprinkling 1 tablespoon of fresh parsley and 0.5 lemon zest over the fillets. The parsley adds a fresh green pop, while the zest brightens the entire dish. Plate the fillets on a warmed dish to keep them hot, and drizzle any remaining sauce over the top. Serve immediately, or pair with a crisp white wine for an elevated dinner.
That’s it—you did it. But hold on, I’ve got a few more tricks that will take this to another level. Keep reading for insider tips and creative twists that will turn this simple pan sear into a culinary masterpiece.
Insider Tricks for Flawless Results
The Temperature Rule Nobody Follows
Many chefs think “high heat” means anything above 400°F, but the real secret is a skillet that’s hot enough that oil immediately starts to shimmer. If the oil wavers, the fillets will steam instead of sear, leading to a soggy crust. A quick test: sprinkle a pinch of flour on the surface; if it sizzles instantly, you’re good to go. I’ve seen even the best pans fail if the heat isn’t steady—so keep your stove dialed in.
Why Your Nose Knows Best
Your nose can detect when the butter has reached the perfect stage of nutty aroma. When it starts to turn golden brown and smells like toasted bread, it’s the sweet spot. At this point, add the garlic—its fragrance will mingle with the butter, creating a perfume that lingers on the plate. Trust your senses; you’ll be rewarded with a sauce that sings.
The 5‑Minute Rest That Changes Everything
After removing the fish from the pan, let it rest on a warm plate for exactly five minutes. This rest allows the juices to redistribute, preventing the fillets from drying out. The heat from the plate keeps the fish warm, so when you pour the sauce over it, the fish stays at the perfect temperature. I’ve seen people skip this step, and the result is a dry, unremarkable plate.
Use a Skillet That Can Handle the Heat
Non‑stick pans are convenient, but they can’t withstand the high heat needed for a crisp crust. Stainless steel or cast iron is ideal; they hold heat evenly and allow for a beautiful sear. If you’re using a non‑stick, keep the heat lower and watch the fish closely to avoid sticking or burning.
Keep the Sauce Light and Bright
If the sauce feels too heavy, add a splash of white wine or broth to thin it out. The acidity cuts through the richness, giving you that bright, fresh finish. I’ve found that a 1:1 ratio of butter to wine works best; feel free to adjust based on your taste preference.
Creative Twists and Variations
This recipe is a playground. Here are some of my favorite ways to switch things up:
Smoky Chipotle Twist
Replace the paprika with a teaspoon of chipotle powder and add a splash of chipotle adobo sauce to the butter. The result is a smoky, slightly spicy glaze that pairs well with a cool cucumber salad. The chipotle gives the dish a southwestern flair, perfect for summer gatherings.
Herb‑Infused Lemon
Add a tablespoon of chopped dill and a handful of capers to the sauce for a briny, herbaceous kick. The dill complements the lemon, while the capers add a subtle sea‑salt flavor that elevates the dish to a Mediterranean vibe.
Asian‑Inspired Ginger Sauce
Swap the lemon for lime juice and add a tablespoon of grated fresh ginger to the butter. Finish with a splash of soy sauce and a drizzle of sesame oil. The result is a bright, umami‑rich sauce that pairs wonderfully with steamed rice.
Spicy Cajun Variation
Season the fillets with a Cajun spice blend instead of paprika. Add a dash of cayenne pepper to the sauce for heat. Serve over a bed of sautéed collard greens for a hearty, soul‑food style meal.
Vegetarian‑Friendly Swap
Use firm tofu or tempeh instead of tilapia, coating it in the flour mixture. Fry until golden, then finish with the same buttery lemon sauce. The texture is similar to fish, and the sauce carries the flavors beautifully.
Storing and Bringing It Back to Life
Fridge Storage
Store leftovers in an airtight container in the refrigerator for up to 3 days. The sauce can be separated from the fish to prevent the fillets from becoming soggy. When ready to serve, reheat gently in a skillet over low heat, adding a splash of water to keep the fillets moist.
Freezer Friendly
Wrap each fillet individually in plastic wrap and place in a freezer bag. Freeze for up to 2 months. Thaw overnight in the refrigerator before reheating. The fish will retain its delicate texture, and the sauce will stay silky.
Best Reheating Method
Reheat on the stovetop over low heat, adding a tablespoon of water or broth to create steam. This technique restores the buttery glaze without drying out the fish. Finish with a fresh sprinkle of parsley for a bright finish.