I’ll be honest—after the first batch, I ate half the cake before anyone else got a bite, and the rest of the night was filled with giggles and praise from my guests. The moment you pull these out of the oven, the kitchen smells incredible, a scent that lingers like a promise. Picture yourself presenting a tray of glossy, chocolate‑filled macarons at a dinner party, and watch the eyes widen. Stay with me here—this is worth it. Let me walk you through every single step—by the end, you’ll wonder how you ever made it any other way.
What Makes This Version Stand Out
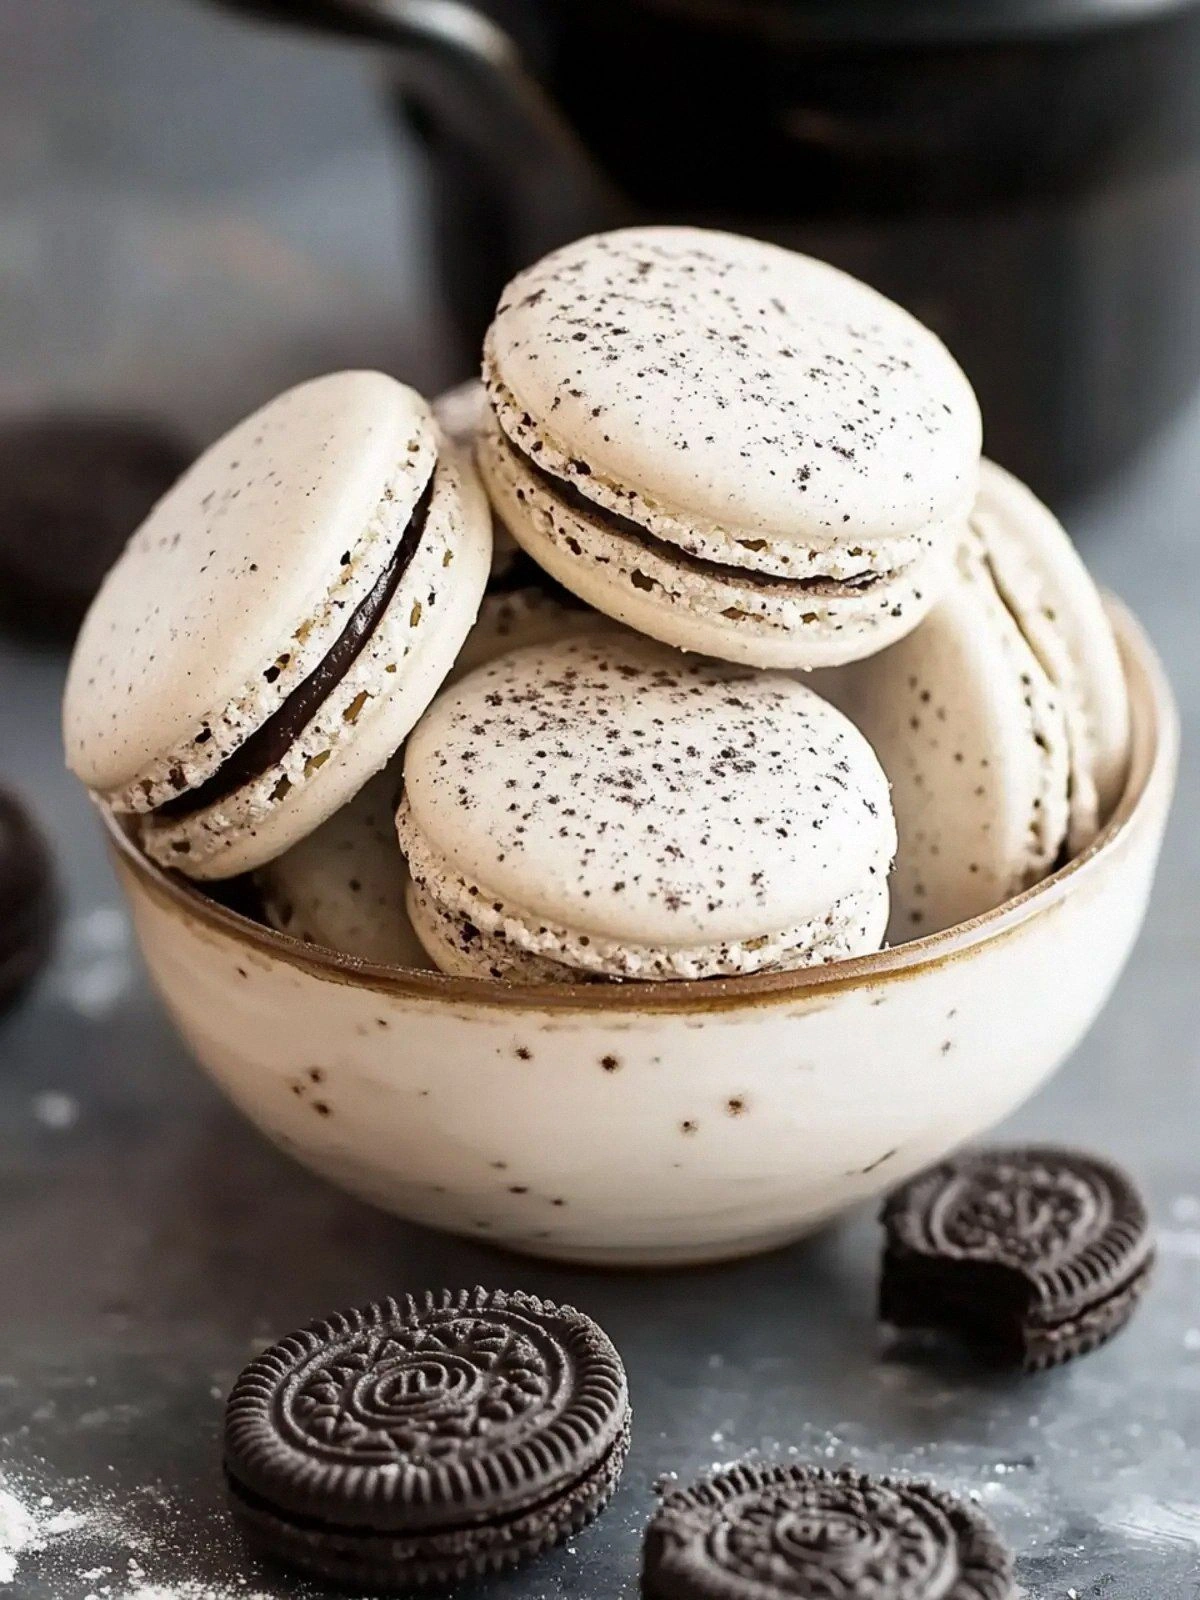
- Flavor: The double‑stuffed Oreos create a decadent, creamy core that pairs perfectly with the subtle almond undertone, giving each bite a layered experience that’s both familiar and surprising.
- Texture: A crisp, airy shell that shatters like thin ice when you bite, contrasted with a dense, buttery filling that melts on the tongue, offers a satisfying mouthfeel.
- Simplicity: Despite its luxurious outcome, the recipe requires only ten minutes of prep time and a single mixing bowl, making it accessible for both beginners and seasoned bakers.
- Ingredient Quality: Using high‑grade almond flour and fresh double‑stuffed Oreos ensures that every macaron is packed with flavor and texture, eliminating the need for artificial additives.
- Crowd Reaction: The visual appeal of glossy chocolate shells and the promise of a creamy center makes these macarons a showstopper at any gathering.
- Make‑Ahead Potential: Once baked, they can be stored in an airtight container for up to a week, and the filling can be prepared in advance, saving you time for your next event.
- Versatility: The recipe’s structure allows for easy variations—swap the Oreos for white chocolate, or add a splash of espresso for an extra kick.
- Portability: The sturdy shells hold up during transport, making them ideal for potlucks, weddings, or gift baskets.
Alright, let's break down exactly what goes into this masterpiece...
Inside the Ingredient List
The Flavor Base
The almond flour is the backbone of this macaron, providing a subtle nutty flavor that balances the sweetness of the Oreos. It also contributes to a tender crumb, preventing the shells from becoming too dense. Skipping almond flour would result in a heavier, less airy shell that feels more like a cookie than a macaron. For a richer taste, choose a brand that’s finely ground; a coarse grind can cause uneven texture.
The double‑stuffed Oreos are the star ingredient, offering both chocolate and vanilla layers that create a delightful contrast. Their creamy filling adds moisture to the batter, preventing the shells from drying out during baking. If you’re allergic to dairy, you can replace the Oreos with a dairy‑free chocolate cookie, but keep the filling consistent for the same mouthfeel.
The Texture Crew
Powdered sugar, used in two distinct amounts, is essential for achieving the macaron’s signature smoothness. The first 200 grams of powdered sugar is blended with the almond flour to create a fine, silky batter that traps air. The second 60 grams of powdered sugar is reserved for the filling, giving it a light, airy consistency that complements the dense shell.
Egg whites, beaten to stiff peaks, are the leavening agent that gives the macarons their volume. The 4 large egg whites provide enough lift to create the delicate shell, while the added cream of tartar stabilizes the peaks, ensuring the batter doesn’t collapse. If you’re concerned about raw eggs, use pasteurized egg whites or a vegan alternative like aquafaba.
The Unexpected Star
Unsalted butter, melted and cooled, adds richness and helps the batter stay moist during baking. The 100 grams of butter also contributes to the glossy finish of the shells. Butter also interacts with the powdered sugar to create a fine, caramelized crust that’s both fragrant and slightly crunchy.
Crushed Oreos, 50 grams, are folded into the batter to give subtle crunch and extra chocolate flavor. They also help anchor the batter, preventing it from spreading too thin on the parchment. If you prefer a smoother texture, you can reduce the amount of crushed Oreos, but the final product will feel less indulgent.
The Final Flourish
Cream of tartar, 1/4 teaspoon, may seem like a small detail, but it’s a game‑changer. It stabilizes the egg whites, keeping the batter airy and preventing it from collapsing during baking. Without it, the shells might appear flat and lack the coveted “puckering” around the edges. If you don’t have cream of tartar, a pinch of salt can serve as a substitute, though the stability will be slightly reduced.
Together, these ingredients form a harmonious blend that delivers a macaron that is both visually stunning and incredibly flavorful. Everything's prepped? Good. Let's get into the real action...
The Method — Step by Step
- Preheat your oven to 160°C (320°F) and line two baking sheets with parchment paper. The low temperature is crucial for even baking and prevents the shells from browning too quickly. While the oven warms, sift together the almond flour, 200 grams of powdered sugar, and Oreo crumbs to ensure a smooth batter. This step eliminates lumps and guarantees a silky texture. Now, set aside to keep the batter cool.
- In a separate bowl, beat the egg whites with a pinch of cream of tartar until soft peaks form. The batter should be glossy and hold its shape when you lift the whisk. Gently fold the beaten whites into the dry mixture, using a spatula to keep the batter airy. Be careful not to overmix, or the batter will lose volume. The batter should flow slowly from the spoon, indicating it’s ready for the next step.
- Fold in the melted butter and the crushed Oreos until evenly distributed. The butter adds richness, while the Oreos give that signature chocolate crunch. At this point, you’ll notice the batter thickening slightly, which is normal. Let the mixture rest for 30 minutes; this allows the flour to hydrate fully, improving the final texture. During this rest, the batter will look slightly cloudy, a sign that it’s ready.
- Transfer the batter to a piping bag fitted with a 4‑mm round tip. Pipe 1‑inch circles onto the prepared sheets, spacing them about 2 inches apart to give the shells room to rise. The batter should be smooth and free of air bubbles. The trick is to pipe with a steady hand; a shaky hand can cause uneven shells. Let the piped batter rest for 15‑20 minutes until a thin skin forms on the surface.
- Place the sheets in the preheated oven and bake for 20‑25 minutes. The shells should rise and develop a faint golden rim, but remain pale on the top. Remove the trays and let the macarons cool completely on a wire rack before removing them from the parchment. This step is critical; if you peel them off too early, they may crack. The aroma at this point is intoxicating, a promise of the indulgent center waiting inside.
- While the shells cool, prepare the filling. In a small saucepan, melt 100 grams of butter with 60 grams of powdered sugar until smooth. Then fold in 12 double‑stuffed Oreos, crushing them finely to create a creamy mixture. Let the filling cool to room temperature; it should be thick enough to pipe but not runny. This filling will be the heart of the macaron, offering a contrasting texture to the crisp shell.
- Pair the cooled shells with the filling using a pastry bag fitted with a 3‑mm round tip. Pipe a small amount of filling onto the flat side of one shell, then top with another shell, pressing gently to create a sandwich. The filling should spread slightly, forming a smooth, chocolatey center. Repeat until all shells are paired. Store the finished macarons in an airtight container for up to a week.
- Before serving, let the macarons sit at room temperature for 15 minutes. This allows the filling to soften and the flavors to meld together. The final product should have a glossy exterior, a light, airy interior, and a luscious, creamy center that melts instantly. The first bite is a revelation—soft, buttery, and bursting with chocolatey sweetness. That sizzle when it hits the pan? Absolute perfection.
That's it — you did it. But hold on, I've got a few more tricks that'll take this to another level...
Insider Tricks for Flawless Results
The Temperature Rule Nobody Follows
Many bakers set the oven to 180°C, but this recipe thrives at 160°C. The lower temperature ensures even baking and prevents the shells from browning too quickly, which can cause a bitter aftertaste. I once baked at 180°C and the shells were too dark; the filling still tasted great, but the overall experience suffered. Keep a thermometer handy to confirm the oven’s actual temperature.
Why Your Nose Knows Best
The aroma of the batter is a subtle indicator of readiness. As the batter rests, you’ll notice a faint buttery scent that becomes stronger as the flour hydrates. If the batter smells like raw flour, give it more time to rest. A well‑rested batter will rise beautifully, and the shells will develop that signature “puckering” along the edges. Trust your nose; it’s a seasoned judge of baking success.
The 5‑Minute Rest That Changes Everything
After piping, let the batter sit for exactly 5 minutes before baking. This short pause allows the surface to form a thin skin, preventing the batter from spreading too much in the oven. I once skipped this step and the shells turned out flat; the filling also leaked onto the parchment. The 5‑minute rest is a small price for a dramatic improvement in texture.
Use a Silicone Mat Instead of Parchment
Silicone mats provide a non‑stick surface that’s easier to lift the finished macarons without tearing. The smooth surface also ensures even heat distribution, giving the shells a uniform rise. If you’re using parchment, make sure it’s well‑lined; otherwise, the shells may stick and break.
Keep the Filling Cool
The filling should be at room temperature but not warm. If it’s too hot, it will run into the shell, causing a messy appearance and a loss of the delicate texture. I once left the filling on the counter too long, and it melted into the shells, ruining the crispness. Keep it in the fridge until you’re ready to pipe.
Avoid Overmixing the Batter
Once the wet and dry ingredients are combined, mix just until the batter is smooth. Overmixing introduces extra air, which can cause the shells to rise unevenly and then collapse. A friend once overmixed her batter and ended up with a lumpy texture that was impossible to pipe. The secret is patience and a gentle touch.
Creative Twists and Variations
This recipe is a playground. Here are some of my favorite ways to switch things up:
Espresso‑Infused Oreo Macarons
Add a teaspoon of instant espresso powder to the batter for a bold, coffee‑laden flavor. The espresso pairs beautifully with the chocolatey Oreos, creating a sophisticated taste. This version is perfect for coffee lovers and makes a great after‑dinner treat.
White Chocolate Ganache Filling
Swap the double‑stuffed Oreos in the filling for a silky white chocolate ganache. The ganache adds a creamy, sweet contrast that balances the chocolate shell. Use high‑quality white chocolate for the best results, and whisk until glossy.
Mint‑Chocolate Surprise
Add a splash of peppermint extract to the batter and a few drops to the filling. The mint undertone gives a refreshing twist that’s especially delightful during the summer months. The color contrast is also visually striking.
Almond‑Butter Crunch
Replace the crushed Oreos with toasted almond slivers in the batter. The toasted almonds add a nutty crunch that complements the buttery shell. This variation offers a lighter, yet still indulgent, flavor profile.
Coconut‑Chocolate Delight
Sprinkle desiccated coconut onto the batter before baking for a tropical twist. The coconut adds a subtle sweetness and a pleasant chewiness. Pair it with a coconut‑infused filling for a truly exotic treat.
Storing and Bringing It Back to Life
Fridge Storage
Store the finished macarons in an airtight container at room temperature for up to 5 days. The airtight seal preserves the crispness of the shells and keeps the filling from drying out. If you notice the filling becoming too firm, let the macarons sit at room temperature for 10 minutes before serving.
Freezer Friendly
For longer storage, place the macarons in a freezer‑safe container with parchment layers between each layer. Freeze for up to 3 months. When you’re ready to enjoy them, thaw at room temperature for 30 minutes. This method keeps the texture intact while extending shelf life.
Best Reheating Method
If the macarons feel a bit stale, reheat them in a preheated oven at 90°C for 5 minutes. Add a tiny splash of water to the baking sheet to create steam, which helps restore moisture. Avoid microwaving, as it can make the shells soggy.