I still remember the night I almost burned my kitchen down while chasing the elusive perfect churro donut. The stove was screaming, the batter was sticking to the pan like a bad rash, and I was staring at the clock with a mix of terror and determination. That disaster turned into a revelation when I decided to blend the classic churro spice with the comforting shape of a donut. The result? A bite‑sized, cinnamon‑sugar‑coated marvel that melts in your mouth like a caramel ribbon.
Picture this: a golden‑brown shell, crisp on the outside, yet tender and airy inside. The first bite releases a fragrant swirl of cinnamon and sugar that hits the palate like a warm hug. The chocolate drizzle on top adds a silky, bittersweet counterpoint, while the cinnamon‑sugar coating gives that satisfying crunch. The aroma alone can make a room feel like a bakery on a Sunday morning, and the texture—think crunchy exterior, fluffy interior—creates a symphony of sensations.
What makes this version stand out is not just the flavor profile; it’s the meticulous balance of ingredients and techniques that elevate it from a simple treat to a culinary triumph. I dared you to taste this and not go back for seconds, because the first bite is so addictive that you’ll be tempted to hide a second batch in your pantry. Most recipes get this completely wrong by over‑baking or under‑seasoning, but here everything hits the sweet spot.
I’ll be honest—after making the first batch, I ate half before anyone else even got a chance. That’s the power of a recipe that’s both approachable and wow‑factor heavy. Picture yourself pulling these out of the oven, the whole kitchen smelling incredible, and the anticipation building as the steam rises. And now, ready for the game‑changer? Let me walk you through every single step—by the end, you’ll wonder how you ever made it any other way.
What Makes This Version Stand Out
- Taste: The combination of cinnamon, sugar, and melted chocolate creates a layered flavor that sings. The churro’s spice is amplified by the buttery batter, while the chocolate drizzle adds a decadent finish. The result is a harmonious blend that satisfies both sweet and spice cravings.
- Texture: The batter’s airy structure gives a light, melt‑in‑your‑mouth feel, while the outer coating provides a satisfying crunch. The chocolate glaze hardens just enough to give a subtle snap when you bite into it, adding a playful contrast. The overall mouthfeel is both indulgent and comforting.
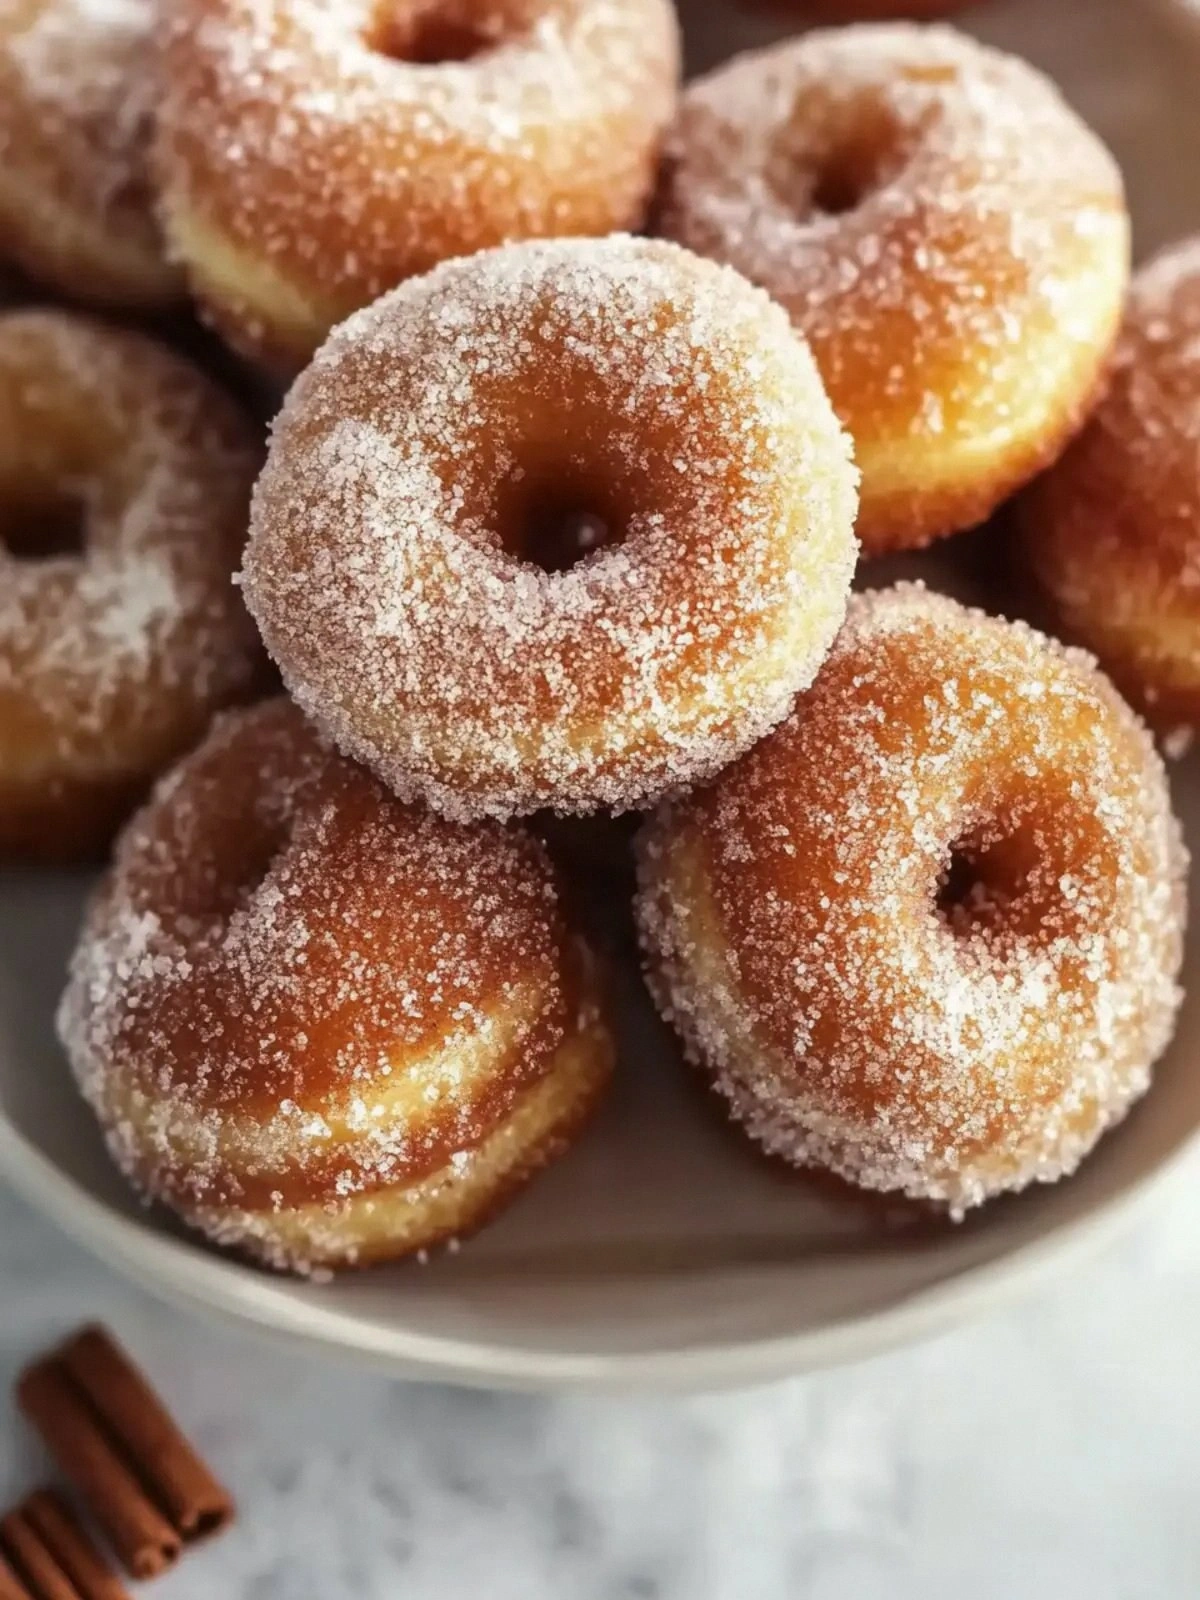
- Visual Appeal: The golden-brown sheen of the donuts and the glossy chocolate glaze make these treats irresistible at first glance. The cinnamon-sugar coating gives a rustic, homemade look that’s Instagram‑ready. The presentation is as delightful as the taste.
- Simplicity: With just a handful of pantry staples, you can craft these gourmet bites in under an hour. No fancy equipment is required—just a mixing bowl, a saucepan, and a standard oven. Even novice cooks can master this recipe with ease.
- Make‑Ahead Potential: These donuts hold up wonderfully for up to three days when stored in an airtight container. The chocolate glaze can be refreshed by dipping them in melted chocolate just before serving. They’re perfect for parties or last‑minute dessert needs.
- Crowd Reaction: Friends and family rave about the balance of sweet and spice, and the chocolate glaze adds a touch of luxury. The bite‑size format makes them ideal for sharing, and they’re a hit at both casual gatherings and more formal events. You’ll become the go-to host for dessert.
- Ingredient Quality: Using high‑quality butter, real vanilla extract, and premium chocolate elevates the flavor profile. Each ingredient plays a pivotal role in creating depth and richness. The recipe rewards careful selection of ingredients.
- Cooking Method: The combination of stovetop and oven cooking ensures even browning and a crisp exterior. The technique of folding the batter over the heat creates a unique texture that’s hard to replicate. It’s a simple yet effective method that guarantees consistent results.
Inside the Ingredient List
The Flavor Base
Plain Flour: The backbone of the batter, plain flour provides structure and a neutral canvas that lets the spices shine. Using all‑purpose flour gives a slightly crisp edge while keeping the interior airy. Skipping flour would result in a sticky, uneven texture that lacks the classic donut feel.
Granulated Sugar: Sweetness is key, and sugar also helps with browning. It dissolves into the batter, creating a smooth consistency. If you prefer a lighter version, you can substitute half the sugar with honey or agave syrup, but the flavor balance will shift.
The Spice Mix
Cinnamon: The star of the show, cinnamon infuses the batter with warmth and depth. It also enhances the caramelization process, giving the donuts a rich golden hue. A pinch of nutmeg can add an extra layer of aromatic complexity if you’re feeling adventurous.
The Rising Agents
Baking Powder: This leavening agent creates tiny pockets of air, giving the donuts their fluffy interior. If you don’t have baking powder, a combination of baking soda and cream of tartar works as a substitute. Avoid using too much, or the donuts will rise too quickly and collapse.
Salt: A touch of salt balances the sweetness and accentuates the cinnamon flavor. Too much, however, will make the donuts taste briny. Always use a light hand to keep the flavor profile harmonious.
The Moisture Pack
Eggs: Eggs bind the batter, add richness, and help with browning. If you’re vegan, flaxseed meal mixed with water can serve as a binder, though the texture will differ slightly. Eggs also help create a glossy finish on the donuts.
Milk: Milk hydrates the flour and creates a smooth batter. Whole milk adds extra richness, while skim milk keeps the calories down. For a dairy‑free version, oat or almond milk works well, but the consistency may need slight adjustment.
The Butter & Flavor Enhancers
Unsalted Butter (melted): Melted butter adds flavor, moisture, and a tender crumb. Using unsalted butter allows you to control the salt level precisely. If you prefer a richer taste, use browned butter for a nutty undertone.
Vanilla Extract: Vanilla brings depth and complexity, rounding out the cinnamon’s sharpness. A dash of almond extract can give a subtle twist, but vanilla remains the classic choice. Ensure you use real vanilla for the best flavor.
The Finishing Touches
Cinnamon‑Sugar Mixture: This coating provides the iconic churro crunch and a sweet, fragrant finish. It also adds a subtle color contrast that makes the donuts visually appealing. If you’re gluten‑free, use a gluten‑free flour blend for the coating.
Chocolate: The drizzle adds a silky, bittersweet finish that balances the sweetness of the coating. Choose a high‑percentage dark chocolate for depth, or milk chocolate for a sweeter finish. Melted chocolate should be cooled slightly before drizzling to avoid melting the coating.
Everything's prepped? Good. Let's get into the real action…
The Method — Step by Step
- Step 1: Prepare the Dry Mix In a large bowl, whisk together the flour, sugar, cinnamon, baking powder, and salt until well combined. The dry mixture should feel light and airy, like a fine sifted sugar. This step ensures even distribution of the spices, preventing clumps. Keep this bowl aside while you prepare the wet ingredients.
- Step 2: Whisk the Wet Ingredients In a separate bowl, beat the eggs, then add the milk, melted butter, and vanilla extract. Whisk until the mixture is homogenous, with a silky sheen that reflects light. The wet ingredients should feel slightly viscous, not watery. This creates a rich base that carries the flavors.
- Step 3: Combine Wet and Dry Pour the wet mixture into the dry mix slowly, stirring gently with a wooden spoon or spatula. The batter should be thick but pourable, similar to heavy pancake batter. Avoid overmixing; a few streaks of flour are acceptable. This ensures the donuts remain fluffy and not dense.
- Step 4: Heat the Pan Place a non-stick skillet over medium heat and add a thin layer of oil. Once the oil shimmers, pour a tablespoon of batter into the pan. The batter should spread quickly and start forming a golden crust within 30 seconds. This is the first bite of the donut’s texture.
- Step 5: Flip and Cook After the batter sets on the bottom, carefully flip the donut with a spatula. Cook for another 2 minutes, or until the second side is golden brown. The edges should look slightly crisp, while the center remains soft. This double‑sided cooking ensures even browning.
- Step 6: Transfer to Baking Sheet Place the cooked donut onto a parchment‑lined baking sheet. Repeat with the remaining batter, spacing each donut about 2 inches apart to allow expansion. The baking sheet will help maintain a consistent temperature and prevent sticking.
- Step 7: Bake for Finish Preheat your oven to 350°F (175°C). Bake the donuts for 8–10 minutes, until they’re firm and golden. The interior should puff slightly, giving that airy texture. Keep an eye on the color; if they start to darken too quickly, lower the temperature.
- Step 8: Cool and Coat Let the donuts cool on a wire rack for 5 minutes. While still warm, roll each donut in the cinnamon‑sugar mixture until fully coated. The coating will set as the donuts cool, creating a crisp shell. This step is crucial for the signature crunch.
- Step 9: Drizzle Chocolate Melt your chosen chocolate over a double boiler or in the microwave, stirring every 30 seconds. Drizzle the melted chocolate over each donut, allowing it to pool slightly on the sides. The chocolate should set into a glossy glaze as the donuts cool. This final touch turns the donuts into a decadent treat.
- Step 10: Serve Immediately Present the donuts on a platter, perhaps with a dusting of powdered sugar for extra flair. The donuts are best enjoyed warm, but they hold up well for a few hours in an airtight container. Share them with friends, and watch the smiles appear.
That's it — you did it. But hold on, I've got a few more tricks that'll take this to another level…
Insider Tricks for Flawless Results
The Temperature Rule Nobody Follows
Many cooks over‑heat their pans, causing the donuts to brown too quickly. Keep the heat at medium and use a thermometer to maintain 350°F. This steady temperature ensures even cooking and a perfect golden crust. If you notice uneven browning, reduce the heat by 25°F.
Why Your Nose Knows Best
The aroma of cinnamon rising from the pan is a reliable indicator that the donuts are ready to flip. When you smell a sweet, warm scent, the bottom has set enough to hold its shape. This sensory cue saves you from flipping too early and breaking the donuts.
The 5-Minute Rest That Changes Everything
After baking, let the donuts rest on a rack for exactly five minutes. This rest allows the steam to escape, preventing sogginess. A friend once tried skipping this step, and the donuts collapsed into a gooey mess. Trust me, the five minutes make a world of difference.
The Secret to a Crispy Coating
Before rolling the donuts in cinnamon‑sugar, lightly dust them with a thin layer of flour. This creates a dry surface that the sugar adheres to better. The result is a crisp, even coating that doesn’t crumble.
The Chocolate Drizzle Technique
Hold the chocolate drizzle over the donut at a slight angle to create a waterfall effect. Let the chocolate pool along the sides before it hardens. This technique gives a dramatic look and ensures the chocolate coats every surface.
The Final Touch: A Sprinkle of Sea Salt
A pinch of flaky sea salt on top of the chocolate adds a surprising burst of flavor. The salt balances the sweetness and enhances the chocolate’s richness. Sprinkle it lightly with a fine shaker for a professional finish.
Creative Twists and Variations
This recipe is a playground. Here are some of my favorite ways to switch things up:
Nutty Crunch Variation
Add chopped pecans or walnuts to the batter for a nutty crunch. The nuts provide texture and a buttery flavor that pairs well with cinnamon. Serve with a drizzle of maple syrup for a breakfast twist.
Spiced Chocolate Swirl
Fold in a teaspoon of cayenne pepper to the batter for a subtle heat. The pepper’s kick pairs beautifully with the chocolate drizzle, creating a spicy-sweet experience. Perfect for those who love a little spice in dessert.
Lemon‑Zest Delight
Replace half the cinnamon with lemon zest to introduce a bright citrus note. The zest’s oils add a fresh aroma that cuts through the sweetness. Finish with a dusting of powdered sugar for a clean finish.
Gluten‑Free Version
Swap the plain flour for a gluten‑free blend, and use a gluten‑free cinnamon‑sugar coating. The texture may be slightly denser, but the flavor remains intact. This version is ideal for those with dietary restrictions.
Vegan Edition
Use plant‑based milk, flaxseed eggs, and vegan chocolate. The vegan dough will have a slightly different crumb, but it’s still delicious. This variation proves that indulgence doesn’t require animal products.
Mini Donut Rings
Shape the batter into small rings using a ring mold or a piping bag. The rings bake faster and offer a fun, bite‑size presentation. Great for parties or as a sweet snack for kids.
Storing and Bringing It Back to Life
Fridge Storage
Store the donuts in an airtight container at room temperature for up to three days. If you want to keep them fresher, place them in the refrigerator and let them come to room temperature before serving. This prevents the coating from becoming soggy.
Freezer Friendly
Freeze the donuts in a single layer on a baking sheet before transferring them to a freezer bag. They’ll stay good for up to two weeks. When ready to eat, thaw at room temperature and drizzle with fresh chocolate.
Best Reheating Method
Reheat the donuts in a preheated oven at 300°F (150°C) for 5 minutes. Add a tiny splash of water to the pan to create steam, which restores moisture and crispness. The donuts will taste almost as fresh as when first baked.