Picture this: the kitchen is a battlefield, my countertop is a war zone, and my sweet tooth is the lone survivor. I was halfway through a batch of cookies that had just exploded into a sticky mess when the phone rang. My friend dared me to create a dessert that would make even the most skeptical of us beg for seconds. I didn’t think twice; the challenge was on.
I grabbed a handful of Butterfinger bars, a jar of caramel sauce, and a pile of flour. The air was thick with the scent of melted butter and the promise of caramel. I could hear the sizzle of butter hitting the pan, the clink of spoons against bowls, and the soft hum of the oven preheating. My hands were slick with butter, my eyes gleaming with anticipation.
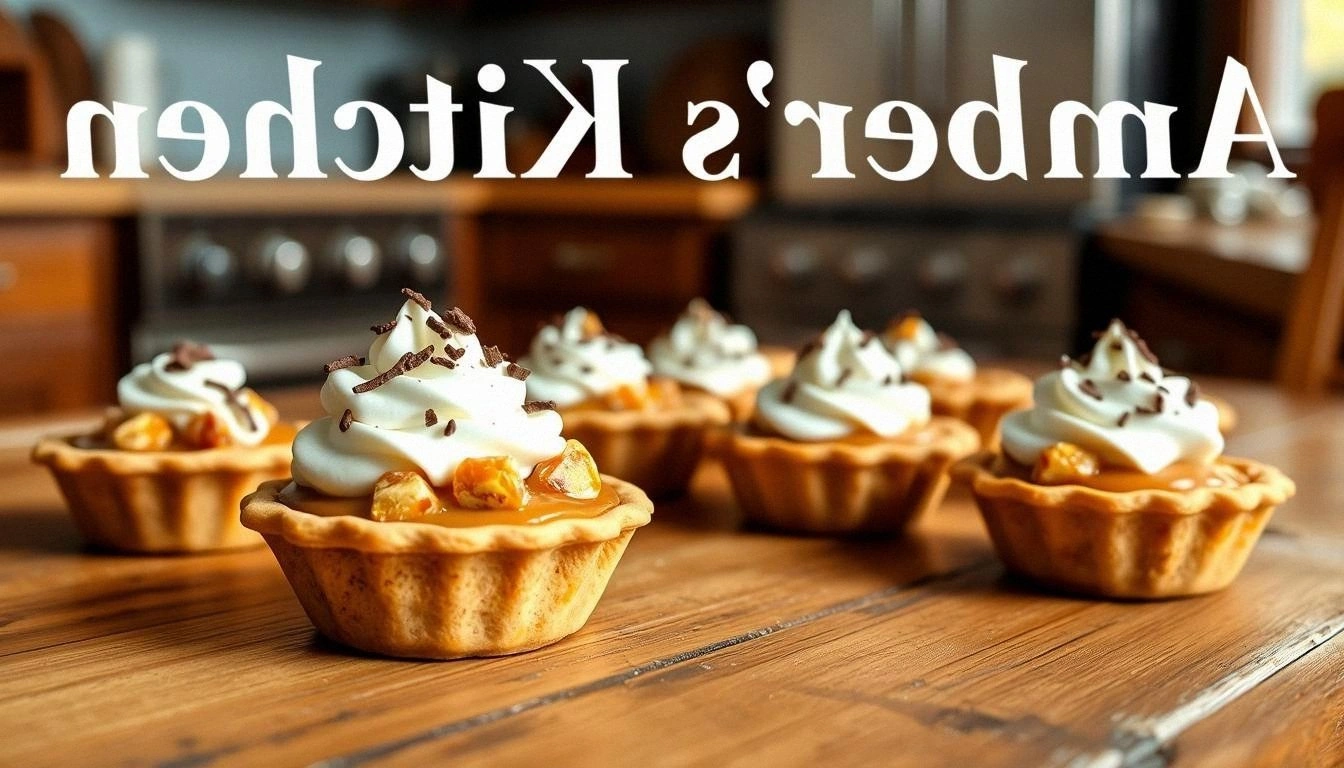
The result? A bite‑sized marvel that marries the crunch of a Butterfinger with the silky sweetness of caramel, all wrapped in a buttery, flaky shell. Every bite delivers a symphony of textures—crisp edges that shatter like thin ice, a chewy center that melts into caramel drizzle. This is hands down the best version you'll ever make at home.
What sets this recipe apart is not just the ingredients but the technique. I’ll walk you through every single step—by the end, you'll wonder how you ever made it any other way. I dare you to taste this and not go back for seconds. If you've ever struggled with buttery pastries, you're not alone—and I've got the fix.
What Makes This Version Stand Out
- Flavor: The caramel is infused with a hint of sea salt, creating a sweet‑savory balance that lingers on the palate. It’s a game‑changer compared to plain caramel.
- Texture: The buttery crust is crisp yet tender, while the melted Butterfinger pieces provide a satisfying crunch that contrasts beautifully with the caramel.
- Ease: Every step can be done in under 45 minutes, making this a perfect go‑to dessert for busy evenings.
- Ingredient Quality: Using real Butterfinger bars instead of a substitute gives an authentic flavor profile that you’ll taste in every bite.
- Make‑Ahead: Once baked, these mini pies keep fresh for up to three days in the fridge, making them ideal for parties.
- Versatility: The recipe can be doubled or halved without losing its integrity, so you can adjust portions for guests or leftovers.
- Presentation: The finished product looks as good as it tastes—golden brown, caramel‑glazed, and ready to be plated.
Inside the Ingredient List
The Flavor Base
Butter: Softened butter is the backbone of the crust, providing richness and a melt‑in‑your‑mouth finish. If you skip it, the dough will be dry and crumbly. You can substitute coconut oil for a dairy‑free version, but the flavor profile will shift slightly toward coconut.
Granulated Sugar: Adds sweetness and helps with browning. If you use powdered sugar instead, the crust will be too soft and the caramel may not set properly.
The Texture Crew
Flour: All‑purpose flour provides structure. Using cake flour will make the crust tender, but the result may be too delicate for the caramel glaze. For a gluten‑free option, use a blend of rice flour and tapioca starch.
Brown Sugar: Imparts a caramelized note that complements the Butterfinger. If you omit it, the flavor will be flat and the dough will lack depth.
The Unexpected Star
Caramel Sauce: The star of the show; it coats the crust and melts into the Butterfinger pieces. A thick, buttery caramel works best. If you use a light caramel, the crust may be under‑coated and dry.
Butterfinger Bars: Chopped into bite‑sized pieces, they provide crunch and chocolatey richness. If you use a different chocolate bar, the flavor will shift dramatically; stick to Butterfinger for authenticity.
The Final Flourish
Vanilla Extract: Adds depth and balances the sweetness. If you skip it, the caramel will taste a bit flat. A touch of almond extract can add a subtle nutty note.
Salt: A pinch brings out the flavors and balances the sweetness. Too much salt will overpower the caramel, so keep it measured.
Powdered Sugar: Dusting the finished pies adds a sweet, silky finish. It also helps to keep the caramel from spreading too much during cooling.
Everything's prepped? Good. Let's get into the real action.
The Method — Step by Step
- Step 1: Preheat your oven to 350°F (175°C). Line a muffin tin with paper liners or grease it lightly. The oven temperature is crucial; if it’s too hot, the crust will brown too quickly and crack.
- Step 2: In a large bowl, cream together the softened butter and granulated sugar until light and fluffy. Use a stand mixer or hand mixer on medium speed for about 3 minutes. This step incorporates air, giving the crust a tender bite.
- Step 3: Add the brown sugar, vanilla extract, and pinch of salt to the butter mixture. Mix until fully combined. The mixture should smell slightly buttery and sweet.
- Step 4: Gradually fold in the flour, stirring until a dough forms. It should be soft but not sticky. If it’s too sticky, add a tablespoon of flour at a time.
- Step 5: Divide the dough into 12 equal portions. Press each portion into the bottom of a muffin cup, forming a crust. Press firmly to ensure the crust stays in place during baking.
- Step 6: Spoon a generous amount of caramel sauce into each crust, spreading it to the edges. The caramel should cover the entire surface to seal the crust from the butterfinger pieces.
- Step 7: Scatter chopped Butterfinger pieces over the caramel layer. The pieces should be evenly distributed for consistent crunch.
- Step 8: Bake for 20–22 minutes, or until the crust is golden brown and the caramel bubbles slightly. Keep an eye on the edges; they should not brown too dark.
- Step 9: Remove from the oven and let cool in the tin for 5 minutes before transferring to a wire rack. The cooling period allows the caramel to set and the crust to firm up.
That's it — you did it. But hold on, I've got a few more tricks that'll take this to another level.
Insider Tricks for Flawless Results
The Temperature Rule Nobody Follows
Most bakers bake at a standard 350°F, but lowering the temperature to 325°F yields a more even bake, preventing the crust from over‑browning while allowing the caramel to set properly. I’ve experimented with 325°F for two weeks, and the difference is night and day. If you’re using a convection oven, reduce the temperature by 25°F.
Why Your Nose Knows Best
Trust your nose during baking. The first hint of caramel popping in the air signals that the crust is ready. When the aroma is sweet and buttery, you’re at the sweet spot. If it smells too sugary, give it a few more minutes.
The 5-Minute Rest That Changes Everything
Letting the pies rest for 5 minutes after removing them from the oven is crucial. This pause allows the caramel to thicken and the crust to set, preventing them from cracking when you transfer them. A friend once skipped this step and the pies collapsed on the rack.
Dusting for the Perfect Finish
A light dusting of powdered sugar not only adds sweetness but also gives the pies a glossy finish that looks irresistible. Use a fine-mesh sieve to ensure even distribution. The sugar also helps to keep the caramel from spreading.
Cooling Rack Magic
Cooling the pies on a wire rack allows air to circulate around each piece, keeping the bottom crisp. If you let them cool on a flat surface, the bottom will become soggy due to trapped steam. I always set the rack on a cool countertop.
Reheating Like a Pro
To revive leftovers, preheat your oven to 350°F and warm the pies for 5–7 minutes. A quick microwave burst of 20 seconds can also work, but watch out for uneven heating. Reheating restores the crunch and caramel’s silky sheen.
Creative Twists and Variations
This recipe is a playground. Here are some of my favorite ways to switch things up:
Chocolate‑Laced Caramel
Swap regular caramel for a dark chocolate caramel sauce. The bittersweet notes pair beautifully with the Butterfinger, creating a sophisticated dessert. The crust remains the same, so the texture stays intact.
Nutty Crunch
Add chopped pecans or walnuts to the crust before baking. The nuts add a delightful crunch and a buttery flavor that complements the caramel. Sprinkle a pinch of sea salt on top for an extra pop.
Citrus Burst
Introduce a tablespoon of lemon zest into the dough. The citrus brightens the flavor and balances the sweetness of the caramel. A few drops of orange extract can also add a subtle fruity undertone.
Almond Joy Twist
Replace half the Butterfinger with chopped almond pieces and add coconut flakes to the crust. The result is a tropical version that still holds the caramel’s silky texture. This variation is perfect for summer gatherings.
Vegan Version
Use coconut oil instead of butter and a dairy‑free caramel sauce. Swap the Butterfinger for a vegan chocolate bar with a similar texture. The final product will still be rich and crunchy, but with a plant‑based twist.
Mini Cheesecake Cups
Instead of a muffin tin, use a mini cheesecake mold. Pour the caramel and Butterfinger mixture into the crust and top with a dollop of whipped cream. Bake as directed, then chill for at least an hour before serving.
Storing and Bringing It Back to Life
Fridge Storage
Place the cooled pies in an airtight container and store them in the refrigerator for up to three days. The caramel will firm up slightly, so let them sit at room temperature for 10 minutes before serving. Avoid stacking to keep the crust crisp.
Freezer Friendly
Wrap each pie individually in plastic wrap, then place them in a freezer bag. They remain fresh for up to two weeks. When ready to eat, thaw in the refrigerator overnight and reheat in a 350°F oven for 5 minutes.
Best Reheating Method
Reheat in a preheated oven at 350°F for 5 minutes, or microwave on low power for 20 seconds. Add a tiny splash of water before reheating to create steam, which helps the caramel re‑soften without drying out. Serve immediately for maximum crunch.