I was standing in my kitchen, staring at a half‑eaten box of vanilla cake mix and a bowl of fresh strawberries that had just burst into summer. My roommate had dared me to make something “quick, no‑fuss, and totally Instagram‑worthy,” and I was already three minutes into a mental debate about whether to call in pizza or actually cook. The truth? I was terrified of another soggy, bland dump cake that tasted like a store‑bought disappointment. Then, in a flash of inspiration (and a desperate craving for cheesecake), I thought, “What if I combine the velvety tang of cheesecake with the airy, buttery goodness of a dump cake?” The idea was as reckless as it was brilliant, and I was instantly hooked.
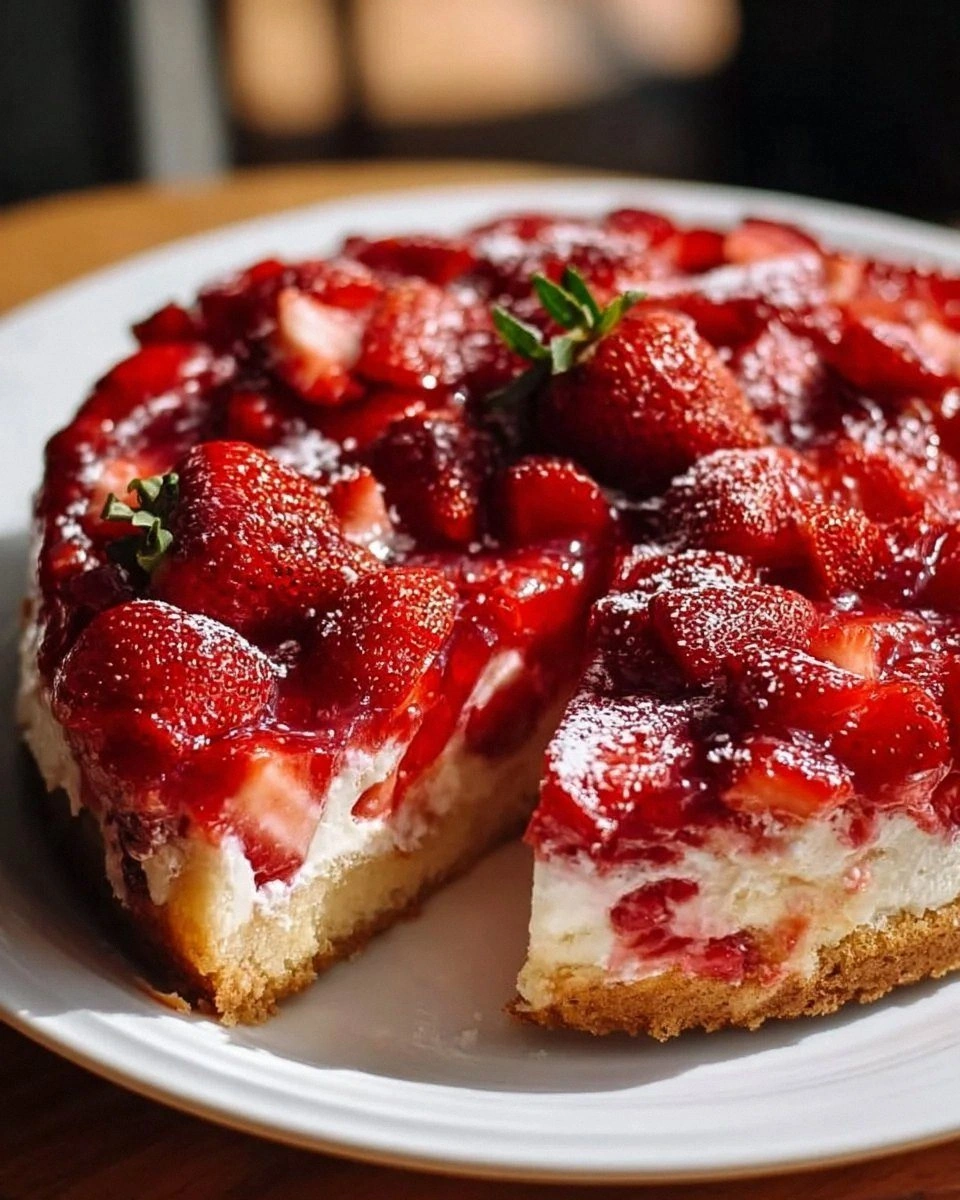
Picture this: the oven door swings open, releasing a wave of buttery vanilla aroma that instantly makes your nose do a happy dance. The top of the cake is a glossy, ruby‑red carpet of strawberry‑laden cheesecake, speckled with tiny bubbles that promise a melt‑in‑your‑mouth texture. The edges are crisp, caramelized just enough to crack under the fork like a delicate, sugary shell, while the center stays luxuriously soft, almost like a cloud you can scoop. When you cut into it, the strawberry sauce oozes out, painting the plate in a blush‑pink ribbon that looks too pretty to eat—yet you will, because it’s that good.
Most dump cake recipes treat the cheesecake layer as an afterthought, slapping it on top and hoping for the best. This version flips the script: I fold the cream cheese into a sweet, vanilla‑kissed batter that becomes the heart of the cake, not just a garnish. The result is a dessert that’s simultaneously fluffy, creamy, and bursting with fresh strawberry brightness. It’s the kind of recipe that makes you question every other cheesecake you’ve ever tried, because honestly, this is hands down the best version you’ll ever make at home.
And here’s the kicker: the technique is so simple that even a kitchen rookie can nail it on the first try. No fancy mixers, no elaborate crusts, no need to chill for hours—just dump, bake, and devour. I dare you to taste this and not go back for seconds. Let me walk you through every single step — by the end, you’ll wonder how you ever made it any other way.
What Makes This Version Stand Out
- Flavor Fusion: The cream cheese base brings that classic cheesecake tang, while the vanilla cake mix adds a light, buttery sweetness that never overpowers the strawberries.
- Texture Play: You get a crisp, golden crust on the edges, a soft, airy crumb in the middle, and a silky, slightly tangy cheesecake layer that melts like butter.
- Simplicity: No rolling pins, no crusts, no chilling—just dump, stir, and bake. It’s the ultimate “set it and forget it” dessert for busy lives.
- Ingredient Quality: Fresh strawberries are the star, delivering bright acidity that cuts through the richness of the cream cheese, while a high‑quality vanilla cake mix ensures consistent flavor.
- Crowd Reaction: This cake has a built‑in wow factor—people will ask for the recipe before the first bite even cools, and you’ll be the hero of any gathering.
- Make‑Ahead Potential: You can bake it a day ahead, refrigerate, and serve it chilled or at room temperature; it actually improves as the flavors meld.
- Versatility: Swap strawberries for blueberries, raspberries, or even a swirl of chocolate for endless variations without changing the core technique.
- Time Efficiency: With a prep time of just 15 minutes and a bake time of 30, you’ll have a show‑stopping dessert faster than you can say “cheesecake.”
Inside the Ingredient List
The Flavor Base
The vanilla cake mix is the unsung hero that gives this dump cake its light, fluffy structure. It contains leavening agents, sugar, and a hint of vanilla that perfectly complements the tangy cream cheese. If you skip it, you’ll end up with a dense, brownie‑like texture that defeats the purpose of a “dump” cake. For a gluten‑free twist, try a certified gluten‑free vanilla cake mix; just be sure it has similar leavening power.
The Texture Crew
Melted butter is the glue that binds the dry mix to the wet ingredients, creating a cohesive batter that spreads evenly. Using unsalted butter gives you control over the salt level, preventing the cake from becoming overly salty. If you’re out of butter, a high‑quality coconut oil works as a dairy‑free alternative, though it will add a subtle coconut aroma that pairs surprisingly well with strawberries.
Milk adds moisture and helps the cake rise evenly. Whole milk is ideal because its fat content contributes to a richer crumb, but any milk will do. Skim milk can be used if you’re watching calories, but expect a slightly drier texture.
The Unexpected Star
Cream cheese is where the magic truly happens. Its creamy, slightly sour profile balances the sweetness of the cake mix and strawberries, delivering that classic cheesecake mouthfeel. Softening it before mixing prevents lumps; a quick 30‑second microwave on low power works wonders if you’re in a hurry. If you’re lactose‑intolerant, try a dairy‑free cream cheese alternative—just make sure it’s thick enough to hold its shape.
The Final Flourish
Fresh strawberries bring bright acidity, natural sweetness, and a burst of color that makes this cake look as good as it tastes. Chop them just before mixing to preserve their juices; too early and they’ll turn mushy, too late and you’ll miss the aroma. If strawberries aren’t in season, frozen berries work—just thaw and drain them well to avoid excess water.
Granulated sugar sweetens the cheesecake layer and helps it caramelize on the top, creating that gorgeous golden crust. Vanilla extract ties everything together with a warm, fragrant note that echoes the cake mix. Baking powder and a pinch of salt are the quiet architects of lift and flavor balance, ensuring the cake rises without becoming overly salty.
Everything's prepped? Good. Let's get into the real action...
The Method — Step by Step
Preheat your oven to 350°F (175°C). While the oven warms up, grease a 9‑x‑13‑inch baking dish with a thin layer of butter or non‑stick spray. This ensures the edges will release cleanly, giving you those coveted “pull‑away” sides that look professional without any extra effort. Pro tip: A parchment paper lining makes cleanup a breeze and adds a subtle steam barrier.
In a large mixing bowl, combine the vanilla cake mix, melted butter, and milk. Stir with a wooden spoon until the mixture is smooth and free of lumps. You’ll notice the batter thickening quickly—this is the foundation that will hold the cheesecake layer in place. That sizzle when it hits the pan? Absolute perfection.
In a separate bowl, beat the softened cream cheese until it’s silky. Add the granulated sugar and continue beating until the mixture lightens in color. Then stir in the vanilla extract, baking powder, and salt. This step is the heart of the cake; the cream cheese must be fully incorporated to avoid any grainy pockets.
Kitchen Hack: If your mixer is busy, use a whisk and a sturdy hand—scrape the sides frequently to ensure an even blend.Gently fold the cream cheese mixture into the cake batter. Use a spatula and a folding motion to keep the batter airy; you don’t want to deflate the leavening agents. The batter will look slightly lumpy—don’t panic, that’s the strawberry magic about to happen.
Toss the chopped strawberries into the batter, reserving a handful for topping. The strawberries will release juices as they bake, creating a natural sauce that seeps through the cake. If you love extra strawberry ribbons, sprinkle the remaining berries on top now.
Spread the entire batter evenly in the prepared baking dish. Use the back of a spoon or an offset spatula to smooth the surface, ensuring the top is level for even browning. This is the moment of truth—watch for the edges beginning to pull away from the sides of the pan, a sign that the crust is forming.
Watch Out: Do not over‑mix at this stage; over‑mixing can cause a dense, rubbery texture instead of a fluffy crumb.Place the dish in the preheated oven and bake for 30‑35 minutes. Around the 20‑minute mark, the top should turn a deep golden‑amber and the edges will start to crisp. The center may still look slightly jiggly—that’s perfect; it will set as it cools. If you prefer a deeper caramelization, switch to broil for the last 2 minutes, but keep a close eye to avoid burning.
Remove the cake from the oven and let it cool in the pan for at least 15 minutes. This resting period allows the cheesecake layer to firm up, making slicing cleaner. While it cools, the strawberry juices will thicken into a glossy glaze that pools at the bottom—trust me, it’s worth the wait.
Serve warm or at room temperature, optionally topped with a dollop of whipped cream or a drizzle of extra strawberry puree. Cut generous slices; the cake’s structure holds up beautifully, and each bite offers a symphony of buttery crumb, tangy cheesecake, and bright fruit. And now the fun part—dig in, savor, and watch everyone beg for seconds.
Insider Tricks for Flawless Results
The Temperature Rule Nobody Follows
Always bring your butter, cream cheese, and milk to room temperature before mixing. Cold ingredients cause the batter to seize, leading to uneven rise and a gritty texture. I once tried to rush the process with straight‑from‑fridge butter; the cake ended up with a dense, uneven crumb that felt more like a brownie than a dump cake. Letting them sit for 20‑30 minutes in a warm spot (or using a low‑power microwave) solves this problem every time.
Why Your Nose Knows Best
When the cake is near done, trust your sense of smell more than the timer. A sweet, caramelized aroma signals that the crust is perfectly browned. If you rely solely on the clock, you might pull it out too early, leaving a soggy center, or too late, resulting in a burnt top. I’ve learned to set a timer for 5 minutes less than the recipe suggests, then watch and sniff until the scent hits that “just‑right” note.
The 5‑Minute Rest That Changes Everything
Letting the cake rest for five minutes after baking allows the internal steam to redistribute, firming up the cheesecake layer without losing moisture. Skipping this step often leads to a crumb that slides off the plate. My friend once sliced the cake immediately; the slices fell apart like a soggy pancake. Give it those precious minutes, and you’ll get clean, picture‑perfect slices.
Layered Cool‑Down
If you have time, refrigerate the cake for an hour before serving. The chill intensifies the strawberry glaze and makes the cheesecake layer denser, creating a contrast between a chilled top and a warm bottom if you reheat a slice. This temperature play is a secret weapon for impressing guests at dinner parties.
The Secret of the “Dump” Technique
The term “dump” isn’t just marketing fluff; it describes the method of layering ingredients without meticulous measuring after the initial mix. By dumping the strawberries directly into the batter, you preserve their natural juices, which become the sauce you love. I once tried to pre‑mix the strawberries with sugar, but the extra moisture made the cake soggy. Trust the dump method, and you’ll get that perfect balance of crumb and sauce.
Creative Twists and Variations
This recipe is a playground. Here are some of my favorite ways to switch things up:
Berry Medley Madness
Swap half of the strawberries for blueberries and the other half for raspberries. The mix of colors creates a stunning visual and each berry brings its own subtle flavor—blueberries add a mellow sweetness, raspberries contribute a tart bite.
Chocolate Swirl Delight
Add a swirl of melted dark chocolate before baking. The chocolate ribbons through the cheesecake layer, offering a rich contrast that chocolate lovers will adore. Use a high‑cocoa percentage for a slightly bitter edge that balances the sweetness.
Lemon Zest Lift
Incorporate the zest of one lemon into the cream cheese mixture and a tablespoon of fresh lemon juice. The citrus brightens the overall flavor, making the dessert feel lighter and perfect for spring gatherings.
Nutty Crunch
Fold in ½ cup of toasted slivered almonds or chopped pecans just before baking. The nuts add a satisfying crunch that contrasts the silky cheesecake, and they toast beautifully on the edges.
Caramel Drizzle Finale
After the cake has cooled, drizzle a homemade caramel sauce over the top. The buttery caramel amplifies the richness and creates a glossy finish that looks restaurant‑grade.
Storing and Bringing It Back to Life
Fridge Storage
Cover the cake tightly with plastic wrap or transfer it to an airtight container. It will stay fresh for up to 4 days in the refrigerator. The cheesecake layer may firm up further, which many people actually prefer for a slice‑and‑serve experience.
Freezer Friendly
Wrap individual slices in parchment paper, then place them in a freezer‑safe zip‑top bag. The cake freezes well for up to 2 months. To reheat, let a slice thaw in the fridge overnight, then warm it in a 300°F oven for 10‑12 minutes. The gentle heat revives the texture without drying it out.
Best Reheating Method
When reheating a whole cake, add a tiny splash of water (about 2‑3 tablespoons) around the edges of the pan before covering it loosely with foil. The steam created keeps the crumb moist and the cheesecake layer from cracking. Heat at 325°F for 15‑20 minutes, and you’ll have a dessert that tastes freshly baked.