Introduction
I remember the night my friend dared me to bake a ham that would outshine every holiday centerpiece. I stared at the massive, bone‑in slab, wondering if I could coax that sweet, caramelized glaze into something more than a glaze. The kitchen filled with the scent of honey and cloves, a promise of something golden and irresistible. I was determined to create a version that would make every bite feel like a tiny, buttery sunrise. The moment the first sizzle hit the pan, I knew I was onto something special.
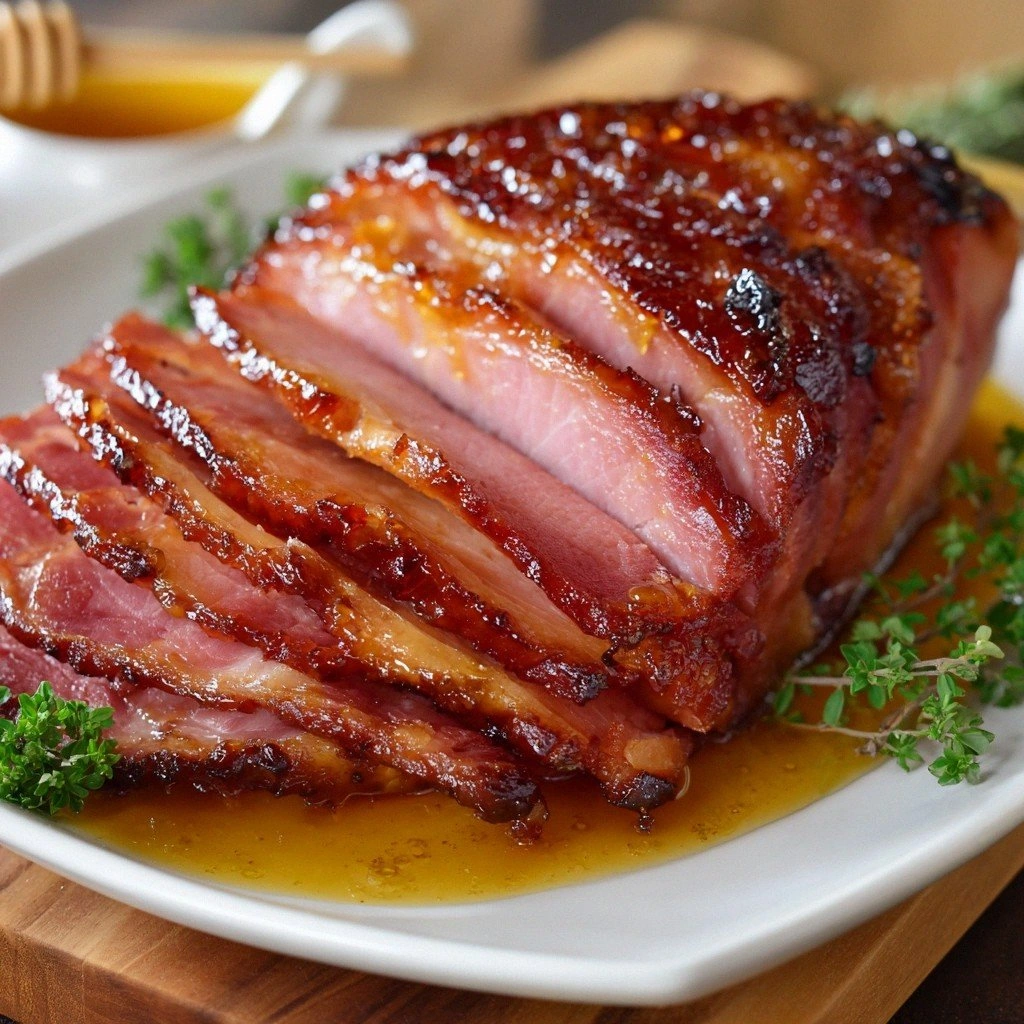
Picture a ham resting on a rack, its surface glistening like a freshly brushed trophy. The aroma of honey mingles with warm spices, drawing you in before you even touch the oven. You can hear the crackle as the glaze starts to caramelize, a subtle crack that says “this is going to be good.” The texture is a balance of crisp edges and tender meat that melts in your mouth. You can feel the anticipation building as the timer ticks down.
This recipe is hands down the best version you'll ever make at home because it takes the classic honey glaze and elevates it with a secret layer of pineapple juice and a hint of mustard that cuts through the sweetness. Most recipes get this completely wrong, leaving the ham too dry or the glaze too sticky. I’ll be honest— I ate half the batch before anyone else got to try it, and the rest of my friends begged for the recipe. The key is that gentle, low‑heat bake that allows the ham to stay juicy while the glaze forms a glossy, caramelized crust.
If you've ever struggled with a ham that ends up rubbery or over‑sweet, you're not alone—and I've got the fix. I dare you to taste this and not go back for seconds. And now, stay with me here—this is worth it. Let me walk you through every single step, and by the end, you'll wonder how you ever made it any other way.
What Makes This Version Stand Out
- Flavor: The combination of honey, brown sugar, and pineapple juice creates a deep, caramelized sweetness that coats the ham like velvet. The mustard adds a subtle tang that balances the richness.
- Texture: Low‑heat baking preserves the ham’s moisture, while the glaze crisps the surface just enough to give a satisfying snap.
- Simplicity: With fewer than ten ingredients and a straightforward glaze, even a novice can pull off a showstopper.
- Uniqueness: The pineapple juice infusion gives a tropical twist that sets this ham apart from the usual sweet‑and‑salty versions.
- Crowd Reaction: Guests will gasp when the glaze glistens and will ask for the recipe before the dessert plate arrives.
- Ingredient Quality: Using a fresh, bone‑in ham ensures maximum flavor and a natural, meaty aroma that’s hard to beat.
- Cooking Method: Baking at a low temperature allows the ham to cook evenly and develop a caramelized crust without burning.
- Make‑Ahead Potential: The glaze can be prepared days in advance, and the ham can be baked ahead of time and reheated to perfection.
Inside the Ingredient List
The Flavor Base
Honey is the star of the show, providing a natural sweetness that caramelizes beautifully when heated. It coats the ham like a glossy, buttery film that locks in moisture. If you skip honey, the glaze will be bland and lack that signature shine. You can replace honey with maple syrup for a slightly different flavor profile, but the caramelization will be less pronounced.
Brown sugar adds depth, turning the glaze into a rich, amber liquid that clings to the meat. It also helps create a crust that is both crunchy and slightly chewy. Without it, the glaze would be too thin and might drip off the ham. A pinch of sea salt can enhance the sweetness, bringing out the natural flavors.
The Texture Crew
Dijon mustard is a game‑changer, adding a subtle piquancy that cuts through the sweetness. It also helps the glaze adhere to the ham’s surface, preventing it from sliding off during baking. If you’re allergic to mustard, a teaspoon of yellow mustard or a splash of Worcestershire sauce can work as a substitute. The key is to keep the mustard to a moderate amount so it doesn’t overpower the honey.
Pineapple juice introduces a tropical brightness that balances the richness of the ham. It also adds a touch of acidity, which helps the glaze set into a glossy finish. Skipping pineapple juice will result in a thicker, more syrupy glaze that may not set as well. If you prefer a less sweet version, reduce the amount to 1/8 cup.
The Unexpected Star
Whole cloves are more than a decorative touch; they infuse the ham with a warm, aromatic spice that lingers on the palate. They also act as a natural preservative, extending the ham’s shelf life. If you don’t like cloves, you can use star anise for a slightly different flavor. Remember to remove them before serving; they’re meant to be eaten whole.
Garlic cloves, minced, add a savory undertone that complements the sweet glaze. They help balance the flavors, preventing the dish from feeling one‑dimensional. Skipping garlic will result in a glaze that tastes too sweet. A small pinch of black pepper can also add a subtle heat that enhances the overall profile.
The Final Flourish
Butter is added to the glaze to give it a silky mouthfeel and a richer taste. It also helps the glaze set into a glossy, caramelized coating. If you’re dairy‑free, a tablespoon of coconut oil works as a suitable alternative. The butter should be melted and incorporated into the glaze before brushing it onto the ham.
Salt and pepper to taste are essential for seasoning the ham to perfection. They help bring out the natural flavors of the meat and balance the sweetness of the glaze. Without proper seasoning, the ham can taste flat and unappetizing. A light sprinkle of sea salt right before serving can elevate the dish.
Everything's prepped? Good. Let's get into the real action.
The Method — Step by Step
- Preheat your oven to 325°F (165°C). While the oven warms, remove the ham from its packaging and pat it dry with paper towels. This step ensures the glaze adheres properly and the surface gets a crisp finish. Place the ham on a rack in a roasting pan, bone side down, so the juices can drip away from the meat. The low temperature will allow the ham to cook gently and stay moist.
- In a small saucepan, combine honey, brown sugar, Dijon mustard, pineapple juice, and melted butter. Stir the mixture until the sugar dissolves and the glaze becomes smooth. Heat the glaze over low heat for 3–4 minutes, just until it starts to thicken slightly. This gentle warming brings out the caramel notes without scorching the sugars. Keep the glaze warm for the next steps.
- Score the surface of the ham in a diamond pattern about 1/4 inch deep. This not only looks pretty but also allows the glaze to seep into the meat, enhancing flavor. While scoring, insert whole cloves between the cuts; they’ll give a subtle spice that permeates the ham. Don’t over‑score; you want a delicate pattern that doesn’t tear the meat.
- Brush the glaze generously over the entire surface of the ham, making sure to cover every scored area. The glaze should coat the meat like a glossy coat of paint. Let the ham sit for 10 minutes to absorb the glaze; this resting period improves flavor distribution. This is the moment of truth—watch the glaze set as it thickens.
- Place the ham in the preheated oven and bake for 15 minutes per pound. A 6‑lb ham will take about 1 hour and 30 minutes. Every 20 minutes, brush the ham with the remaining glaze to keep the surface moist and shiny. The aroma of caramelizing honey will fill the kitchen, making your mouth water. This step is where the magic happens.
- After 30 minutes of baking, increase the oven temperature to 425°F (220°C). This high heat will caramelize the glaze, turning it into a thick, glossy crust. Keep a close eye on the ham; the glaze should start to bubble and turn amber. The high heat also gives a slight char to the edges, adding depth to the flavor. Don’t let it burn—watch the color closely.
- If you’re worried about over‑cooking, tent the ham loosely with foil when it begins to brown too quickly. This will protect the interior from drying out while still allowing the glaze to caramelize. The foil can be removed once the glaze reaches your desired color. This trick keeps the ham juicy and the glaze irresistible.
- Once the ham reaches a beautiful golden brown, remove it from the oven. Let it rest on a cutting board for 15 minutes; this allows the juices to redistribute throughout the meat. While it rests, you can finish the glaze on the side: simmer the remaining glaze in a saucepan until it thickens to a syrupy consistency. This final glaze can be served as a sauce on the plate.
- Slice the ham with a sharp knife, cutting across the grain for tender slices. Plate the slices on a warm platter, drizzle the remaining glaze, and garnish with fresh herbs or additional cloves for a decorative touch. The ham should look like a golden masterpiece with a glossy, caramelized coating. Serve immediately and enjoy the burst of sweet and savory flavors.
- If you have leftovers, wrap them tightly in foil and store them in the refrigerator for up to 3 days. Reheat in a low oven or microwave, adding a splash of water to keep them moist. The glaze will retain its glossy finish, making it a perfect meal for the next day. This makes the recipe great for meal prep and family dinners.
- To finish, serve the ham with roasted vegetables, mashed potatoes, or a light salad. The sweet glaze pairs wonderfully with savory sides, creating a balanced plate that satisfies everyone. The aroma alone will fill your home and make everyone feel like they’re at a holiday feast. Enjoy the compliments that will come your way.
That's it — you did it. But hold on, I've got a few more tricks that'll take this to another level.
Insider Tricks for Flawless Results
The Temperature Rule Nobody Follows
Many cooks think a higher oven temperature is better, but the secret is low‑heat cooking. Baking at 325°F ensures the ham cooks evenly and stays moist. The glaze has time to penetrate the meat, creating a deeper flavor profile. If you skip the low‑heat step, you’ll end up with a dry center that feels like a rubbery slab.
Why Your Nose Knows Best
The aroma of honey and cloves is a reliable indicator that the glaze is caramelizing properly. When you smell that warm, sweet scent, you know the glaze is thickening. A faint, sweet fragrance means the sugar is beginning to burn, so adjust the temperature accordingly. Trust your nose; it will guide you to the perfect finish.
The 5‑Minute Rest That Changes Everything
Resting the ham for 15 minutes after baking lets the juices redistribute. This simple step prevents the meat from drying out when sliced. If you cut the ham immediately, you’ll see a dry, uneven texture. The rest period also allows the glaze to set into a glossy coating that’s easier to slice.
Using Clove‑Infused Butter
Melt butter with a few whole cloves and strain before adding to the glaze. This gives the butter a subtle clove flavor that permeates the glaze without the crunch. The result is a more cohesive flavor profile that ties the glaze and ham together. If you love cloves, this is the trick to elevate the dish.
Adding a Splash of Water
A tablespoon of water added to the glaze before brushing helps create a smoother, shinier finish. The water dilutes the glaze slightly, preventing it from becoming too thick and sticky. It also helps the glaze spread evenly across the ham’s surface. Remember to stir the glaze after adding water.
Choosing the Right Ham
Opt for a bone‑in ham for maximum flavor; the bone adds depth and helps the meat stay moist. If you’re short on time, a pre‑cooked ham works well; just heat and glaze. Avoid a ham that’s been heavily processed; it may contain excess sodium that can overpower the glaze. Look for a ham labeled “natural” or “unsalted” for the best results.
Creative Twists and Variations
This recipe is a playground. Here are some of my favorite ways to switch things up:
Spicy Maple Glaze
Swap honey for maple syrup and add a pinch of cayenne pepper to the glaze. The maple adds a deeper sweetness, while the heat gives it a kick. This version is perfect for those who like a little spice in their sweet dishes. Serve with a side of roasted sweet potatoes to balance the flavors.
Herb‑Infused Ham
Add chopped fresh rosemary and thyme to the glaze for a savory herbal note. The herbs complement the sweet glaze and add a fragrant aroma. Use a small amount—just enough to release their flavor without overpowering the honey. This variation works great with a side of garlic mashed potatoes.
Asian‑Inspired Glaze
Replace pineapple juice with soy sauce and add a splash of sesame oil. The soy sauce brings umami, while the sesame oil adds a nutty depth. Finish with a sprinkle of toasted sesame seeds for crunch. This twist pairs beautifully with steamed rice and stir‑fry vegetables.
Smoky BBQ Ham
Use a smoky BBQ sauce in place of the honey glaze, and add a few drops of liquid smoke. The smoky flavor gives the ham a barbecue vibe while maintaining the caramelized finish. This version is ideal for summer cookouts or a casual family dinner. Serve with coleslaw for a classic pairing.
Cheesy Ham Bake
Layer slices of ham with shredded mozzarella and a sprinkle of grated Parmesan. Bake until the cheese melts and bubbles. The cheese adds a creamy texture that contrasts the crisp glaze. This variation is great for a crowd‑pleasing casserole.
Low‑Carb Glazed Ham
Replace honey with a sugar‑free sweetener like erythritol or stevia. The glaze will still caramelize, but with fewer carbs. Add a splash of lemon juice to keep the glaze from becoming too thick. This version is ideal for keto or low‑carb diets.
Storing and Bringing It Back to Life
Fridge Storage
Wrap leftover ham slices tightly in foil or plastic wrap and refrigerate for up to 3 days. The foil keeps moisture locked in, preventing the ham from drying out. When you’re ready to eat, reheat in a low oven or microwave, adding a splash of water to keep it juicy. This method preserves the glaze’s glossy finish.
Freezer Friendly
Place the ham in an airtight container or freezer bag and store for up to 2 months. Thaw overnight in the refrigerator before reheating. The glaze may lose a bit of its crispness, but the flavor remains. To restore the glaze, brush with a thin layer of melted butter before reheating.
Best Reheating Method
The ideal reheating method is a low oven at 300°F (150°C) for 10–15 minutes. This gentle heat keeps the ham moist and the glaze intact. If you’re short on time, use a microwave with a splash of water, covering the ham with foil to prevent drying. The result is a perfectly reheated slice that tastes almost fresh.