Picture this: it’s a rainy Saturday afternoon, the kind that makes you crave something sweet, salty, and utterly comforting, but you’ve already raided the pantry for cookies and the result was a soggy disappointment that tasted like regret. I was standing in my kitchen, surrounded by a half‑melted chocolate puddle and a stack of plain graham crackers that had been staring at me like they were judging my life choices. I dared a friend to a “best‑ever snack” showdown, and she laughed, saying, “You’ll never beat the store‑bought buckeyes.” I laughed back, grabbed a pen, and whispered, “Watch me.” That moment sparked the birth of the most irresistible buckeye graham crackers you’ll ever taste, a mash‑up that turned a humble pantry staple into a show‑stopping treat.
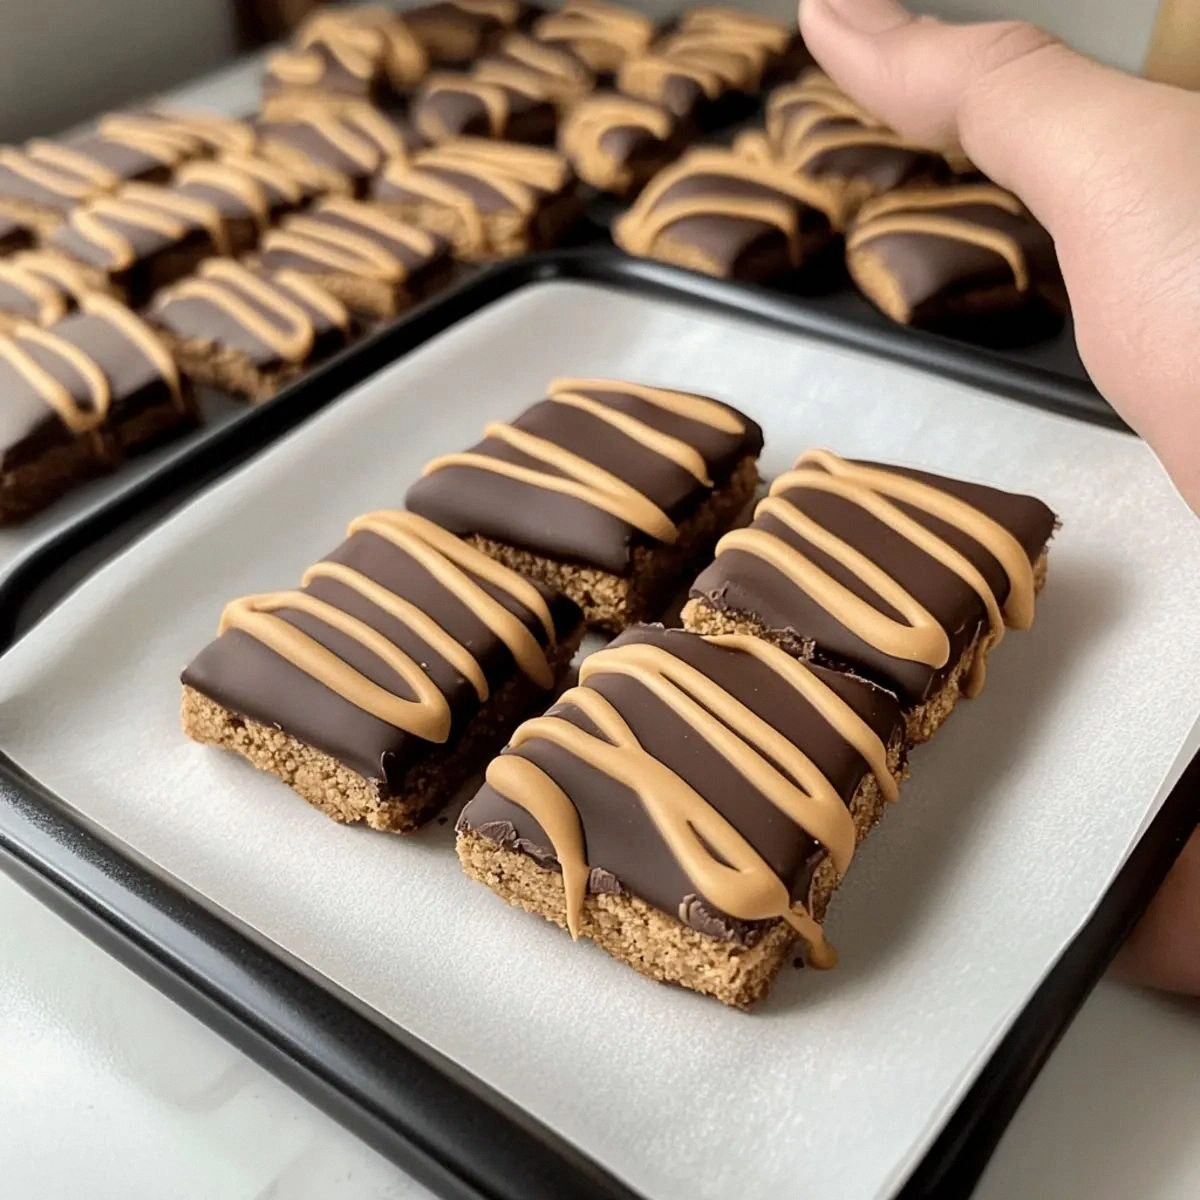
The first thing that hits you is the aroma—sweet butter melting into a nutty, peanut‑butter perfume that drifts through the kitchen like a warm hug. As the chocolate chips melt into a glossy river, you hear the faint sizzle of butter meeting pan, a sound that promises richness. The texture? Imagine the crisp snap of a fresh graham cracker, then a buttery, creamy coating that clings like a second skin, followed by a chocolate drizzle that solidifies into a glossy armor. When you finally bite, the flavors explode: salty butter, sweet powdered sugar, earthy peanut butter, and that deep, slightly bitter chocolate that makes your taste buds do a little happy dance.
What makes this version truly stand out is a tiny secret I discovered while scrolling through endless recipe forums: most buckeye copies either drown the crackers in a cloying glaze or skip the butter entirely, resulting in a soggy mess. I refused to settle for that. By incorporating a butter‑infused peanut‑butter base, a dash of vanilla, and a strategic melt‑and‑pour technique, I achieved a coating that’s firm enough to hold its shape yet melts in your mouth like a dream. The addition of peanut butter chips adds a surprise crunch that most recipes overlook, creating a textural symphony you won’t find elsewhere.
And here’s the kicker: I’m going to reveal a technique that most home cooks miss—the “double‑dip” method that guarantees a glossy, crack‑free chocolate shell every single time. Trust me, once you master this, you’ll never go back to the flimsy store version again. Let me walk you through every single step — by the end, you’ll wonder how you ever made it any other way.
What Makes This Version Standout
- Flavor Explosion: The buttery peanut‑butter base marries sweet and salty in perfect harmony, while the chocolate coating adds a rich, slightly bitter counterpoint that keeps the palate intrigued.
- Texture Triumph: Each bite delivers a triple‑layer experience—crunchy graham, creamy interior, and a firm chocolate shell that snaps satisfyingly.
- Simplicity Redefined: You only need eight pantry staples, yet the result feels like a gourmet confection crafted by a pastry chef.
- Unique Twist: Peanut butter chips are folded into the coating, offering surprise pockets of crunch that most recipes completely skip.
- Crowd‑Pleaser Factor: I’ve watched adults and kids alike line up for seconds; I dare you to taste this and not go back for more.
- Ingredient Quality: Using real butter (not margarine) and high‑quality semi‑sweet chocolate elevates the entire flavor profile.
- One‑Pan Magic: The entire process happens on the stovetop and a single baking sheet, minimizing cleanup and maximizing flavor.
- Make‑Ahead Potential: These crackers keep beautifully for up to a week, and they taste even better after the flavors meld overnight.
Inside the Ingredient List
The Flavor Base
0.5 cups Butter: This is the foundation of our coating. Butter brings a rich, creamy mouthfeel and helps the peanut butter emulsify smoothly. If you swap it for margarine, you’ll lose that luxurious melt‑in‑your‑mouth quality and get a waxy finish. For the best flavor, use unsalted, high‑fat European‑style butter and let it soften at room temperature before mixing.
1 cup Creamy Peanut Butter: The star of the show, creamy peanut butter provides the nutty depth that defines a buckeye. Its oil content ensures a glossy, spreadable coating. If you prefer a crunchier texture, you can blend half creamy and half crunchy, but be aware the coating may become grainier.
2 cups Powdered Sugar: This sweetens the coating without adding grit, creating a silky finish. Powdered sugar dissolves quickly, preventing a grainy texture. If you’re watching sugar, you can reduce to 1.5 cups, but the coating will be less glossy.
1 teaspoon Vanilla Extract: A splash of vanilla lifts the entire flavor profile, adding a subtle floral note that balances the butter and peanut butter. Opt for pure vanilla extract; imitation can taste flat.
The Texture Crew
10 sheets Graham Crackers: These provide the crunchy backbone. Their honey‑sweet flavor complements the peanut butter and chocolate perfectly. If you can’t find traditional graham crackers, substitute with honey‑baked oat biscuits, but the texture will be slightly different.
0.5 cups Peanut Butter Chips: These tiny nuggets add a surprise pop of crunch and extra peanut flavor. They melt just enough to blend with the coating but retain a bite. If you’re allergic to peanuts, try almond or cashew butter chips for a similar effect.
The Final Flourish
1 cup Semi‑Sweet Chocolate Chips: This forms the outer shell, delivering a glossy, slightly bitter contrast to the sweet interior. Use good quality chips that contain at least 30% cocoa; lower‑quality chips can become grainy when melted.
3 tablespoons Vegetable Oil: The oil thins the chocolate just enough to coat evenly without becoming runny. It also adds a subtle shine. You can replace it with a neutral‑flavored oil like canola, but avoid olive oil—it will impart an unwanted flavor.
Everything’s prepped? Good. Let’s get into the real action…
The Method — Step by Step
Start by melting the butter in a medium saucepan over low heat. As it melts, you’ll hear a gentle sizzle—this is the sound of flavor building. Once fully melted, add the creamy peanut butter and stir until the mixture becomes a smooth, golden river. I dare you to taste this base before moving on; it’s already dangerously good.
Now, gradually whisk in the powdered sugar, one cup at a time. The mixture will puff up and become thick, like a cloud of sweet snow. Keep the heat low to avoid scorching; you’ll know it’s perfect when the mixture pulls away from the sides of the pan, forming a glossy ribbon when you lift the whisk. This is the moment of truth—if it looks too grainy, add a splash of milk to smooth it out.
Stir in the vanilla extract, then remove the pan from heat. Let the coating cool for about five minutes; it should be warm to the touch but not hot enough to melt chocolate later. While it cools, line a baking sheet with parchment paper and set the graham crackers aside.
Using a small spatula, spread a generous layer of the butter‑peanut mixture onto each graham cracker, covering the top and sides. The coating should be thick enough to hold the chocolate later but thin enough to let the cracker’s crunch shine through. Press the peanut butter chips into the coating while it’s still warm; they’ll embed nicely, creating pockets of surprise.
Now for the chocolate shell. Place the semi‑sweet chocolate chips and vegetable oil in a heat‑proof bowl. Melt them together using a double‑boiler method: set the bowl over a pot of simmering water, making sure the bowl doesn’t touch the water. Stir constantly; the chocolate should become silky and glossy, with a glossy sheen that reflects light like a polished gemstone.
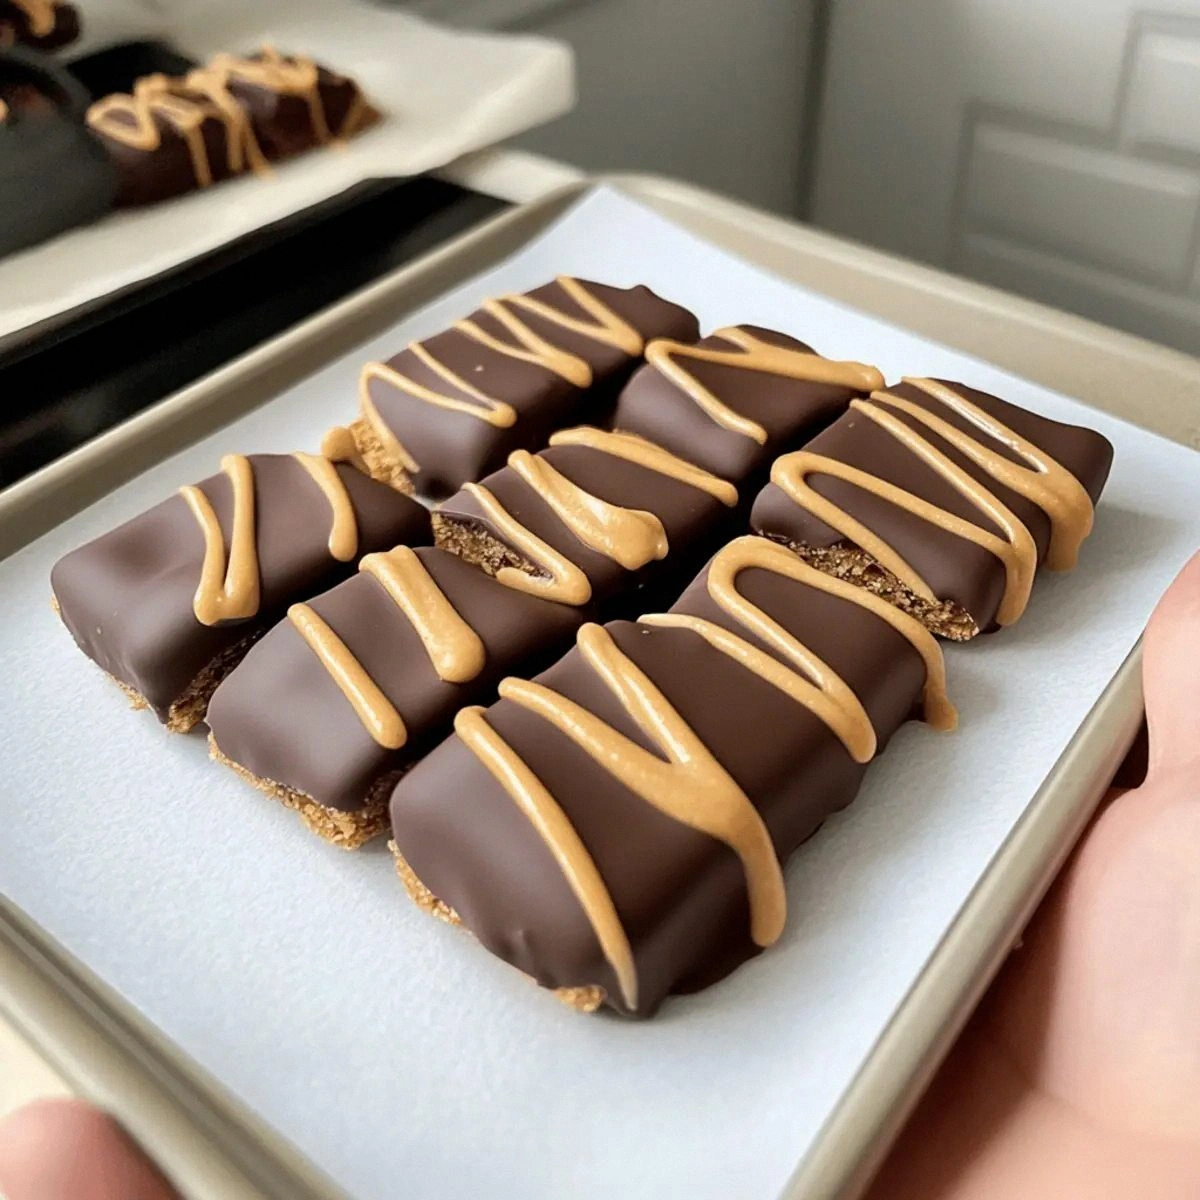
One by one, dip each coated graham cracker into the melted chocolate, using a fork to lift and let excess drip off. The chocolate should coat the top and sides, leaving a small exposed area where the peanut butter chips peek through. Place the dipped crackers back onto the parchment‑lined sheet, spacing them out to prevent sticking.
Allow the chocolate to set at room temperature for about 15 minutes, or speed up the process by placing the sheet in the refrigerator for 5‑7 minutes. You’ll notice the chocolate hardening into a smooth, glass‑like finish. This is where patience pays off; rushing this step results in a soft, sticky coating that never truly sets.
Once fully set, transfer the buckeye graham crackers to an airtight container. Store them at room temperature for up to a week, or freeze for longer storage. When you’re ready to serve, let them sit at room temperature for a few minutes to bring out the full flavor. And now the fun part—watch everyone’s eyes light up as they bite into the perfect blend of crunch, cream, and chocolate.
Insider Tricks for Flawless Results
The Temperature Rule Nobody Follows
Most home cooks think “just melt the chocolate” is enough, but the real secret is keeping the chocolate between 88°F and 115°F. Below that range, the chocolate won’t coat properly; above it, the cocoa butter separates, leading to a dull, streaky finish. I keep a candy thermometer on hand and adjust the heat accordingly. A friend once tried to melt chocolate in the microwave without stirring—she ended up with a burnt mess that tasted like rubber. Trust me, this temperature window is the difference between a professional‑grade shine and a kitchen‑counter disaster.
Why Your Nose Knows Best
The moment the butter‑peanut mixture starts to bubble, your nose will pick up a buttery, nutty aroma that signals the coating is ready for the next step. If you rely solely on a timer, you might over‑cook and lose that delicate flavor. Trust the scent; it’s the kitchen’s built‑in timer. I’ve found that a quick sniff can save you from a burnt batch more often than any timer ever could.
The 5‑Minute Rest That Changes Everything
After you finish coating the crackers, let them rest uncovered for five minutes before refrigerating. This brief pause allows the outer chocolate shell to firm up just enough to resist condensation when you chill them. Skipping this step leads to a soggy layer that loses its snap. I once rushed this and ended up with a gummy mess; the lesson? Patience is a flavor enhancer.
Chocolate Tempering Shortcut
If you’re short on time, you can “seed” the melted chocolate with a handful of solid chips after it’s off the heat. The solid pieces melt into the mixture, quickly bringing the temperature down and stabilizing the cocoa butter. This trick works especially well with semi‑sweet chips because they have a higher cocoa content, which helps lock in that glossy finish.
Using a Silicone Mat for Easy Release
Line your baking sheet with a silicone baking mat instead of parchment. The mat’s non‑stick surface ensures the chocolate never sticks, making it effortless to lift the finished crackers without breaking them. I’ve tried parchment many times; the edges sometimes tear, ruining the perfect snap. The mat also provides a consistent temperature surface, helping the chocolate set evenly.
Creative Twists and Variations
This recipe is a playground. Here are some of my favorite ways to switch things up:
Salted Caramel Drizzle
Swap the plain chocolate coating for a salted caramel glaze made with brown sugar, butter, and a pinch of sea salt. The sweet‑salty combo adds depth, and the caramel’s buttery notes echo the butter in the base. Perfect for those who love a sophisticated twist.
White Chocolate & Coconut
Use white chocolate chips instead of semi‑sweet, and sprinkle toasted coconut flakes on the coating before it sets. The result is a tropical, creamy bite that pairs beautifully with the peanut butter’s earthiness.
Spicy Chili Chocolate
Add a pinch of cayenne pepper to the melted chocolate for a subtle heat that tingles the palate. The spice cuts through the richness, creating a surprising kick that’s perfect for adventurous eaters.
Nutty Crunch
Mix finely chopped toasted almonds or hazelnuts into the butter‑peanut coating before spreading. This adds an extra layer of crunch and a nutty aroma that elevates the overall texture.
Vegan Version
Replace butter with a plant‑based margarine, use a vegan peanut butter (make sure it’s truly dairy‑free), and swap semi‑sweet chocolate chips for a vegan brand. The result is still indulgent, and it’s friendly for guests with dietary restrictions.
Mini Bite‑Size
Instead of full‑size graham sheets, cut the crackers into bite‑size squares before coating. These mini buckeyes make perfect party snacks and are easier for kids to handle.
Storing and Bringing It Back to Life
Fridge Storage
Place the finished crackers in an airtight container and store them in the refrigerator for up to 7 days. The cool environment keeps the chocolate firm and prevents the coating from becoming sticky. If you notice a slight hardening, let them sit at room temperature for 10 minutes before serving.
Freezer Friendly
For longer storage, wrap each cracker individually in parchment paper, then place them in a zip‑top freezer bag. They’ll stay fresh for up to 3 months. When you’re ready to enjoy, move them to the fridge for an hour, then bring to room temperature. This gradual thaw preserves the texture.
Best Reheating Method
To revive a slightly hardened cracker, place it on a microwave‑safe plate, add a tiny splash of water (about a teaspoon) in the corner of the plate, and microwave for 5‑7 seconds. The steam gently melts the chocolate, restoring its glossy sheen without melting the interior. This trick works wonders for crackers that have been stored for a while.