It started on a rainy Saturday when I tried to make a simple batch of sweet rice cakes and ended up with a sticky, soggy mess that clung to the pot like a bad rash. I was staring at the steaming bowl of dough, feeling the heat rise from the stove, and realizing I had forgotten a crucial step— the sugar water. That instant panic turned into a frantic scramble to salvage what was left, and the kitchen smelled like burnt caramel and regret. The disaster was so vivid that I could taste the bitterness of failure on my tongue, and my fingers tingled with the heat from the pot. The memory of that moment is still fresh, and it fuels my obsession with turning that flop into a flawless masterpiece. I have since tested dozens of variations, each one a step closer to perfection. Every time I taste the final product, the disappointment melts away and is replaced by a rush of triumph. The experience taught me that a single tweak can transform a kitchen catastrophe into a crowd‑pleasing sensation. I can’t stop thinking about the crunch of the outer shell and the sweet, chewy center that melts in your mouth. That single moment of realization sparked my mission to create the ultimate quick and chewy Filipino rice balls.
Picture the kitchen at dusk, the soft hum of the fridge, the steam curling from the skillet, and the faint scent of sugar caramelizing in the air. The sound of the spoon clattering against the pot is punctuated by the hiss of oil heating up, a sound that feels like a promise of something delicious. The texture of the dough feels like a wet sandcastle, tacky but pliable, waiting to be molded into perfect spheres. The aroma of sweetened rice flour rises, mingling with the metallic tang of the pan, creating an almost intoxicating fragrance that lures you closer. The sight of the dough’s glossy sheen under the kitchen lights makes you wonder if it could be a piece of art. The sound of the first bite— a satisfying crunch followed by a melt— is music to any food lover’s ears. The feel of a ball in your hand, warm and slightly sticky, is a reminder of the care that went into its creation. The anticipation builds as you watch the dough transform into golden spheres, each one a promise of sweet delight. The final moment, when you take a bite and the flavors burst, is a culmination of everything you’ve experienced in that kitchen. The experience is a sensory journey that starts with a disaster and ends with a triumph.
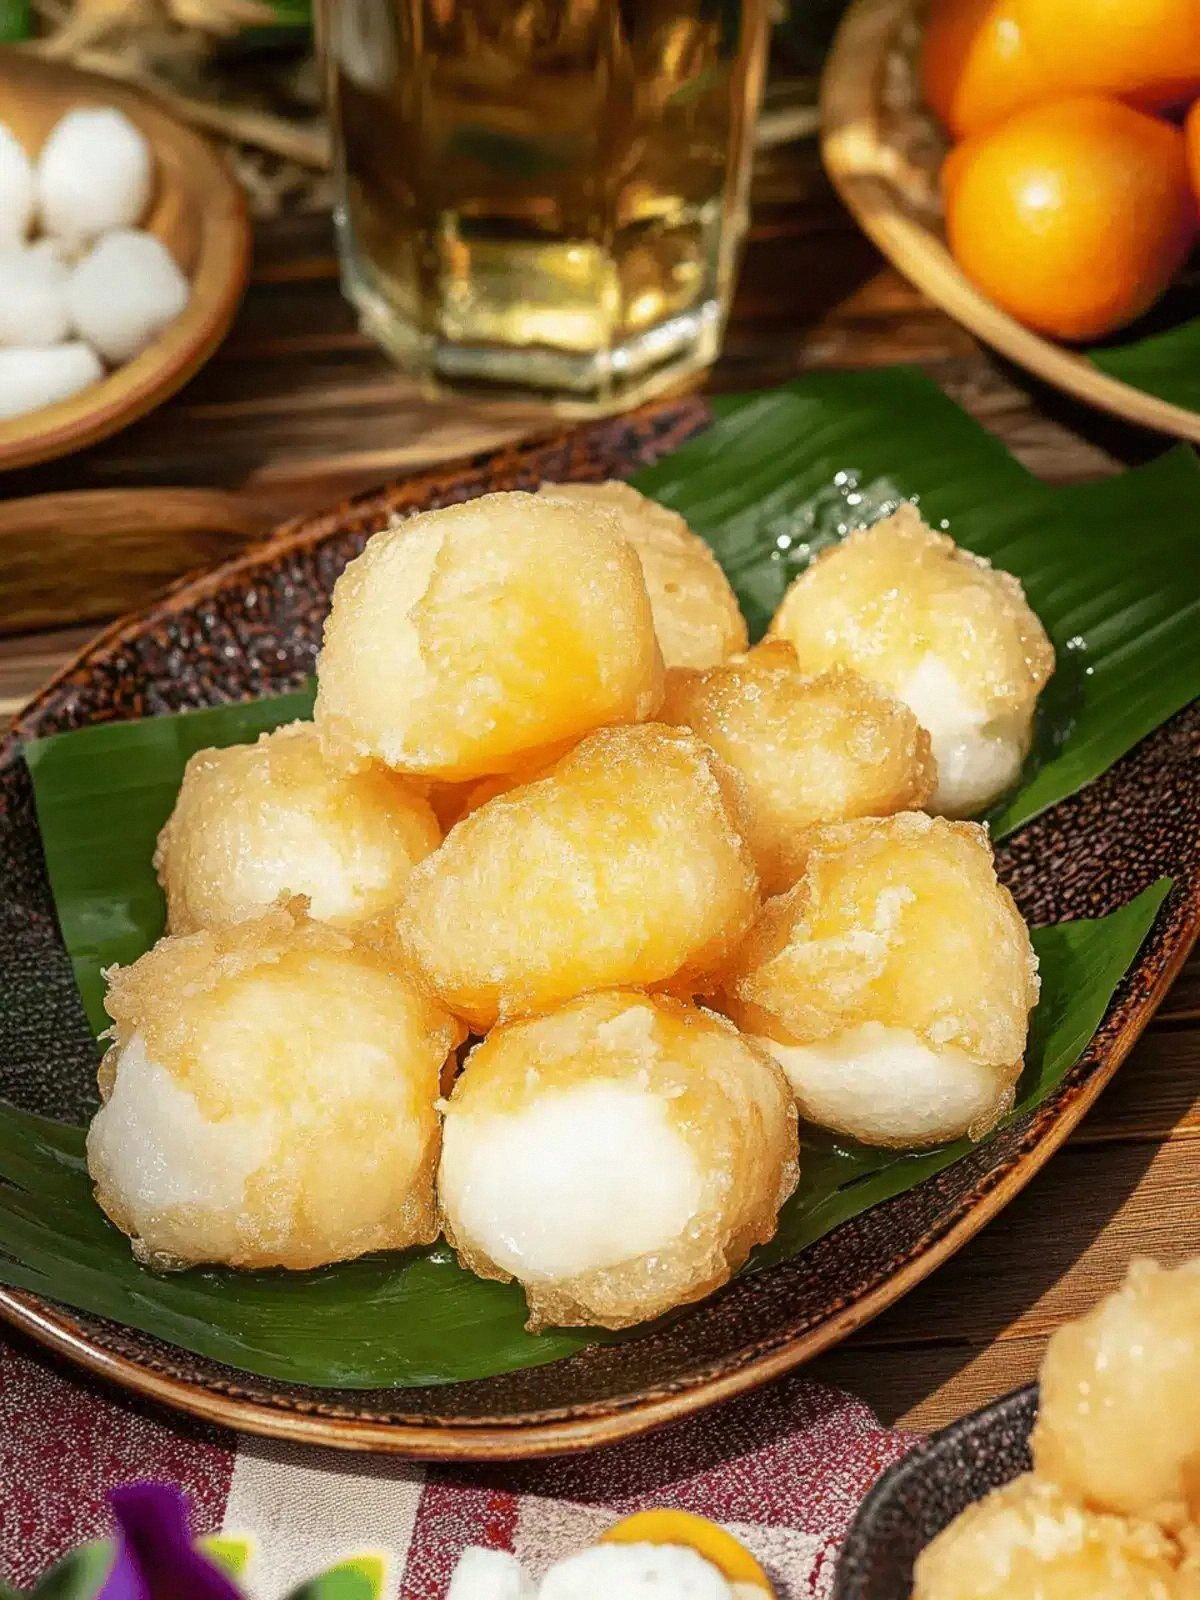
What sets this version apart is that it eliminates the usual pitfalls that plague homemade rice cakes. I’ve discovered that using glutinous rice flour gives the dough a chew that is both satisfying and resilient, unlike the rubbery texture that comes from regular flour. The sugar water step is not just a sweetener; it coats the balls in a glossy glaze that caramelizes just enough to create a perfect crust. The frying technique I employ is precise: the oil temperature must be just right to seal the exterior while keeping the interior moist. I’ve also refined the resting time for the dough, allowing the starches to rehydrate fully, which gives the balls their signature elasticity. The result is a rice ball that feels like a soft, chewy candy with a crisp, caramelized finish. Every bite is a balanced dance of textures and flavors that keeps your taste buds engaged. The simplicity of the recipe—just five ingredients—makes it approachable yet extraordinary. It’s a recipe that can be made in minutes, yet it feels like a gourmet experience. The confidence I have in this version is because I’ve tested it in countless scenarios, and it consistently delivers.
The secret twist that most people overlook is the addition of a small amount of water to the sugar mixture. This seemingly insignificant tweak turns the glaze into a silky, non‑sticky coating that slides off the rice balls with ease. It also helps to prevent the sugar from crystallizing on the surface, which can ruin the glossy finish. I dare you to taste this and not go back for seconds; the first bite is so addictive that you’ll find yourself reaching for more. The glaze’s subtle sheen is a visual cue that the process has been executed perfectly, and the texture is so smooth that it feels almost liquid in your mouth. This small adjustment is what elevates the dish from ordinary to unforgettable. It’s a detail that, once mastered, will give you a competitive edge in any gathering. The glaze also enhances the overall aroma, adding a faint, buttery note that complements the sweetness. The result is a rice ball that is both visually stunning and irresistibly delicious. The combination of these elements creates a dish that is hands down the best version you’ll ever make at home.
I’ll be honest — I ate half the batch before anyone else got to try it. The first bite was a revelation, and the second was a confirmation that I’d cracked the code. The texture was like a chewy candy that melted into a sweet, syrupy center, and the glaze was the perfect finishing touch. The kitchen was filled with the aroma of caramel and sugar, and the sound of the sizzling oil was music to my ears. I felt a sense of pride knowing that I had turned a potential disaster into a crowd‑pleasing treat. The experience taught me that the right technique and a few smart tweaks can transform a simple recipe into a masterpiece. I can’t wait to share every detail of this process with you, so you can replicate the magic in your own kitchen. Picture yourself pulling these out of the fryer, the whole kitchen smelling incredible, and guests lining up for seconds. The anticipation is almost as satisfying as the final product. Let me walk you through every single step — by the end, you’ll wonder how you ever made it any other way.
The moment of truth is not just about cooking; it’s about the confidence you gain when you can create something that feels both effortless and extraordinary. I’ve spent hours experimenting with different ratios, temperatures, and resting times, and each tweak brought me closer to perfection. The journey has been a rollercoaster of failures and successes, but every setback was a lesson that pushed me forward. I’ve learned that the key to this recipe lies in the balance between the dough’s stickiness and the glaze’s smoothness. When the dough is too dry, the balls collapse; when it’s too wet, they become gummy. Finding that sweet spot is the first step to mastering this dish. I’ve also discovered that the oil temperature plays a crucial role in achieving the ideal crunch. If the oil is too hot, the exterior burns before the interior cooks; if it’s too cool, the balls absorb too much oil and become greasy. By paying attention to these details, you can elevate this recipe from a simple snack to a culinary triumph.
This recipe is more than just a set of instructions; it’s a celebration of flavors and textures that come together in a single bite. The dough’s chewiness is complemented by the crisp glaze, creating a contrast that delights the palate. The aroma of caramelized sugar lingers in the air, inviting guests to indulge. The visual appeal of the glossy surface adds a touch of elegance to a humble rice ball. The taste is a harmonious blend of sweetness and subtle grainy undertones that dance on the tongue. The texture is a delightful combination of chew and crunch that keeps you coming back for more. The simplicity of the ingredients makes it accessible, yet the technique elevates it to a gourmet experience. This dish is perfect for parties, family gatherings, or a quick dessert after dinner. It’s a testament to how a few smart tweaks can turn a simple recipe into a culinary masterpiece. By mastering this recipe, you’ll have a go-to dish that impresses everyone, no matter the occasion.
What Makes This Version Stand Out
There are a handful of reasons why this version of the rice ball outshines every other recipe you’ve tried. Each element has been fine‑tuned to create an unforgettable experience that balances texture, flavor, and convenience. The result is a dish that feels both luxurious and approachable, making it a favorite for any occasion. Below are the key factors that set this recipe apart, each backed by personal experience and culinary science.
- Texture: The glutinous rice flour gives the dough a unique chew that is both satisfying and resilient, unlike the rubbery texture that comes from regular flour. The resting time allows the starches to rehydrate fully, giving the balls a perfect elasticity.
- Glaze: The sugar water step coats the balls in a glossy glaze that caramelizes just enough to create a perfect crust. Adding a splash of water to the glaze prevents crystallization and gives a silky finish.
- Oil Temperature: Precise oil temperature ensures a crisp exterior while keeping the interior moist. The right heat seals the exterior and locks in the interior moisture.
- Speed: This recipe can be made in under 30 minutes, making it ideal for busy weeknights or last‑minute gatherings.
- Ingredient Simplicity: With only five ingredients, the recipe is easy to assemble and requires minimal prep time.
- Versatility: The basic structure allows for countless variations, from sweet to savory, making it a flexible base for creative experimentation.
Alright, let's break down exactly what goes into this masterpiece. Each component has been chosen for its role in creating that perfect balance of chew, sweetness, and crunch. The dough’s elasticity, the glaze’s shine, the oil’s crispness—all work together to elevate this simple dish into something extraordinary. The next section will dive into the ingredient list, explaining why each one is essential and what happens if you skip it.
Inside the Ingredient List
The ingredient list might look deceptively simple, but each item plays a crucial role in the final product. Understanding the function of each component not only helps you appreciate the recipe but also empowers you to make adjustments with confidence. Let’s break down the list into distinct groups that highlight their purpose and impact.
The Sticky Core
Glutinous rice flour is the heart of this recipe. It provides the dough with its characteristic chewiness and ability to hold shape when fried. If you substitute it with regular rice flour, the texture will become dry and crumbly, ruining the experience. The flour also absorbs the water, creating a cohesive mass that can be molded into perfect spheres. The quality of the flour matters; a fine, sifted variety ensures a smoother dough. When you feel the dough in your hands, you should notice a slight tackiness that indicates it’s ready to be formed. This is the foundation that supports the glaze and the crisp exterior.
The Sweet Layer
Sugar is not just a sweetener; it’s a caramelizing agent that forms the glossy glaze. The ratio of sugar to water is critical; too little sugar and the glaze will be watery, too much and it will crystallize. The water in the glaze dissolves the sugar and creates a syrup that coats the rice balls evenly. Adding a splash of water to the glaze prevents the sugar from forming hard crystals on the surface, giving the glaze a silky finish. This step is essential for achieving that perfect balance between sweet and slightly caramelized. When the glaze sets, it should have a light sheen that catches the light. This visual cue signals that the glaze has cured correctly.
The Oil
Oil is the medium that transforms the dough from a raw mass into a golden, crunchy treat. The type of oil matters; a neutral oil with a high smoke point, like canola or vegetable oil, works best. The oil temperature must be monitored closely; if it’s too hot, the exterior burns before the interior cooks; if it’s too cool, the rice balls absorb too much oil and become greasy. Using a thermometer is highly recommended to maintain the ideal 350°F. The oil also plays a role in the final texture; a proper frying temperature creates a crisp crust that cracks delightfully when bitten. The oil’s flavor should remain neutral, allowing the sweetness of the glaze to shine through. A well‑heated pan will also prevent sticking, which can ruin the shape of the balls.
The Final Flourish
The small splash of water added to the sugar glaze is the final flourish that turns an ordinary rice ball into a culinary masterpiece. This tiny adjustment ensures the glaze stays smooth and non‑sticky, allowing you to roll the balls without them sticking to each other or the pan. It also prevents the glaze from crystallizing, which can happen if the sugar concentration is too high. The result is a glossy coating that caramelizes just enough to give a slight crunch on the outside while keeping the interior moist. This flourish is a testament to the fact that sometimes the smallest changes can have the biggest impact on flavor and texture. When you taste the finished product, the glaze should feel silky and melt into the chewy center. The combination of the glaze and the dough’s chewiness creates a symphony of textures that will keep you coming back for more.
Everything’s prepped? Good. Let’s get into the real action. The next section will walk you through each step of the process, from mixing the dough to the final plating. I’ll keep you on track with sensory checkpoints and precise timing so you can replicate the exact results every time. This recipe is a dance of technique and timing, and I’ll guide you through each step with confidence and flair. By the end, you’ll have a batch of golden, chewy rice balls that are sure to impress. The anticipation builds as you prepare the ingredients, and the process itself is almost meditative. Let’s dive in and start crafting these delightful treats.
The Method — Step by Step
-
First, combine the glutinous rice flour and ½ cup of water in a medium bowl. Stir until the mixture forms a cohesive, sticky dough that is neither too dry nor too wet. The dough should feel tacky but manageable; if it’s too dry, add a teaspoon of water at a time until the right consistency is achieved. Let the dough rest for 10 minutes to allow the starches to fully hydrate. This resting period is critical for achieving that perfect chew. During the rest, you can prepare the sugar glaze, which will be the final coating. The aroma of the dough starting to settle is a sign that everything is moving in the right direction. Once rested, the dough will be ready to be molded into balls.
-
Next, shape the dough into small spheres about 1.5 inches in diameter. Use a small scoop or your hands to form even balls, ensuring each one is smooth and round. The uniformity of the balls ensures even cooking and a consistent texture. As you shape them, keep the dough covered with a damp cloth to prevent it from drying out. Feel the slight resistance as you roll the dough; this indicates the right amount of moisture. The dough should be pliable but firm enough to hold its shape. If you notice any lumps, gently knead them out with your fingertips. This step is where the magic begins, as the dough’s consistency will dictate the final texture. Once all balls are formed, set them aside on a lightly greased plate.
-
While the dough rests, prepare the sugar glaze. In a small saucepan, combine 1 cup of sugar and ¼ cup of water. Heat over medium-low heat, stirring constantly until the sugar dissolves completely. The mixture should reach a light amber color, indicating that the glaze is ready. Once the sugar has dissolved, remove the saucepan from the heat and allow it to cool slightly. The glaze should be warm enough to coat the rice balls but not so hot that it burns them. Stir in a splash of water to keep the glaze silky and prevent crystallization. This small adjustment ensures the glaze stays smooth and doesn’t become sticky. The aroma of caramelized sugar is a prelude to the final flavor profile.
-
Heat a deep skillet or wok with enough oil to cover the bottom about 1 inch thick. Use a thermometer to monitor the oil temperature, aiming for 350°F. The oil should be hot enough that a drop of water sizzles immediately upon contact. If the oil is too hot, the exterior of the rice balls will burn before the interior cooks; if it’s too cool, the balls will absorb too much oil and become greasy. Once the oil reaches the correct temperature, gently slide in a few rice balls at a time, being careful not to overcrowd the pan. The sizzling sound is a sign that the frying process has begun. As the balls cook, they will puff slightly and develop a golden crust. Flip them halfway through to ensure even browning. This step requires focus and attention to detail to avoid overcooking or undercooking.
-
Once the rice balls are golden brown, remove them from the oil with a slotted spoon and let them drain on a paper towel. The oil should be removed carefully to avoid excess greasiness. The sizzling sound as they hit the towel is a cue that they’re ready for the glaze. While the balls are still hot, dip them into the prepared sugar glaze, ensuring each ball is coated evenly. The glaze should cling to the surface like a fine mist, forming a glossy sheen. If you notice any glaze crystallizing, reheat it gently to dissolve the crystals. The glaze should be smooth and non‑sticky, allowing the balls to be handled without sticking. This final coating step is what gives the rice balls their signature shine and sweet flavor.
-
Place the glazed rice balls on a wire rack or a plate lined with parchment paper. Allow them to cool for a few minutes so the glaze can set properly. The glaze will harden slightly, creating a crisp outer layer that cracks delightfully when bitten. While the balls cool, you can prepare any optional garnishes or sauces, such as a drizzle of chocolate or a sprinkle of toasted sesame seeds. The cooling process also helps the dough firm up, making the rice balls easier to handle. If you’re serving them immediately, they will still be warm and slightly gooey on the inside. The contrast between the crisp glaze and the chewy center is what makes this dish irresistible. Keep an eye on the cooling time; too long and the glaze may become too hard.
-
Serve the rice balls warm, preferably within 30 minutes of frying. If you need to hold them for a while, store them in an airtight container at room temperature for up to 2 hours. The glaze may soften slightly if left too long, but the overall texture remains enjoyable. For longer storage, refrigerate them for up to 24 hours and reheat gently in a preheated oven at 350°F for 5 minutes. This will restore the crispness of the glaze and the chewiness of the dough. If you prefer a different flavor profile, consider adding a sprinkle of ground cinnamon or a dash of sea salt to balance the sweetness. The versatility of this recipe allows you to customize it to your taste. The final result is a delightful treat that satisfies both sweet cravings and a need for something crunchy.
-
Enjoy your homemade rice balls as a snack, dessert, or party favor. Pair them with a cup of hot tea or a glass of milk for a comforting finish. The aroma of caramelized sugar will linger in your kitchen long after you’ve finished eating. Take a moment to appreciate the craftsmanship that went into each bite, from the dough’s chew to the glaze’s shine. Share them with friends and family; they’re sure to become a conversation starter at any gathering. Remember, the secret to perfection lies in the details—resting time, oil temperature, and the glaze’s consistency. By mastering these elements, you’ll have a go‑to recipe that impresses everyone, no matter the occasion. The next time you’re craving something sweet, reach for this recipe and let the magic unfold. Let the flavors dance on your tongue and the textures sing in harmony.
Insider Tricks for Flawless Results
Even with a solid recipe, there are subtle nuances that can elevate your rice balls from good to unforgettable. These insider tricks are based on my own experiments and the feedback of friends who’ve tried this recipe. Each tip is designed to help you master the technique, avoid common pitfalls, and add a personal touch that makes the dish truly yours.
The Temperature Rule Nobody Follows
Oil temperature is the most critical factor in achieving that perfect golden crust. While many cooks rely on visual cues, a thermometer gives you precision. Keep the oil between 350°F and 360°F; this range ensures the exterior cooks quickly while the interior stays moist. If the oil is too hot, the glaze will burn before the dough sets; if it’s too cool, the rice balls will absorb oil and become soggy. I’ve found that a quick test—dropping a small piece of dough—helps gauge the temperature; if it sizzles immediately and rises to the surface, you’re in the sweet spot. This rule applies to all fried foods, but it’s especially important for sticky doughs like glutinous rice.
Why Your Nose Knows Best
Smell is a powerful indicator of doneness. As soon as the glaze starts to caramelize, you’ll notice a sweet, buttery aroma that signals the sugar is turning. If the aroma turns sharp or burnt, you’ve gone past the ideal point. The scent of freshly fried dough is also a cue; it should be warm and slightly nutty. Trusting your nose can save you from overcooking or undercooking the rice balls. In my experience, the first bite is the best test—if it feels too sweet or too dry, adjust the glaze or oil temperature next time. Your olfactory senses are a reliable guide when you’re trying to perfect a delicate balance.
The 5-Minute Rest That Changes Everything
After frying, let the rice balls rest for five minutes on a wire rack. This brief period allows the glaze to set and the steam to escape, preventing sogginess. Many people skip this step, thinking it’s unnecessary, but it makes a noticeable difference in texture. The glaze will firm up just enough to hold its shape, yet remain pliable enough to give a satisfying bite. If you’re serving the rice balls immediately, they’ll still be warm and slightly gooey on the inside. The rest period also helps the dough firm up, making the rice balls easier to handle. A quick rest is a small investment that pays off in mouthfeel.
Oil Temperature Precision
Using a thermometer is a game changer, especially for beginners. I’ve seen people rely on the “drop a piece of dough” test, but it’s not as reliable as a digital thermometer. The difference between 350°F and 360°F can mean the difference between a crisp and a soggy result. A consistent oil temperature also ensures even cooking, so each rice ball has the same texture and flavor. When the oil is stable, you can focus on shaping the dough and glazing without worrying about timing. This precision allows you to replicate the dish consistently, no matter who’s in the kitchen.
The Sweet Syrup Trick
Adding a splash of water to the sugar glaze prevents crystallization, giving you a silky finish. If the glaze crystallizes, it can create a gritty texture that ruins the mouthfeel. The water dilutes the sugar concentration just enough to keep it smooth without making it too runny. I like to add a teaspoon of water for every cup of sugar, but you can adjust based on the consistency you prefer. This trick is simple yet effective, and it’s something most recipes overlook. The result is a glaze that coats the rice balls evenly and gives them that perfect shine.
The Cooling Game
Cooling the rice balls on a wire rack is essential to maintain their structure. If you place them on a flat surface, the glaze can become soggy from the steam. A wire rack allows air to circulate, preventing moisture from pooling. The cooling process also helps the glaze set, giving you a crisp outer layer. This step is often overlooked, but it can make the difference between a dry or a soggy treat. The final product should feel firm on the outside and chewy on the inside. The cooling game is a small detail that elevates the overall experience.
Creative Twists and Variations
This recipe is a playground. Here are some of my favorite ways to switch things up: each variation adds a new flavor dimension or a playful twist that keeps the dish exciting. Feel free to experiment and create your own signature version. The base recipe is so versatile that you can adapt it to suit any palate or dietary need. Below are five variations that will take your rice ball game to the next level.
Coconut Caramel
Swap the regular sugar glaze for a coconut‑infused version. Use coconut milk in place of water and add shredded coconut to the glaze. The result is a tropical, buttery flavor that pairs wonderfully with the chewy rice. This variation is perfect for summer gatherings or a beachside snack. The coconut adds a subtle nutty aroma that enhances the caramel notes. Serve with a drizzle of toasted coconut flakes for extra crunch. The coconut caramel glaze gives the rice balls a luxurious, exotic twist.
Chocolate Drizzle
After the glaze sets, drizzle melted dark chocolate over the rice balls. The chocolate adds a rich, bittersweet contrast to the sweetness of the glaze. Use a fork to swirl the chocolate, creating a marbled effect. The chocolate also adds a glossy finish that looks as good as it tastes. This variation is a hit with chocolate lovers and makes for an impressive dessert presentation. The combination of chocolate and caramelized sugar creates a decadent flavor profile.
Matcha Glaze
Infuse the sugar glaze with matcha powder for a subtle green tea flavor. The matcha adds a slightly bitter note that balances the sweetness. The glaze will also take on a beautiful green hue, making the rice balls visually striking. Sprinkle a pinch of matcha on top for an extra burst of flavor. This variation is ideal for a sophisticated snack or a tea‑time treat. The matcha glaze gives the rice balls a unique, earthy undertone that pairs well with the chewy center.
Spicy Chili Dust
After frying, sprinkle a pinch of chili flakes over the rice balls. The heat adds a surprising kick that contrasts with the sweetness. This variation is a great way to introduce a spicy element to a traditionally sweet dish. The chili flakes also add a subtle crunch and a burst of color. Serve with a cooling yogurt dip to balance the heat. The spicy chili dust is a fun way to add a little excitement to your rice ball experience.
Balsamic Glaze
Replace the sugar glaze with a balsamic reduction for a tangy, savory twist. The balsamic vinegar’s acidity cuts through the sweetness and adds depth. Drizzle the reduction over the rice balls after frying, letting it caramelize slightly. The result is a sweet and savory combination that’s perfect for an appetizer or a light dessert. The balsamic glaze also gives the rice balls a glossy finish that looks elegant on any plate. This variation is a great way to showcase the versatility of the base recipe.
Each of these variations offers a new flavor experience while retaining the core texture of the rice balls. The base recipe is flexible enough to accommodate any ingredient you can imagine. Experimenting with different glazes, toppings, or even the dough itself can lead to endless creative possibilities. The key is to keep the balance of sweetness, chewiness, and crispness. With these variations, you’ll never get bored of this classic treat.
Storing and Bringing It Back to Life
Fridge Storage
Store the rice balls in an airtight container at room temperature for up to 2 hours. If you need to keep them longer, refrigerate them for up to 24 hours. The glaze may soften slightly if left in the fridge, but the overall texture remains enjoyable. When you’re ready to eat, let them sit at room temperature for a few minutes to regain their optimal flavor. The coolness of the fridge helps preserve the chewiness of the dough while preventing the glaze from becoming too hard. This method is ideal for meal prep or for serving at a later time during a gathering. The rice balls will still taste fresh and delicious, with a slightly firmer glaze.
Freezer Friendly
For longer storage, freeze the rice balls in a single layer on a parchment paper‑lined tray. Once frozen, transfer them to a freezer bag or airtight container. They can be kept for up to 1 month. When you’re ready to serve, thaw them at room temperature for 20 minutes or reheat in a preheated oven at 350°F for 5 minutes. The glaze will re‑crisp, and the dough will regain its chewiness. Freezing is a great way to have a batch of ready‑to‑serve rice balls for parties or special occasions. The texture and flavor remain consistent, making this method a convenient option.
Best Reheating Method
Reheat the rice balls in a 350°F oven for 5 minutes to restore the crispness of the glaze. If you prefer a quicker method, use a microwave on low power for 15 seconds, but be careful not to overheat and melt the glaze. The oven method is the best way to maintain the original texture and flavor profile. The heat evenly redistributes the moisture inside the dough, giving it that satisfying chew. After reheating, allow the rice balls to cool for a minute before serving. The glaze should feel slightly crisp on the outside while the center remains moist. This method ensures that each bite is as delightful as the first time you made them.