I was standing in my cramped kitchen, staring at a half‑roasted pineapple that had been abandoned in the fridge for weeks. The smell of that fruit was a warning sign, but also a promise of something sweet and tropical. I had a dare from a friend: make the most unforgettable mini cheesecake that could survive the heat of a July summer. So I pulled out every ingredient I could find, and the air filled with the scent of coconut milk and condensed sugar. Little did I know that this simple challenge would turn into a culinary revelation.
The first time I tasted the batter, a wave of nostalgia washed over me. It felt like childhood summers in a beach town, where the sun never seemed to set and the ocean breeze carried the scent of pineapples and coconut. The texture was silky, with a hint of crunch from the graham cracker crust, and the flavor burst like a tropical fireworks display. My friends, who were skeptical at first, fell in love at the first bite, and the room filled with delighted chatter. That moment cemented my belief that this recipe was something special.
I realized that the secret lay in the balance between sweet, tangy, and creamy, and in the way the pineapple was caramelized to bring out its natural sugars. The condensed milk added a velvety richness that turned a simple dessert into a luxurious treat. The coconut milk brought a subtle warmth that made the cheesecake feel like a hug on a hot day. Every component worked together like a well‑orchestrated symphony, and the result was a mini cheesecake that was both indulgent and refreshing. This is the version that will change the way you think about desserts.
I dare you to taste this and not go back for seconds. The combination of pineapple, coconut, and condensed milk is a game‑changer that will keep your taste buds dancing. Picture yourself pulling this out of the oven, the whole kitchen smelling incredible, and a crowd of friends gathering around. This is hands down the best version you'll ever make at home, and you’ll wonder how you ever settled for anything else. Stay with me here — this is worth it.
What Makes This Version Stand Out
- Flavor: The caramelized pineapple slices deliver a depth of sweetness that cuts through the richness of the cheesecake, creating a balanced bite that lingers.
- Texture: The combination of a crisp graham cracker base and a silky filling results in a contrast that feels both comforting and exciting.
- Ingredient Quality: Using fresh, organic pineapple and full‑fat coconut milk elevates the flavor profile beyond what canned ingredients can offer.
- Make‑Ahead Potential: These mini cheesecakes can be prepared a day in advance, allowing the flavors to meld and the crust to firm up for an even better experience.
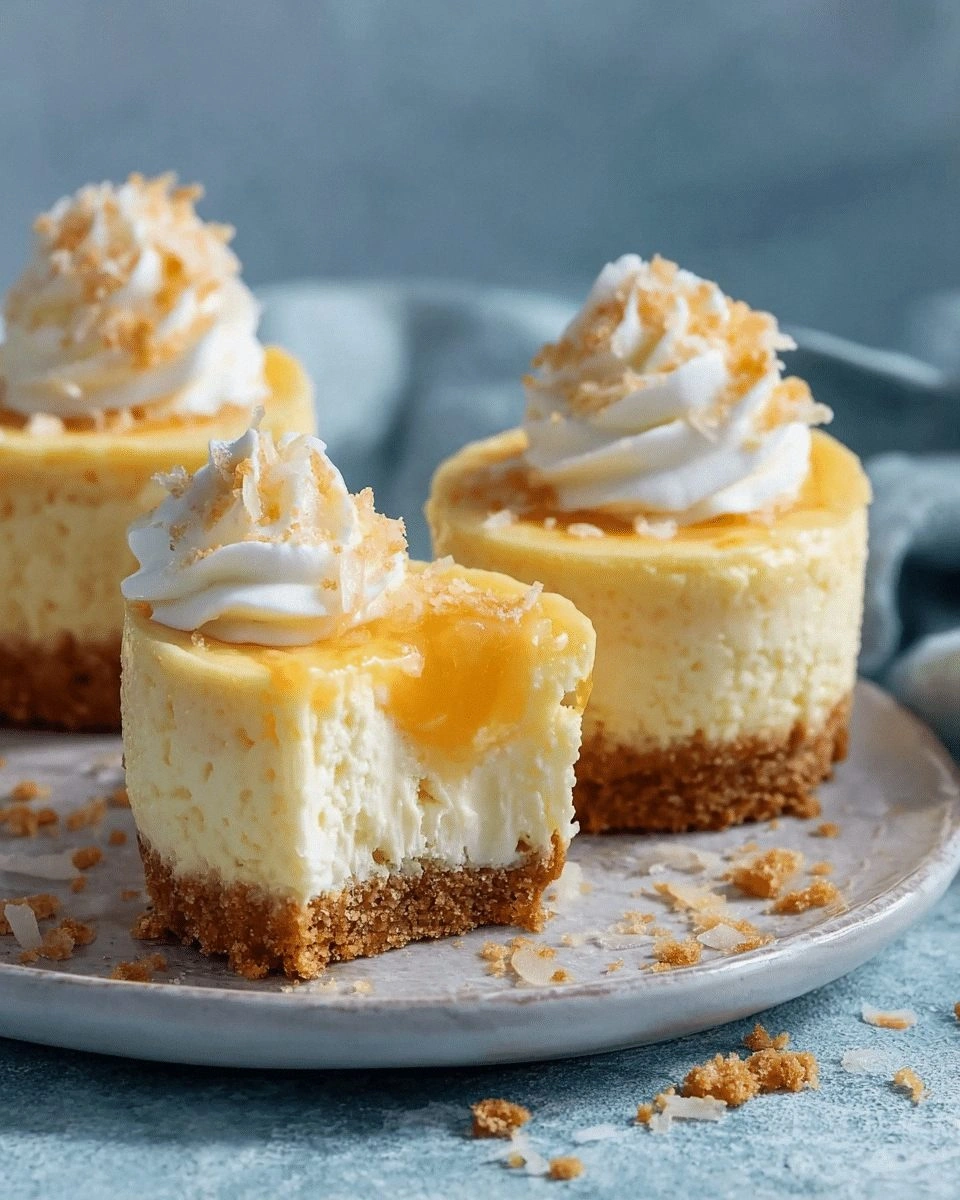
- Visual Appeal: The bright pineapple topping against the creamy white cheesecake creates an eye‑catching presentation that works for parties or a quiet family dinner.
- Portability: Their bite‑size nature makes them ideal for picnics, potlucks, or as a dessert on a camping trip where you want a sweet treat that travels well.
Inside the Ingredient List
The Flavor Base
Fresh pineapple is the star of this dish, and it deserves to shine. Use a ripe, sweet pineapple that has a fragrant aroma; this will provide the natural sweetness that balances the condensed milk’s richness. If you can’t find fresh pineapple, canned pineapple in juice (not syrup) works, but it will alter the texture slightly. Remember, the pineapple will be caramelized, so it should be sliced thinly to ensure even cooking.
Condensed milk is the key to the cheesecake’s silky mouthfeel. It’s thicker than regular milk, so it helps bind the filling together without the need for heavy cream. A 14‑oz can is the standard measure for a 4‑serving batch. If you prefer a lighter version, substitute half of the condensed milk with coconut milk to reduce calorie density while retaining flavor.
Coconut milk adds a tropical nuance that complements the pineapple. Use full‑fat coconut milk for a richer taste, or light coconut milk for a milder profile. The coconut milk also helps create a smoother texture, especially when blended with the cream cheese. A half‑cup is sufficient for a 4‑serving portion; adjust accordingly if you scale the recipe.
The Texture Crew
Cream cheese is the backbone of any cheesecake. Choose a room‑temperature, unsalted variety to avoid the need for extra salt. It should be soft enough to blend smoothly with the other ingredients. For a denser bite, use a 4‑oz block; for a lighter texture, use a 2‑oz block, but keep the ratio of other liquids consistent.
Graham cracker crumbs form the crunchy foundation that contrasts with the creamy filling. They also add subtle sweetness and a buttery flavor. Crush them finely to avoid clumps; a food processor works best. Use about 1 cup of crumbs for a 4‑serving batch, and mix with 2 tablespoons of melted butter to bind the crumbs together before pressing into the pan.
Eggs act as a binder and give the cheesecake structure. A single large egg is enough for the 4‑serving version. Beat the egg lightly before adding it to the mixture to avoid lumps. If you’re vegan, a flaxseed egg (1 tablespoon ground flaxseed + 3 tablespoons water) can replace the egg with a similar binding effect.
The Unexpected Star
Vanilla extract is the unsung hero that ties all flavors together. A teaspoon of pure vanilla provides warmth and depth. Use a high‑quality extract for the best aroma; cheaper brands can taste flat. If you’re allergic, a drop of almond or coconut extract can serve as a suitable substitute.
A pinch of salt is essential to enhance the sweetness and balance the flavors. It’s a small detail that makes a big difference. Use sea salt for a subtle crunch, or Himalayan pink salt for a mineral edge. Don’t skip it; the absence of salt can make the dessert taste overly sweet.
The Final Flourish
A splash of coconut water adds a subtle hint of coconut flavor without adding extra calories. It also helps to keep the cheesecake moist during baking. Use just a tablespoon to avoid making the batter too runny. This final touch is optional but highly recommended for an authentic tropical experience.
Everything's prepped? Good. Let's get into the real action...
The Method — Step by Step
- Prepare the crust. In a medium bowl, combine 1 cup graham cracker crumbs, 2 tablespoons melted butter, and 1/2 cup sugar. Stir until the mixture resembles wet sand. Press the crumb mixture firmly into the bottom of a 9‑inch springform pan, using a flat glass or the back of a spoon to create an even layer. Chill the crust for 15 minutes to set it before adding the filling. This step ensures a crisp base that holds up against the moist filling.
- Blend the filling. In a blender or food processor, combine 8 oz softened cream cheese, 1/2 cup sweetened condensed milk, 1/2 cup coconut milk, 1 egg, 1 teaspoon vanilla extract, and a pinch of salt. Blend until completely smooth, scraping down the sides as needed. The mixture should be silky and free of lumps. This process ensures a uniform texture that melts in your mouth.
- Caramelize the pineapple. Slice the pineapple into thin wedges and spread them in a single layer on a baking sheet. Drizzle with a tablespoon of melted butter and sprinkle a pinch of sugar over the top. Bake at 400°F for 8–10 minutes, until the edges are golden and the pineapple releases its juices. Let the pineapple cool to room temperature before adding it to the cheesecake mixture. The caramelization intensifies the pineapple’s natural sweetness and adds a subtle buttery flavor.
- Assemble the cheesecake. Gently fold the caramelized pineapple into the smooth cheesecake batter. Pour the mixture over the chilled crust, smoothing the top with a spatula. The batter should settle evenly, with the pineapple pieces distributed throughout. This step creates the signature burst of pineapple flavor in every bite.
- Bake the cheesecake. Place the pan in a preheated oven at 325°F. Bake for 30 minutes, then reduce the heat to 275°F and bake for an additional 20 minutes. The cheesecake should be set around the edges but still slightly jiggle in the center. The gentle lower temperature prevents cracking and ensures a smooth finish. Watch the timer closely; overbaking can dry out the pineapple.
- Cool and chill. After removing the cheesecake from the oven, let it cool on a wire rack for 15 minutes. Then cover it with plastic wrap and refrigerate for at least 4 hours, preferably overnight. The chilling phase allows the flavors to meld and the cheesecake to firm up, making it easier to slice into mini portions.
- Serve and enjoy. Cut the cheesecake into bite‑sized squares or use a small cookie cutter to create uniform mini portions. Arrange them on a platter and garnish with fresh mint or a drizzle of caramel sauce if desired. Serve chilled for the best texture and flavor. This final presentation turns a simple dessert into a showstopper that will impress anyone who sees it.
That's it — you did it. But hold on, I've got a few more tricks that'll take this to another level. Each step is designed to bring out the best in the ingredients, and a few extra touches will make your mini cheesecakes unforgettable.
Insider Tricks for Flawless Results
The Temperature Rule Nobody Follows
Many bakers bake cheesecakes at a high temperature for a short time, hoping to get a firm set quickly. However, the slow, low‑heat method described here prevents cracks and ensures a silky finish. Keep the oven temperature between 325°F and 275°F throughout the bake, and always use a water bath if you’re experimenting with larger pans. This trick keeps the cheesecake moist and prevents the dreaded “crack” that ruins the look.
Why Your Nose Knows Best
The aroma of caramelizing pineapple is a cue that the fruit is ready. If the smell is sweet and buttery, the pineapple is perfectly caramelized. If it’s still raw, give it a few more minutes. Trust your nose; it will guide you to the ideal texture and flavor. A well‑caramelized pineapple adds depth without overpowering the cheesecake.
The 5‑Minute Rest That Changes Everything
After baking, let the cheesecake rest in the oven with the door slightly ajar for 5 minutes before taking it out. This step allows the residual heat to finish the cooking process gently, preventing sudden temperature changes that can cause cracking. It also helps the cheesecake set more evenly, giving you a smooth top and a perfectly creamy interior.
Use a Parchment‑Lined Pan
Lining the springform pan with parchment paper before adding the batter ensures that the cheesecake doesn’t stick to the sides. This makes removal easier and keeps the crust intact. The parchment also helps the cheesecake bake evenly, as it acts as a barrier between the batter and the pan’s metal.
Add a Splash of Coconut Water
A tablespoon of coconut water in the batter adds a subtle coconut flavor and keeps the cheesecake moist. It also balances the sweetness of the condensed milk, giving the dessert a more rounded taste. Coconut water is low in calories and adds electrolytes, making it a smart addition for a tropical treat.
The Final Chill
Refrigerating the cheesecake for at least 4 hours, preferably overnight, is crucial. This chilling time allows the flavors to meld and the texture to firm up, making slicing easier and the bite more satisfying. If you’re short on time, a 2‑hour chill will still produce good results, but the texture will be slightly looser.
Creative Twists and Variations
This recipe is a playground. Here are some of my favorite ways to switch things up:
Mango Madness
Swap the pineapple for diced mango and add a pinch of chili powder for a sweet‑spicy kick. The mango’s tropical sweetness pairs wonderfully with the coconut milk, and the chili adds a surprising heat that lingers on the palate. This variation is perfect for those who love a little spice in their desserts.
Chocolate Coconut Swirl
Fold in 1/4 cup of melted dark chocolate into the cheesecake batter for a rich chocolate twist. The chocolate complements the coconut, creating a decadent flavor profile. Garnish with shaved chocolate and a drizzle of chocolate sauce for an extra wow factor.
Almond Crunch
Replace the graham cracker crust with almond flour and add toasted almond slivers on top. The nutty crunch contrasts with the creamy filling and adds a subtle nuttiness that pairs well with the coconut. This version is gluten‑free and offers a different textural experience.
Boozy Pineapple
Add 1 tablespoon of pineapple rum or coconut rum to the batter for a grown‑up version. The alcohol adds depth and a subtle warmth that enhances the tropical notes. Serve with a splash of rum on the side for a cocktail‑inspired dessert.
Lemon Zest Surprise
Incorporate the zest of one lemon into the batter for a bright citrus twist. The lemon zest cuts through the sweetness, balancing the flavors and adding a fresh aroma. This variation is especially refreshing during hot summer days.
Mini Coconut Macaroons
For a crunchy alternative, replace the cheesecake filling with shredded coconut macaroons and top with a drizzle of condensed milk. The macaroons provide a chewy texture, while the condensed milk adds sweetness. This version is a perfect bite‑size treat for parties.
Storing and Bringing It Back to Life
Fridge Storage
Store the mini cheesecakes in an airtight container in the refrigerator for up to 5 days. Keep them chilled to maintain the creamy texture and prevent mold growth. If you notice any condensation, blot the surface with a paper towel to keep them fresh.
Freezer Friendly
For longer storage, wrap each mini cheesecake individually in plastic wrap and place them in a freezer bag. Freeze for up to 3 months. When ready to serve, thaw overnight in the refrigerator and let them sit at room temperature for 15 minutes before serving.
Best Reheating Method
Reheat frozen or chilled mini cheesecakes in the oven at 300°F for 10 minutes, or microwave on low power for 30 seconds. Add a tiny splash of water before reheating; this steams the cheesecake back to perfection and prevents it from drying out. Let them rest for a minute before slicing to allow the heat to distribute evenly.