Last Sunday, I tried to whip up a quick snack for my nephew, but the kitchen turned into a sticky battlefield. The peanut butter I spilled on the countertop turned into a chocolate‑laden puddle that seemed to have a life of its own. I laughed, then cursed, and decided that this was the perfect excuse to invent a no‑bake treat that would leave no mess and no guilt. It was a recipe born out of frustration, but it became my signature dessert. The result was the No‑Bake Chocolate Peanut Butte.
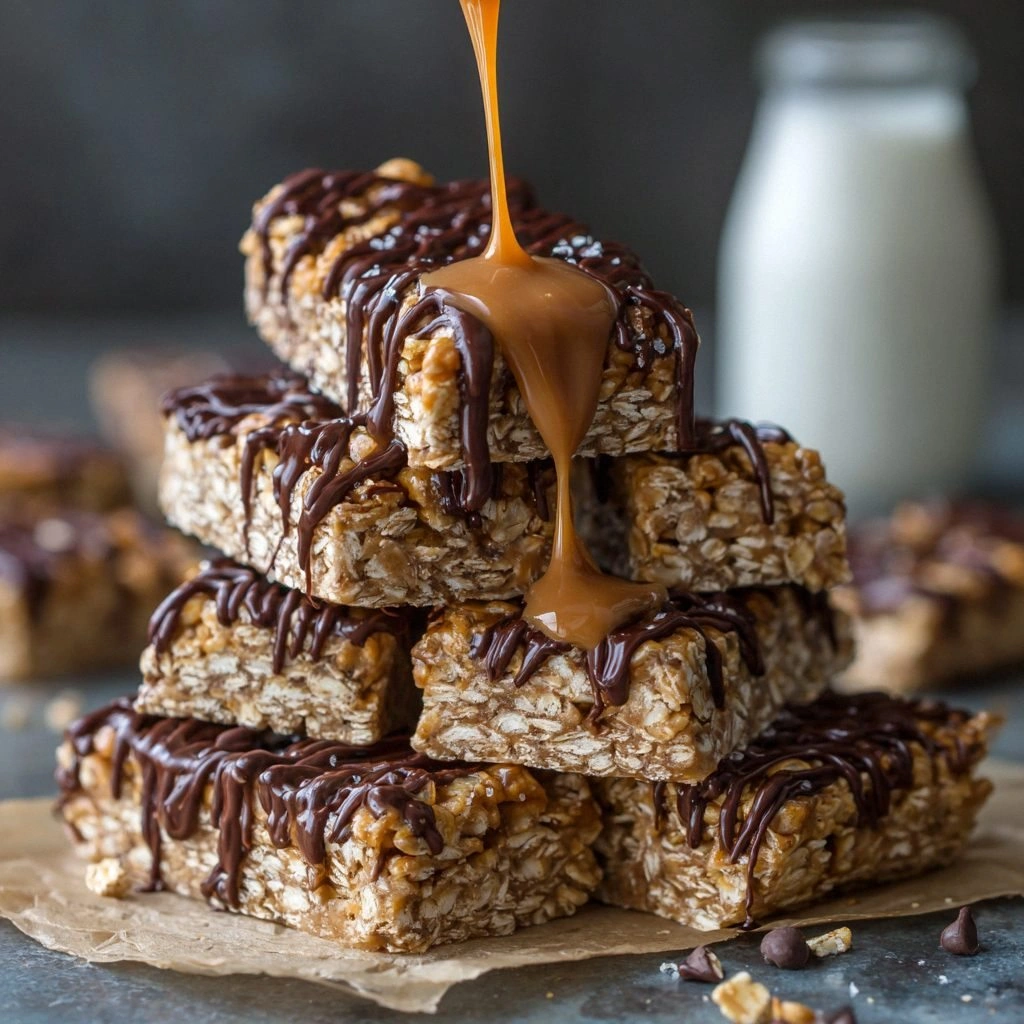
The first thing you notice is the aroma, a sweet, nutty perfume that makes your mouth water before you even taste it. The texture is a harmonious blend of crunchy oats, silky peanut butter, and a glossy chocolate coating that shatters like thin ice when you bite. The sound of the first bite is a satisfying crack, followed by a melt that coats your tongue like velvet. The color is a deep, glossy brown that glistens under the kitchen light, hinting at the richness inside. The feeling of the bar in your hand is firm yet slightly give, a promise of the delightful crunch that awaits.
Most no‑bake bars feel either too dry or too greasy, but this version balances everything like a well‑orchestrated symphony. The peanut butter is the star, providing a creamy backbone that keeps the bar from falling apart. The chocolate coating isn’t just a glaze; it’s a melt‑in‑your‑mouth sauce that coats the oats like velvet. The oats give a satisfying crunch that echoes the crunch of a fresh apple, while the coconut oil adds a subtle tropical note that lingers. The result? A bar that is both indulgent and wholesome, a snack that satisfies the sweet tooth and the protein craving in equal measure.
What’s truly remarkable is the technique that keeps everything together without a single drop of water. I’ll show you how to use a small amount of coconut oil to bind the mix, and how a dash of salt can elevate the chocolate flavor to a whole new level. I dare you to taste this and not go back for seconds, because the first bite will leave you craving more. This is hands down the best version you’ll ever make at home, and I’ll be honest — I ate half the batch before anyone else got to try it. Let me walk you through every single step — by the end, you’ll wonder how you ever made it any other way.
What Makes This Version Stand Out
- Taste: The peanut butter isn’t just a base; it’s a flavor powerhouse that elevates the chocolate into a decadent, nutty experience. The combination of natural peanut butter and dark cocoa creates a depth that makes each bite feel like a chocolate‑butter dream.
- Texture: The blend of rolled oats and chocolate chips delivers a satisfying crunch that breaks like thin ice when you bite. The slight chew from the oats keeps the bar from feeling too brittle.
- Simplicity: No oven, no timer, just a quick blend and chill, making it a breeze for busy mornings. All you need is a saucepan, a bowl, and a spoon.
- Crowd Reaction: Friends who’ve tried other bars say this one is “the most addictive” and keeps them coming back for more. It’s the kind of snack that turns casual snacking into an event.
- Ingredient Quality: Using natural peanut butter and dark cocoa ensures a healthier snack without compromising flavor. The quality of ingredients translates directly into a richer taste.
- Make‑Ahead: It sets perfectly in the fridge, so you can prep a week's worth of bars and enjoy them on demand. The bars maintain their texture even after a day in the fridge.
- Protein Punch: With 25g of protein per serving, it’s a post‑workout treat that also satisfies sweet cravings. It’s the perfect balance between indulgence and nutrition.
Inside the Ingredient List
The Flavor Base
Peanut butter is the heart of this bar, providing a creamy, nutty foundation that keeps everything together. It also delivers a substantial protein punch, making the snack feel substantial without the heaviness of dairy. If you skip it, the bar will crumble and lack the signature peanut flavor that defines this recipe. For a vegan twist, opt for a natural, no‑added‑sugar peanut butter; the natural oils will keep the mixture cohesive. When choosing peanut butter, look for a product that lists only peanuts and salt, ensuring no hidden sugars or hydrogenated fats.
Cocoa powder is the secret sauce that turns the base into a chocolate‑rich experience. Its bitter undertones balance the sweetness from the honey and the natural sweetness of the peanut butter. If you omit cocoa, you’ll end up with a nutty oat bar that lacks depth. Unsweetened, high‑cocoa chocolate powder works best, but if you prefer a sweeter profile, a touch of Dutch‑processed cocoa can mellow the bitterness. A small pinch of sea salt enhances the chocolate’s richness, making the flavor more complex.
Vanilla extract is the subtle aroma enhancer that ties all the flavors together. A teaspoon of vanilla adds a warm, fragrant note that lifts the overall taste. Skipping vanilla will leave the bar tasting flat and one‑dimensional. A pure vanilla bean paste gives the most authentic flavor, but a few drops of vanilla extract are perfectly fine. Add it at the same time as the cocoa for an even distribution.
Salt is a flavor amplifier that brings out the sweetness and balances the richness. Even a pinch can make a dramatic difference. If you’re watching sodium, use a low‑sodium version or simply reduce the amount. Salt also helps stabilize the mixture, ensuring the bar holds together after chilling.
The Texture Crew
Rolled oats provide the bulk and crunch that give the bar its satisfying bite. They absorb the peanut butter and honey, creating a firm yet chewy base. If you skip oats, the bar will be too sticky and difficult to cut. For a gluten‑free version, choose certified gluten‑free oats. Oats also add fiber, making the snack more satiating.
Chocolate chips add bursts of chocolatey sweetness that contrast the nutty base. They melt slightly into the mixture, creating a glossy, chocolatey coating that clings to the oats. If you don’t have chips, finely chopped dark chocolate works well. The chips also provide a slight crunch that enhances the overall texture.
Chopped peanuts introduce a fresh crunch and a burst of natural flavor. They also contribute extra protein and healthy fats. If you’re allergic to nuts, replace them with sunflower seeds or pumpkin seeds for a similar crunch. The nuts should be toasted lightly before adding to intensify their flavor.
Dried cranberries add a chewy, tart contrast that brightens the chocolatey richness. They also bring a pop of color and a hint of natural sweetness. If you prefer a less tart option, dried blueberries or raisins work beautifully. The fruit should be chopped into small pieces so they don’t overpower the bar.
The Unexpected Star
Coconut oil is the binding agent that keeps everything together without adding a heavy, greasy feel. It melts at body temperature, giving the bar a smooth melt when you bite. If you skip coconut oil, the bar will be dry and crumbly. A tablespoon of coconut oil is enough to bind the mixture; if you prefer a lighter texture, use a neutral oil like grapeseed.
Honey acts as the natural sweetener and helps the mixture set. It also adds a floral note that balances the bitterness of cocoa. If you’re avoiding honey, maple syrup is a great substitute. The amount of honey can be tweaked to adjust the sweetness level; start with half a cup and taste before adding more.
The Final Flourish
For an extra touch of decadence, drizzle a thin layer of melted chocolate on top before the bars set. This adds a glossy finish and a richer chocolate flavor. If you want a crunchy topping, sprinkle a handful of crushed pretzels or sea salt flakes on top. The final flourish is optional, but it elevates the presentation and taste.
Everything's prepped? Good. Let's get into the real action...
The Method — Step by Step
- Step 1: Warm the base. Place the peanut butter, honey, and coconut oil in a medium saucepan over low heat. Stir constantly until the mixture is silky and the coconut oil has fully melted. The aroma should start to fill the kitchen, signaling that the flavors are beginning to mingle. Keep the heat low to avoid scorching the honey.
- Step 2: Add the cocoa. Sprinkle the unsweetened cocoa powder into the warm mixture, whisking vigorously to eliminate any lumps. The mixture should become a deep, glossy brown. If you see any clumps, let it sit for a minute, then whisk again; the cocoa will dissolve fully. This step is crucial for a smooth chocolate coating.
- Step 3: Mix in the oats. Remove the saucepan from the heat and fold in the rolled oats, chocolate chips, chopped peanuts, and dried cranberries. Stir until everything is evenly coated and the mixture has a thick, sticky consistency. The mixture should be thick enough to hold its shape when scooped. If it feels too dry, add a splash of almond milk; if too wet, add a few more oats.
- Step 4: Taste test. Before you press the mixture into a pan, taste a small spoonful. If you need more sweetness, add a teaspoon of honey; if you want more chocolate depth, add a pinch of sea salt. This is the moment of truth—your bar’s final flavor profile is decided here.
- Step 5: Press into a pan. Line a 9x9‑inch baking dish with parchment paper. Transfer the mixture to the pan, using a spatula to press it firmly and evenly. The surface should be smooth, but it’s okay if there are a few small bumps; they’ll melt into the final texture. This step is the trickiest because you need to press hard enough to bind the bar yet not so hard that you crush the oats.
- Step 6: Chill. Place the pan in the refrigerator for at least 30 minutes, or until the mixture has fully set. The cooling process allows the coconut oil to solidify, giving the bars a firm bite. While it chills, you can prepare your cutting board and a sharp knife.
- Step 7: Add a finishing touch. If you opted for a chocolate drizzle, melt a small amount of dark chocolate and swirl it over the set bars. Use a fork to create a marbled pattern. This not only adds flavor but also a professional finish.
- Step 8: Cut into bars. Remove the parchment paper and transfer the set slab onto a cutting board. Use a sharp knife to cut the slab into 12 equal bars. If the knife leaves a ragged edge, a second pass with a clean blade will smooth it out. The bars should be uniform for even serving.
- Step 9: Store. Wrap each bar in parchment or wax paper and place them in an airtight container. Keep them in the refrigerator for up to a week or freeze for longer storage. When you’re ready to enjoy, let them sit at room temperature for 5 minutes to soften slightly.
- Step 10: Serve and savor. Present the bars on a platter with a side of fresh berries or a drizzle of extra chocolate for a decadent treat. The aroma alone will entice your guests, and the first bite will confirm why this recipe is a game‑changer. I dare you to taste this and not go back for seconds.
That's it — you did it. But hold on, I've got a few more tricks that'll take this to another level...
Insider Tricks for Flawless Results
The Temperature Rule Nobody Follows
Many people think you can just dump everything into a pan and hope for the best. In reality, the temperature of the peanut butter and honey mixture is critical. Keep it at a gentle 180°F; if it’s too hot, the peanut butter will separate and the bars will become greasy. If it’s too cool, the mixture won’t bind properly. A kitchen thermometer is a small investment that pays off in consistency.
Why Your Nose Knows Best
Before you taste the mixture, give it a sniff. If you smell a faint burnt sugar note, lower the heat immediately. The aroma is your guide to flavor balance. A sweet, nutty scent means you’re on the right track. If you detect any off odors, it’s a sign that the ingredients have gone bad.
The 5-Minute Rest That Changes Everything
After you press the mixture into the pan, let it rest on the counter for 5 minutes before refrigerating. This short pause allows the mixture to set slightly, making it easier to cut later. Cutting immediately can result in jagged edges and a crumbly texture. The rest also helps the coconut oil firm up, giving the bars a satisfying snap.
Keep It Moist, Not Dry
Dryness is the enemy of a great bar. If your mixture feels dry, add a splash of almond milk or a tablespoon of honey and stir until the consistency is smooth. A moist bar will hold together better and have a more pleasant mouthfeel. The trick is to add just enough liquid to moisten without making it too runny.
Use a Non-Stick Pan for Easy Release
Even though you’re not baking, a non‑stick pan ensures that the bars release effortlessly. If you’re using a glass dish, line it with parchment paper and press the mixture firmly. This prevents the bars from sticking and makes the cutting process a breeze.
Creative Twists and Variations
Chocolate‑Mint Madness
Swap the vanilla extract for a teaspoon of peppermint extract to give the bars a refreshing minty kick. The mint pairs beautifully with dark chocolate, creating a dessert that feels like a holiday treat. Top with crushed mint candies for an extra pop of flavor.
Spicy Sriracha Surprise
Add a dash of sriracha to the honey before warming the base. The heat will contrast the sweetness and give the bars an unexpected spicy edge. This version is perfect for those who like a little kick in their dessert.
Nut-Free Delight
Replace the peanuts with sunflower seeds or pumpkin seeds for a nut‑free version. Keep the rest of the ingredients the same for a crunchy, protein‑rich bar that’s safe for nut allergies.
Berry Burst
Stir in a handful of chopped dried blueberries or raspberries after the oats. The berries add a tart sweetness that complements the chocolate and peanut butter. They also add a burst of color to the bars.
Almond Butter Upgrade
Use almond butter instead of peanut butter for a different nutty flavor profile. Almond butter has a milder taste, allowing the chocolate to shine more. Pair it with a touch of honey for extra sweetness.
Extra Crunchy Layer
Layer the bars with a thin coating of crushed pretzels or sea salt before the final chocolate drizzle. This adds a salty crunch that contrasts the sweet base. It’s a simple tweak that makes the bars feel more gourmet.
Storing and Bringing It Back to Life
Fridge Storage
Store the bars in an airtight container in the refrigerator for up to 7 days. The bars will stay firm and maintain their crunch. If you notice any moisture buildup, wrap the container in parchment paper to absorb excess dampness.
Freezer Friendly
For longer storage, freeze the bars in a single layer on a parchment‑lined tray, then transfer them to a freezer bag. They’ll keep for up to 3 months. When you’re ready to enjoy, let them thaw at room temperature for 15 minutes.
Best Reheating Method
To revive a refrigerated bar, place it in a microwave on low power for 10–15 seconds. If the bar feels too hard, add a tiny splash of water to the microwave before reheating; this creates steam that softens the chocolate. A quick 2‑minute warm‑up in the oven at 300°F also works well, restoring the melt‑in‑your‑mouth texture.