Picture this: I’m standing in my cramped kitchen, the timer on the old microwave buzzing like an angry bee, and a sudden craving for something that screams sunshine hits me like a wave. I grabbed the nearest box of cake mix, tossed in a can of crushed pineapple, and thought, “What could possibly go wrong?” The batter splattered onto the counter, the pineapple juice dripped like tropical rain, and I swear I heard my oven sigh in anticipation. That chaotic moment sparked the birth of what I now proudly call the Pineapple Heaven Cake—a dessert that turned a kitchen disaster into a tropical triumph.
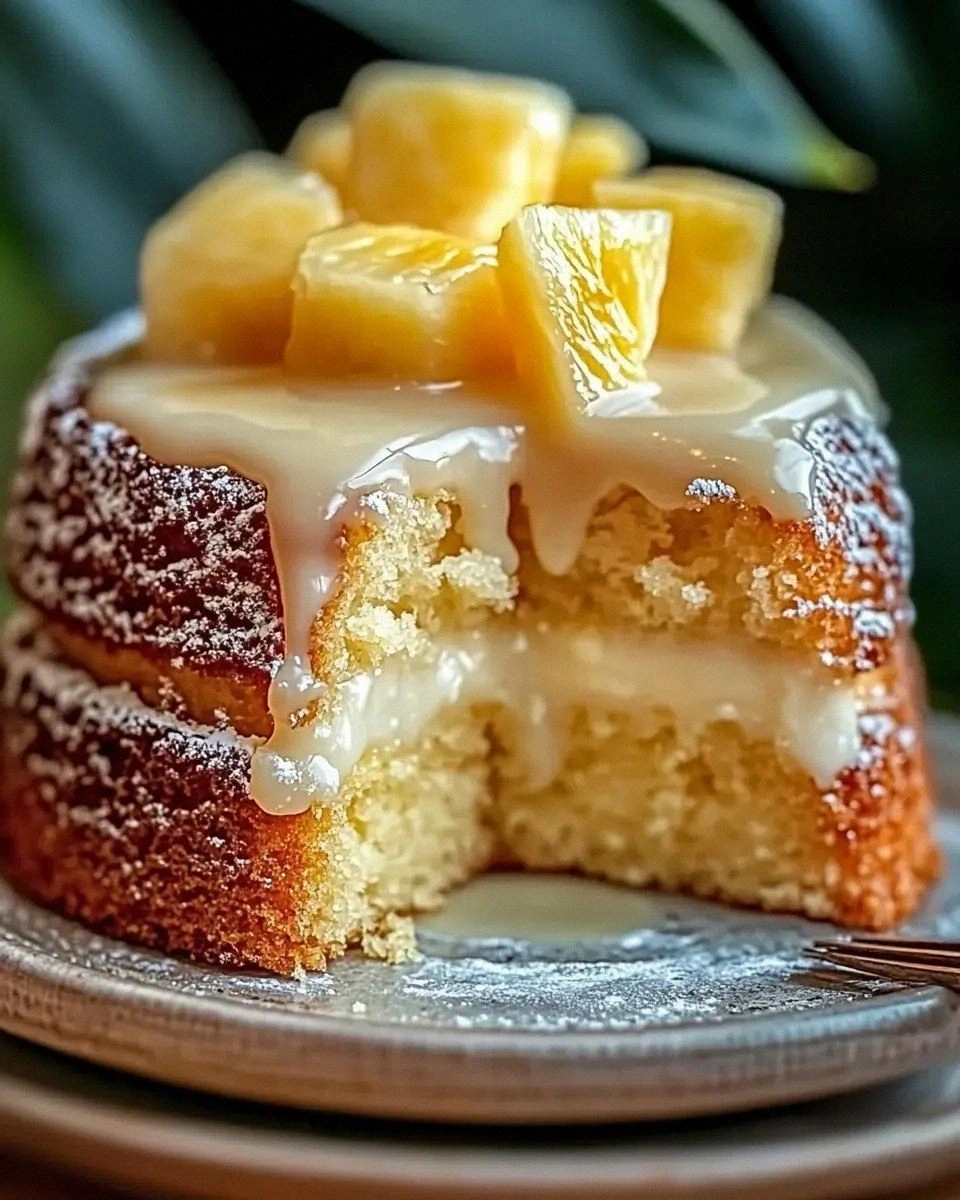
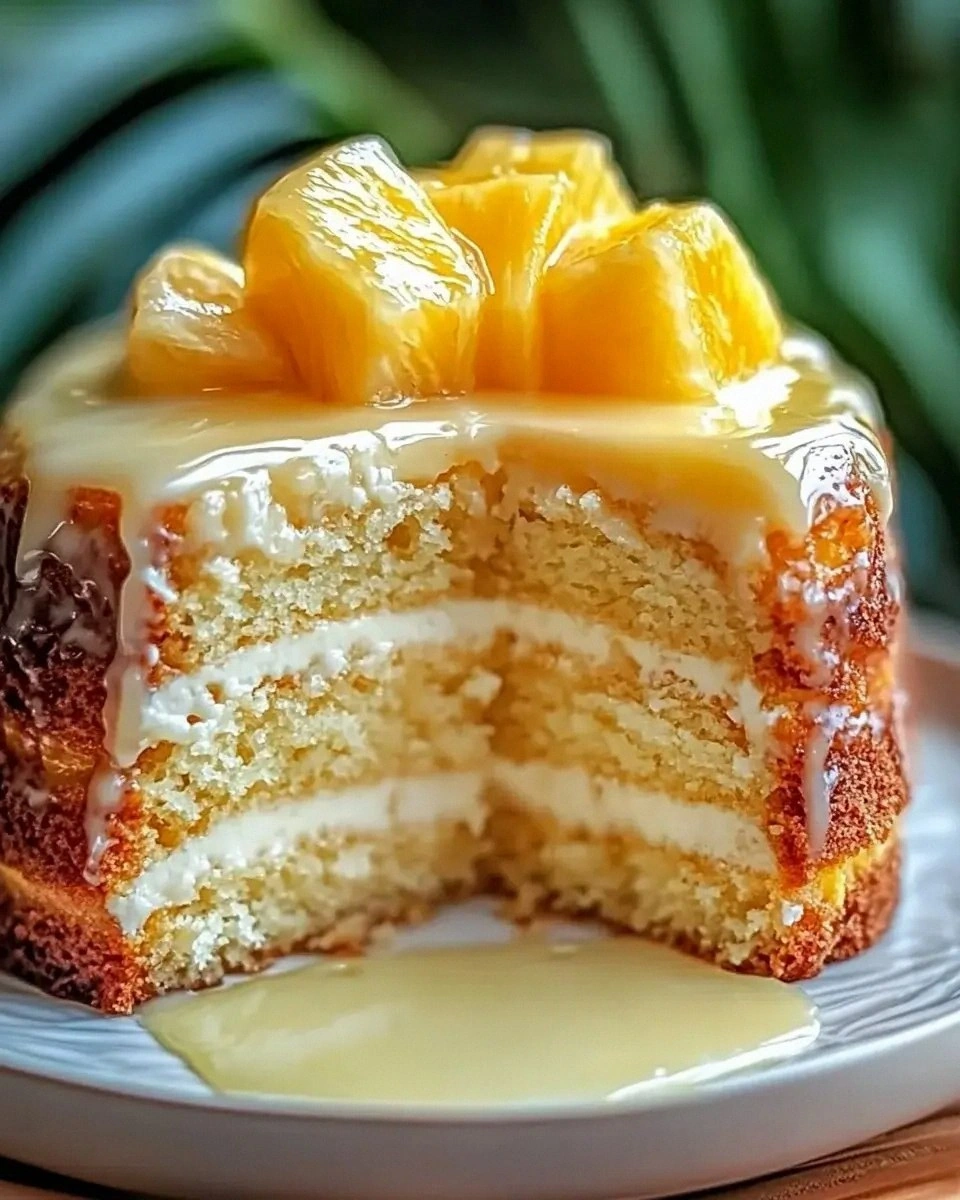
When that cake finally emerged from the oven, the aroma was an intoxicating blend of caramelized sugar, toasted coconut, and a whisper of vanilla that wrapped around me like a warm hug from a beachside barista. The top was a golden crown, slightly cracked, revealing a moist, buttery interior studded with juicy pineapple chunks that glistened like tiny suns. I took a bite, and the texture was an orchestra: the crumb was soft yet sturdy enough to hold the juicy fruit, the coconut added a subtle crunch, and the walnuts gave a buttery finish that lingered on the palate. It was a flavor explosion that made me gasp, “I dare you to taste this and not go back for seconds.”
Most pineapple cakes I've tried either end up soggy, overly sweet, or missing that essential tropical zing. This version, however, nails the balance by marrying a classic yellow cake mix with a carefully calibrated wet mix that ensures the pineapple stays bright without drowning the crumb. The secret? A splash of sour cream that adds tangy depth, and a touch of milk that keeps the batter airy without compromising structure. I’ll be honest — I ate half the batch before anyone else got to try it, and that’s a testament to how addictive this cake truly is.
Now, I’m about to spill every detail, from the precise order of mixing to the exact moment you know the cake is done. I’m going to share a technique involving a quick “steam‑boost” that most recipes overlook, and a surprising ingredient that adds a buttery richness you won’t believe. Let me walk you through every single step — by the end, you’ll wonder how you ever made it any other way.
What Makes This Version Stand Out
- Taste: The pineapple’s natural acidity cuts through the sweetness, while the coconut and walnuts introduce a nutty, buttery undertone that feels like a mini vacation in every bite.
- Texture: A moist crumb that holds together without being gummy, thanks to the perfect ratio of oil, sour cream, and milk, creates a cake that’s tender yet sturdy enough for frosting.
- Simplicity: You only need a single box of cake mix and a handful of pantry staples—no fancy equipment, no exotic spices, just pure, straightforward deliciousness.
- Uniqueness: The addition of shredded coconut and chopped walnuts adds a crunch contrast that most pineapple cakes completely miss, turning it into a multi‑dimensional treat.
- Crowd Reaction: Guests invariably ask for the recipe, and the first slice often triggers a chorus of “Wow, this is hands down the best version you’ll ever make at home!”
- Ingredient Quality: Using crushed pineapple (not juice) preserves texture, while high‑quality coconut and fresh nuts elevate the flavor profile from ordinary to extraordinary.
- Cooking Method: A gentle bake at 350°F ensures even rise, and a brief “steam‑boost” in the last five minutes guarantees a glossy, tender top.
- Make‑Ahead Potential: This cake freezes beautifully, so you can prep it weeks in advance and still enjoy that fresh‑out‑of‑the‑oven vibe.
Inside the Ingredient List
The Flavor Base
The cornerstone of this cake is the crushed pineapple. Its natural acidity brightens the batter, preventing it from becoming cloyingly sweet, and the tiny fruit pieces burst with juicy sweetness when you bite them. If you skip the pineapple, you’ll lose that signature tropical pop and the cake will feel flat. A good swap is canned mandarin oranges for a citrus twist, but the texture will be softer.
The Texture Crew
We rely on vegetable oil and sour cream to create a tender crumb. The oil keeps the cake moist, while the sour cream adds a subtle tang and a richer mouthfeel that butter alone can’t achieve. If you’re dairy‑free, replace sour cream with coconut yogurt; the flavor will shift slightly but still stay lush. The shredded coconut contributes a faint chew and a fragrant aroma that transports you straight to a beachside grill.
The Unexpected Star
Enter the walnuts or pecans. These nuts introduce a buttery crunch that balances the softness of the pineapple and the cake’s crumb. They also add a dose of healthy fats, making the dessert a bit more satisfying. If you’re allergic, try toasted pumpkin seeds for a similar crunch without the nutty flavor.
The Final Flourish
The finishing touches are the powdered sugar and vanilla extract. Powdered sugar sweetens the cake without gritty texture, while vanilla rounds out the flavor, adding depth that lets the pineapple shine without being overbearing. A splash of milk keeps the batter from becoming too thick, ensuring a smooth pour into the pan. Skipping any of these will make the cake feel unfinished—trust me, the vanilla is the quiet hero.
Everything's prepped? Good. Let's get into the real action...
The Method — Step by Step
Preheat your oven to 350°F (175°C) and grease a 9‑inch round cake pan with a thin layer of vegetable oil, then dust with a little flour. That sizzle when the oil hits the hot pan? Absolute perfection. This ensures the cake releases cleanly and the edges develop that coveted golden crust. While the oven warms, line the bottom with parchment for an extra safety net.
In a large mixing bowl, combine the box cake mix, crushed pineapple (with its juice), and shredded coconut. Using a whisk, fold them together until the pineapple is evenly distributed—think of it as creating a tropical mosaic. The pineapple’s juice will start to soften the dry mix, creating a slightly wet batter that’s perfect for the next step.
Kitchen Hack: Use a rubber spatula to scrape the sides; this prevents dry pockets and ensures every crumb gets a taste of pineapple.In a separate bowl, whisk together the vegetable oil, eggs, sour cream, milk, and vanilla extract until smooth. This wet mixture should look glossy and slightly thick, like a tropical sunrise in a bowl. Once combined, pour it over the dry ingredients, and gently fold until just incorporated—over‑mixing will develop gluten and make the cake tough.
Stir in the chopped walnuts (or pecans) and powdered sugar, allowing the sugar to dissolve into the batter. The sugar will give the cake a subtle sheen and a tender crumb, while the nuts add that satisfying crunch. At this point, the batter should be thick enough to hold its shape but still pourable.
Transfer the batter to the prepared pan, smoothing the top with the back of a spoon. Tap the pan lightly on the counter three times to release any large air bubbles; you’ll hear a faint “pop” that signals a smoother crumb. Then, pop the pan into the oven and bake for 25‑30 minutes, or until a toothpick inserted into the center comes out with just a few moist crumbs.
About five minutes before the timer dings, open the oven and quickly mist the top of the cake with a spray bottle of water. This “steam‑boost” creates a glossy finish and prevents the top from drying out. Watch Out: Be careful not to open the oven door too often; every extra minute of heat loss can cause the cake to sink.
Watch Out: If you over‑steam, the top may become soggy; a quick 10‑second mist is enough.When the cake is done, the edges will start pulling away from the pan, and the top will have a golden‑brown hue that looks like caramelized sand. Let the cake cool in the pan for 10 minutes; this rest lets the crumb set, preventing it from crumbling when you remove it.
After the 10‑minute rest, run a thin knife around the perimeter, then invert the cake onto a cooling rack. The moment you flip it, you’ll see the pineapple pieces glistening like tiny jewels. Allow the cake to cool completely before frosting or serving; this ensures the frosting won’t melt.
For the finishing touch, whisk together a simple glaze of powdered sugar, a splash of milk, and a drop of vanilla. Drizzle this over the cooled cake, letting it cascade down the sides like a tropical waterfall. That final drizzle? Pure magic. Serve with a dollop of whipped cream if you’re feeling extra indulgent.
Kitchen Hack: Freeze the glaze for 5 minutes before drizzling; it will set faster and create a glossy finish.
That's it — you did it. But hold on, I've got a few more tricks that'll take this to another level...
Insider Tricks for Flawless Results
The Temperature Rule Nobody Follows
Always bake your cake on the middle rack. This ensures even heat distribution, preventing the bottom from becoming soggy while the top over‑browns. I once tried the top rack and ended up with a burnt crown and a raw center—lesson learned. If your oven has hot spots, rotate the pan halfway through the bake.
Why Your Nose Knows Best
Instead of relying solely on a timer, trust the scent. When the cake reaches that sweet, toasted aroma with a hint of coconut, you know it’s nearly done. If you smell a faint burnt sugar note, pull it out a minute early to avoid a bitter finish.
The 5‑Minute Rest That Changes Everything
Letting the cake rest for five minutes in the pan after baking allows the steam to finish cooking the interior gently. Skipping this step results in a crumb that’s too crumbly and prone to falling apart when sliced. I’ve seen novices cut straight out of the pan and end up with a sad, broken cake.
Whisk, Don’t Beat
When combining wet ingredients, whisk gently instead of beating vigorously. Over‑whipping incorporates too much air, which collapses during baking, leaving a dense texture. A gentle whisk creates a smooth emulsion that stays light and airy.
Cold Ingredients, Warm Oven
Keep your eggs and sour cream at room temperature before mixing. Cold ingredients can cause the batter to seize, resulting in uneven texture. Let them sit out for 20 minutes while the oven preheats; the slight warmth also helps them blend more easily.
Creative Twists and Variations
This recipe is a playground. Here are some of my favorite ways to switch things up:
Tropical Coconut Cream Frosting
Swap the simple glaze for a rich coconut cream frosting made with whipped coconut cream, powdered sugar, and a dash of lime zest. The citrus adds brightness that complements the pineapple perfectly, turning the cake into a dessert worthy of a luau.
Rum‑Infused Glaze
Add a tablespoon of dark rum to the glaze for an adult‑only version. The rum deepens the caramel notes and gives the cake a subtle warmth that’s perfect for holiday gatherings.
Chocolate Swirl
Gently fold in a few tablespoons of melted dark chocolate before baking. The chocolate ribbons create a visual contrast and a flavor duet that’s surprisingly harmonious with the pineapple.
Berry Burst
Replace half of the pineapple with fresh raspberries or strawberries. The berries add a tart pop that balances the sweetness, and the visual specks make the cake look even more inviting.
Gluten‑Free Adaptation
Use a gluten‑free cake mix and substitute the regular flour in the recipe with a 1:1 gluten‑free blend. The texture remains fluffy, and the flavor stays true to the original, proving that dietary restrictions don’t have to limit indulgence.
Storing and Bringing It Back to Life
Fridge Storage
Place the cooled cake in an airtight container and store it in the refrigerator for up to 5 days. The moisture from the pineapple keeps the cake from drying out, and a thin layer of the glaze on top acts as a seal.
Freezer Friendly
Wrap the cake tightly in plastic wrap, then foil, and freeze for up to 3 months. When you’re ready to enjoy, let it thaw in the fridge overnight, then bring it to room temperature before serving.
Best Reheating Method
To revive that fresh‑out‑of‑the‑oven feel, preheat your oven to 300°F (150°C), place the slice on a baking sheet, and heat for 8‑10 minutes. Add a tiny splash of water to the pan before reheating; the steam will restore the cake’s moisture and give it a just‑baked glow.