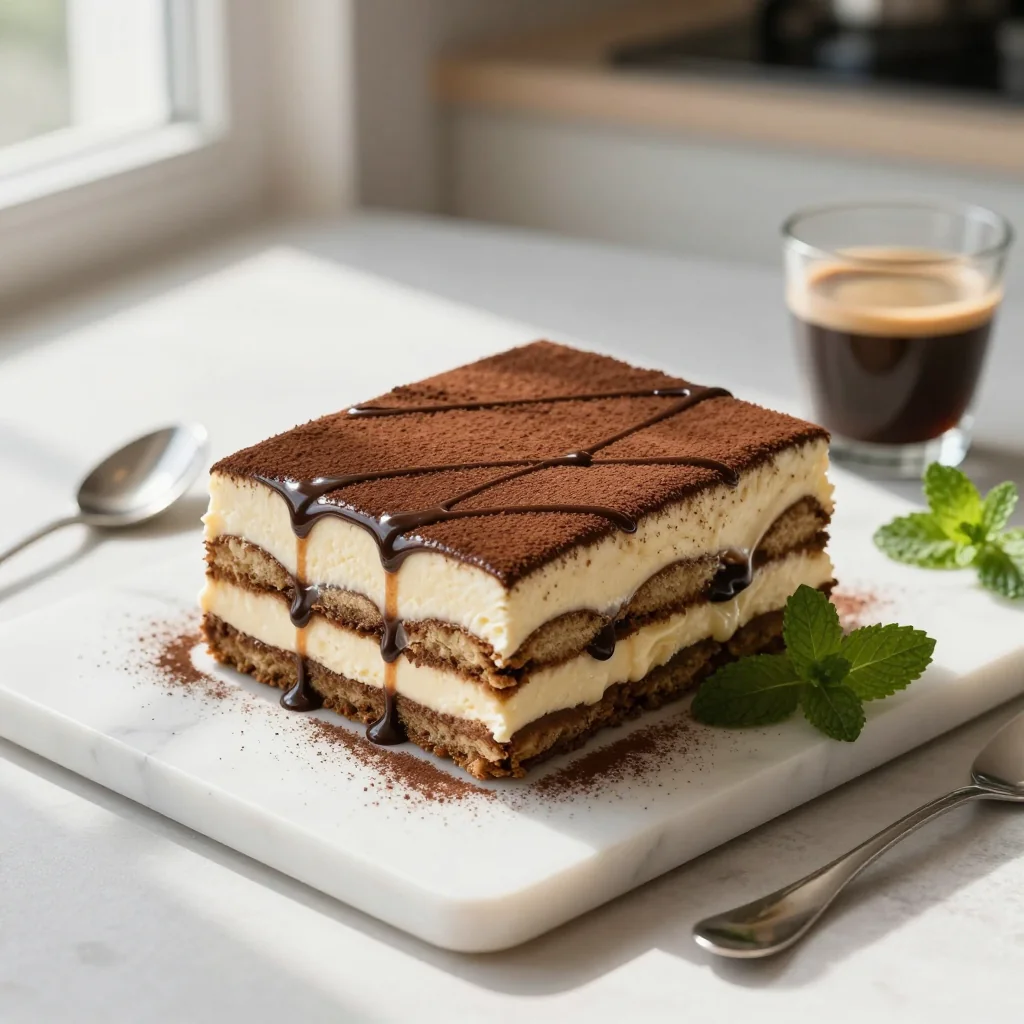
A playful, no‑bake twist on the classic Italian tiramisu that you’ll poke, layer, and serve with flair.

When I first tasted a traditional tiramisu in a tiny café tucked away in Rome, the silky mascarpone, the punch of espresso, and the delicate dust of cocoa created a memory that has followed me across continents. Years later, while experimenting in my home kitchen, I wondered: what if that beloved layered dessert could be transformed into a fun, poke‑style cake that invites you to dive in with a spoon? The result is this Tiramisu Poke Cake – a vibrant, deconstructed version that keeps all the beloved flavors while offering a fresh visual twist.
The classic tiramisu hails from the Veneto region of Italy, traditionally built in a deep dish with ladyfingers soaked in coffee and liqueur, then layered with a light mascarpone mixture. My adaptation respects that heritage but swaps the ladyfingers for a soft sponge cake that can be poked, allowing each bite to release a burst of coffee‑infused cream. It’s perfect for gatherings where you want a show‑stopper that’s both elegant and interactive.
In this guide you’ll discover how to bake a light espresso‑scented sponge, whip a luxuriously airy mascarpone cream, and assemble the cake with strategic “pokes” that let the flavors mingle beautifully. I’ll also share pro tips for achieving the perfect crumb, troubleshooting common pitfalls, and customizing the cake for different dietary needs.
So grab your whisk, preheat the oven, and let’s embark on a delicious journey that will make every guest reach for another spoonful.
🌟 Why This Recipe Will Captivate You
From its striking presentation to its harmonious balance of coffee and cream, this tiramisu poke cake offers a fresh take on a timeless favorite.
- ✨ Interactive Presentation : The poke‑style design encourages guests to customize each bite, creating an engaging dining experience that feels both playful and sophisticated.
- ✨ No‑Bake Cream Layer : The mascarpone cream sets without baking, preserving its airy texture and ensuring a quick assembly that saves you time.
- ✨ Balanced Sweet‑Bitter Profile : The espresso‑soaked sponge provides a gentle bitterness that perfectly offsets the sweet, velvety mascarpone, delivering a nuanced flavor journey.
- ✨ Versatile for Any Occasion : Whether you’re hosting a brunch, a birthday, or an elegant dinner, the cake’s vibrant look and familiar taste fit seamlessly into any setting.
- ✨ Simple Ingredient List : With pantry staples and a few specialty items, the recipe is approachable for home cooks without sacrificing authenticity.
- ✨ Scalable Portions : The built‑in portion adjuster lets you expand or shrink the recipe effortlessly, making it ideal for intimate families or larger gatherings.
🥗 Ingredients
📝 Complete Ingredient List
For the Espresso Sponge:
For the Mascarpone Cream:
For the Topping:
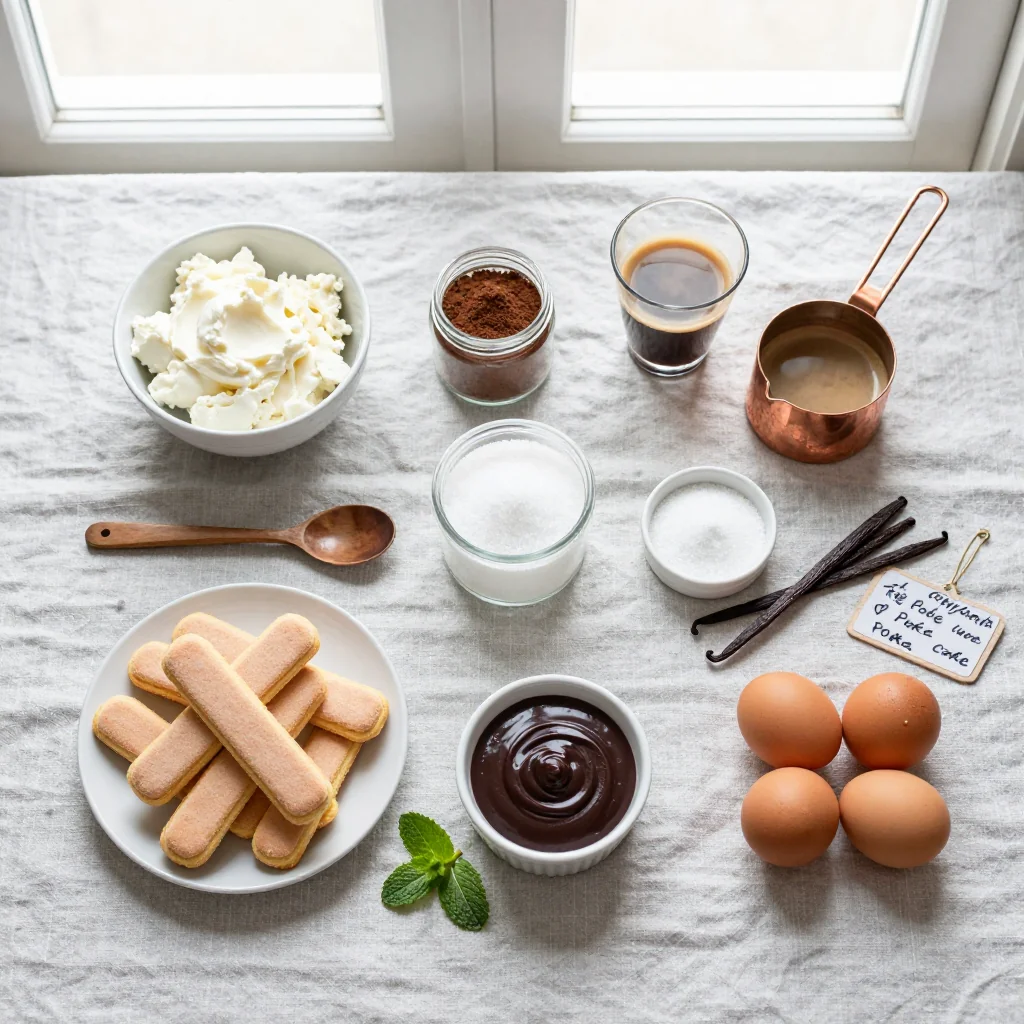
🔍 Focus on Key Ingredients
Espresso
Espresso is the soul of tiramisu. Using freshly brewed, strong espresso gives the sponge a deep, aromatic bitterness that balances the sweetness of the mascarpone. Choose beans with chocolatey undertones for an extra layer of flavor, and let the coffee cool completely before mixing it into the batter to avoid curdling the eggs.
Mascarpone Cheese
Mascarpone provides the velvety richness that defines tiramisu. Look for a label that reads “100% dairy” and avoid versions with added stabilizers, which can make the cream grainy. Bring the cheese to room temperature before whipping; this ensures a smoother, more homogeneous mixture when combined with the whipped cream.
Cocoa Powder
Sifted cocoa powder prevents lumps and creates an even dusting on the surface. Opt for a Dutch‑process cocoa for a darker color and slightly less acidity, which pairs beautifully with the espresso‑infused sponge.
🔄 Quick Substitutions
| If you don’t have... | Use instead... |
|---|---|
| Espresso | Strong brewed coffee (double strength) |
| Mascarpone | Cream cheese mixed with 2 tbsp heavy cream |
| Dark chocolate | Chocolate chips or cocoa nibs |
👨🍳 Step‑by‑Step Instructions
Follow these detailed steps to create a flawless tiramisu poke cake that will impress both the eyes and the palate.
📋 Phase 1: Preparation & Mise en Place
Gather your tools, pre‑heat the oven, and whisk together the base batter.
Preheat and Prepare Pan
Set your oven to 180 °C (350 °F). Grease a 9‑inch (23 cm) round cake pan with a thin layer of butter and line the bottom with parchment paper. This will ensure the sponge releases cleanly after baking, a crucial factor for a smooth poke‑style surface.
Whisk Dry Ingredients
In a medium bowl, sift together the all‑purpose flour, baking powder, and salt. Sifting aerates the flour, resulting in a lighter crumb that will absorb the espresso without becoming soggy.
Beat Eggs and Sugar
Using a stand mixer on medium speed, beat the eggs and granulated sugar for about 5 minutes, until the mixture becomes pale, thick, and triples in volume. This creates a mousse‑like base that gives the sponge its airy texture.
Incorporate Wet Ingredients
Gently fold the milk, cooled espresso, and vanilla extract into the egg‑sugar foam using a rubber spatula. Fold in three additions of the sifted flour mixture, each time turning the batter until just combined. Over‑mixing will develop gluten and make the cake dense.
🔥 Phase 2: Baking & Assembly
Bake the sponge, then create the layered poke structure.
Bake the Sponge
Pour the batter into the prepared pan, smoothing the top with a spatula. Bake for 20‑25 minutes, or until a toothpick inserted in the center comes out clean. The cake should be golden‑brown and spring back lightly when pressed.
Cool and Poke
Allow the cake to cool in the pan for 10 minutes, then transfer to a wire rack to cool completely (about 20 minutes). Once cool, use a long, thin skewer or a wooden chopstick to make a grid of evenly spaced holes—approximately 2 cm apart—through the entire depth of the cake. This “poking” creates channels for the espresso‑soaked cream to flow into.
Prepare Mascarpone Cream
In a chilled bowl, whisk the heavy cream until soft peaks form. In a separate bowl, combine mascarpone, powdered sugar, vanilla, and coffee liqueur (if using). Gently fold the whipped cream into the mascarpone mixture until fully incorporated, creating a light, airy cream that will seep into the poke holes.
Fill the Pokes
Using a pastry bag fitted with a wide tip, pipe the mascarpone cream into each poke, filling them generously. The cream will rise to the surface, forming a beautiful, uneven top that mimics the classic tiramisu appearance.
✨ Phase 3: Finishing & Serving
Add the final touches that make this cake unforgettable.
Dust with Cocoa
Generously sift cocoa powder over the top of the cake, allowing it to settle into the crevices. The cocoa not only adds a classic visual cue but also introduces a subtle bitterness that balances the sweet cream.
Garnish with Chocolate and Coffee Beans
Scatter shaved dark chocolate and crushed coffee beans across the surface. The chocolate adds a glossy texture, while the coffee beans provide a crunchy contrast and an aromatic finish.
Refrigerate Before Serving
Cover the cake loosely with plastic wrap and refrigerate for at least 2 hours. This allows the flavors to meld, the cream to set slightly, and the cake to become fully infused with coffee aroma.
💡 Expert Tips & Tricks
🛒 Choosing the Right Ingredients
When selecting espresso beans, look for a medium‑dark roast with notes of chocolate and caramel; these flavors echo the cocoa dusting and enhance the overall harmony. For mascarpone, a fresh, high‑fat content version yields a creamier texture—avoid low‑fat alternatives that can become grainy. Finally, opt for high‑quality dark chocolate with at least 70 % cocoa solids for a bitter contrast that prevents the dessert from feeling cloying.
🔪 Preparation Techniques
Whisk the egg and sugar mixture until it reaches the ribbon stage; this is when the mixture falls back into the bowl in a thick ribbon. This technique incorporates air, giving the sponge its signature lightness. When folding dry ingredients, use a gentle “cut and fold” motion to maintain the trapped air. For the cream, chill all equipment for at least 10 minutes before whipping to achieve stable peaks.
🌡️ Mastering the Baking Process
Every oven behaves differently, so invest in an oven thermometer. The ideal internal temperature for a fully baked sponge is around 95 °C (203 °F). If you prefer a slightly denser texture, reduce the bake time by 2‑3 minutes; just be sure the center is no longer wet.
🍽️ Presentation & Service
Serve the cake on a chilled marble slab to keep it cool longer. Provide a small spoon for each guest, allowing them to scoop both the creamy interior and the cocoa‑dusted top. Pair with a dusting of extra cocoa or a drizzle of espresso‑infused chocolate ganache for added drama.
🏆 Pro Tips
Elevate your tiramisu poke cake from home‑cooked to restaurant‑level with these professional insights.
- 🎯 Precise Temperature Control: Use a digital instant‑read thermometer to monitor the batter’s temperature before baking. Keeping the batter around 20 °C (68 °F) ensures even rise and prevents premature coagulation of the eggs.
- 🎯 Layered Flavor Infusion: After baking, lightly brush the sponge with a mixture of espresso and a splash of coffee liqueur. This double‑infusion technique deepens the coffee flavor without making the cake soggy.
- 🎯 Cream Stabilization: Add a pinch of cream of tartar to the whipped cream before beating. This stabilizer increases the cream’s ability to hold its shape, especially important when the cake sits out for longer periods.
- 🎯 Uniform Poke Distribution: Use a ruler to mark a grid on the cake’s surface before poking. Consistent spacing ensures even distribution of the cream, preventing dry spots.
- 🎯 Chocolate Shave Technique: Use a vegetable peeler on a chilled chocolate block for fine, glossy shavings that melt slowly on the palate, adding a luxurious mouthfeel.
- 🎯 Final Glaze Option: For a glossy finish, lightly brush the top with a thin layer of espresso‑infused simple syrup just before serving. This adds a subtle sheen and an extra coffee kick.
"The secret to a great tiramisu is not just coffee, but the balance of texture and temperature." — Chef Alessandro Bianchi
🔄 Variations & Adaptations
The flexibility of this recipe invites you to explore different dietary needs and flavor twists while preserving its core identity.
🥬 Vegetarian / Vegan Version
Swap the eggs for a flax‑egg mixture (1 tbsp ground flaxseed + 3 tbsp water per egg) and replace mascarpone with a blend of silken tofu, coconut cream, and a splash of lemon juice for tang. Use almond milk instead of dairy milk, and choose a vegan dark chocolate for the topping.
- Flax‑egg mixture provides binding without animal products.
- Coconut cream adds richness while keeping the texture smooth.
🌶️ Flavor Variations
Play with the flavor profile by incorporating complementary ingredients that highlight the coffee base.
Spicy Mocha Version:
Add ½ tsp cayenne pepper to the espresso batter and sprinkle a pinch of chili‑infused chocolate shavings on top. The heat amplifies the chocolate’s depth.
Mediterranean Citrus Version:
Replace half the espresso with orange zest‑infused water and drizzle a light orange‑cocoa glaze over the final cake. The citrus brightens the richness.
Asian Matcha Fusion:
Substitute half the cocoa powder with matcha powder and incorporate a hint of yuzu liqueur into the cream. The earthy‑green notes contrast beautifully with the coffee.
⚠️ Dietary Adaptations
Gluten‑Free:
Use a blend of rice flour, almond flour, and tapioca starch (2 : 1 : 1) in place of all‑purpose flour. Ensure the baking powder is gluten‑free.
Lactose‑Free:
Swap whole milk for oat milk and use lactose‑free mascarpone alternatives made from cultured coconut cream.
Low‑Calorie:
Reduce sugar in the sponge by 30 % and replace heavy cream with a 1:1 mixture of low‑fat Greek yogurt and a splash of skim milk. This cuts calories while maintaining creaminess.
👶 Family / Kids Version
For younger palates, omit the coffee liqueur and reduce espresso to a milder coffee‑water blend. Add a layer of strawberry jam between the sponge and cream for a fruity surprise, and top with colorful sprinkles instead of crushed coffee beans.
📦 Storage & Reheating
🧊 Conservation
In the Refrigerator:
- Duration: 3 days
- Recommended container: airtight cake dome or sealed plastic container
- Tip: Place a sheet of parchment between the lid and the cake to prevent condensation from soaking the sponge.
In the Freezer:
- Duration: 1 month
- Method: Wrap the cooled cake tightly in plastic wrap, then a layer of aluminum foil.
- Defrosting: Transfer to the refrigerator overnight, then let sit at room temperature for 30 minutes before serving.
💡 For optimal texture, avoid freezing the mascarpone cream alone; keep the entire assembled cake frozen as a single unit.
♨️ Reheating
🔥 Oven (Recommended):
- Preheat to 150 °C (300 °F).
- Cover the cake loosely with aluminum foil.
- Heat for 10 minutes, then remove foil and heat an additional 5 minutes to restore the cocoa dust.
⚡ Microwave (Quick):
- Place a slice on a microwave‑safe plate.
- Cover with a microwave‑safe lid or another plate.
- Heat on medium power for 30 seconds, then check; repeat in 15‑second bursts if needed.
🍳 Stovetop (Optional):
If you prefer a gentle reheating, place a slice in a non‑stick skillet over low heat, covering with a lid for 2‑3 minutes. This method revives the cream’s softness without drying the sponge.
🍷 Perfect Pairings
🥗 Side Dishes
- Fresh Berry Salad: A mix of strawberries, blueberries, and mint adds acidity that cuts through the richness.
- Light Citrus Sorbet: Lemon or orange sorbet refreshes the palate between bites.
- Almond Biscotti: Crunchy biscotti offers texture contrast and a traditional Italian touch.
🍷 Wine & Beverage Pairings
- Vin Santo: The sweet, nutty Italian dessert wine mirrors the coffee notes and enhances the mascarpone’s creaminess.
- Espresso Martini: A cocktail of vodka, coffee liqueur, and fresh espresso amplifies the coffee theme.
- Non‑Alcoholic Option: Sparkling water with a splash of orange bitters offers a refreshing, palate‑cleansing alternative.
🍰 Complementary Courses
Start the meal with a light caprese salad drizzled with balsamic glaze, then serve the tiramisu poke cake as the grand finale. Follow with a simple lemon granita to cleanse the palate and keep the dining experience balanced.
❓ Frequently Asked Questions
Q: Can I use instant coffee instead of espresso?
Yes, you can substitute instant coffee by dissolving 2 tablespoons of granules in 60 ml of hot water. While the flavor will be slightly less robust, the cake will still retain its characteristic coffee aroma.
Q: How do I prevent the sponge from becoming too soggy?
Ensure the espresso is fully cooled before mixing it into the batter, and avoid over‑soaking the cake after baking. The poke technique allows the cream to infiltrate without drowning the sponge, preserving its light texture.
Q: What if I don’t have a pastry bag?
A sturdy zip‑top bag works well—fill it with the mascarpone cream, snip a small corner, and pipe the cream into the holes. The key is to apply even pressure for consistent filling.
Q: Can I make this cake ahead of time?
Absolutely. Assemble the cake up to the point of cocoa dusting, then cover and refrigerate. Add the cocoa and chocolate garnish just before serving to maintain freshness.
Q: Is the coffee liqueur necessary?
The liqueur adds depth but is optional. If you prefer an alcohol‑free version, simply omit it or replace with an extra tablespoon of espresso.
Q: How can I adjust the recipe for a gluten‑free diet?
Replace the all‑purpose flour with a gluten‑free blend (rice flour, almond flour, tapioca starch) and confirm that your baking powder is gluten‑free. The texture will remain light if the blend is well‑balanced.
🎉 Let’s Get Baking!
With its striking visual appeal, aromatic coffee notes, and silky mascarpone layers, this Tiramisu Poke Cake stands out as a show‑stopping dessert that’s both familiar and refreshingly novel. Whether you’re entertaining friends, celebrating a milestone, or simply craving a luxurious treat, the step‑by‑step guidance ensures a flawless result every time. Remember, the secret lies in the balance of textures, the precision of your poke grid, and the quality of your coffee.
Now that you have all the tools, techniques, and variations at your fingertips, it’s time to roll up your sleeves and bring this masterpiece to life. Share your creations, ask questions, and let the community celebrate your success.
Have you tried this recipe?
Leave a comment and rating below! Share your photos on Instagram with #TiramisuPokeCake to be featured on our page.
Tiramisu Poke Cake
A playful, no‑bake twist on classic tiramisu that invites you to poke, fill, and savor.
📝 Ingredients
Espresso Sponge
Mascarpone Cream
Topping
👨🍳 Instructions
- 1 Preheat oven to 180 °C (350 °F) and prepare a 9‑inch round cake pan.
- 2 Whisk together flour, baking powder, and salt; set aside.
- 3 Beat eggs and sugar until pale and thick, about 5 minutes.
- 4 Fold milk, espresso, and vanilla into the egg mixture, then gently incorporate the dry ingredients.
- 5 Pour batter into pan and bake 20‑25 minutes; test with a toothpick.
- 6 Cool cake, then poke a uniform grid of holes using a skewer.
- 7 Whip heavy cream to soft peaks; blend with mascarpone, powdered sugar, vanilla, and optional liqueur.
- 8 Pipe mascarpone cream into each poke until the surface is filled.
- 9 Dust generously with sifted cocoa powder.
- 10 Garnish with shaved chocolate and crushed coffee beans; refrigerate 2 hours before serving.
🥗 Nutritional Information (per serving)
*Values are estimates based on standard ingredient data.